
This healthy homemade spicy garlic hummus made with canned chickpeas makes for a delicious dip that’s so ready in just a few minutes! Infused with flavors of roasted garlic, tahini, lemon and spicy red pepper flakes, this creamy hummus recipe is a great option for quick and easy meals and healthy snacks! {Gluten-free, dairy-free & vegan-friendly}

Roasted Garlic Hummus – Spicy, Creamy & Delicious!
With this Lebanese-inspired recipe, canned chickpeas are whipped together with tahini, roasted garlic, lemon juice, olive oil and spices for the best hummus ever. It’s super smooth and creamy with just the right amount of spice to warm you up without making you sweat!
Plus, it’s loaded with plant-based protein, fiber, and healthy fats, making it the ideal dip for fresh vegetables, spreading onto sandwiches and more. We live off this stuff, and have it in our fridge all the time!
For more delicious dips and spreads, be sure to check out this Pumpkin Pie Hummus and Sweet Potato Hummus too!

Why We Love This Easy Spicy Garlic Hummus Recipe
- Formulated by a Registered Dietitian to be nutritionally balanced
- Excellent source of fiber and plant-based protein
- Can be served as a flavorful dip or spread
- Made with roasted garlic for a sweet, savory, spicy flavor
- Tastes way better than store-bought hummus (no comparison)
- Customizable and easy to tweak for different dietary preferences
- Quick enough to throw together in a hurry
Ingredient Notes

- Garlic: Provides amazing flavor to the hummus. Roast two whole heads of fresh garlic in the oven for the best garlic flavor.
- Chickpeas: Also known as garbanzo beans. I typically use low sodium canned chickpeas for convenience, but you can also use dried chickpeas that you cook from scratch.
- Aquafaba: This is the reserved chickpea liquid. It helps give the hummus a more smooth and creamy texture. You can also sub in 1/4 cup warm water if preferred.
- Tahini: Provides a slight nutty flavor and acts like a glue to help hold the hummus together. If you don’t like the slightly bitter undertone, you can also sub in a nut or seed butter like cashew butter or sunflower seed butter.
- Olive oil: Helps provide a smoother texture. Use extra virgin olive oil for the most health benefits.
- Lemon juice: Adds tangy flavor to the hummus. Use fresh lemon juice for the best flavor. Lime juice works, too!
- Honey: Helps to counteract some of the bitterness in the tahini. You can also use regular sugar or maple syrup for a vegan option.
- Spices: Red pepper flakes act as the spicy variant, providing a little kick, while salt offers extra flavor. Adapt both according to personal taste preferences.
Step-by-Step Instructions
1. How to Roast Garlic
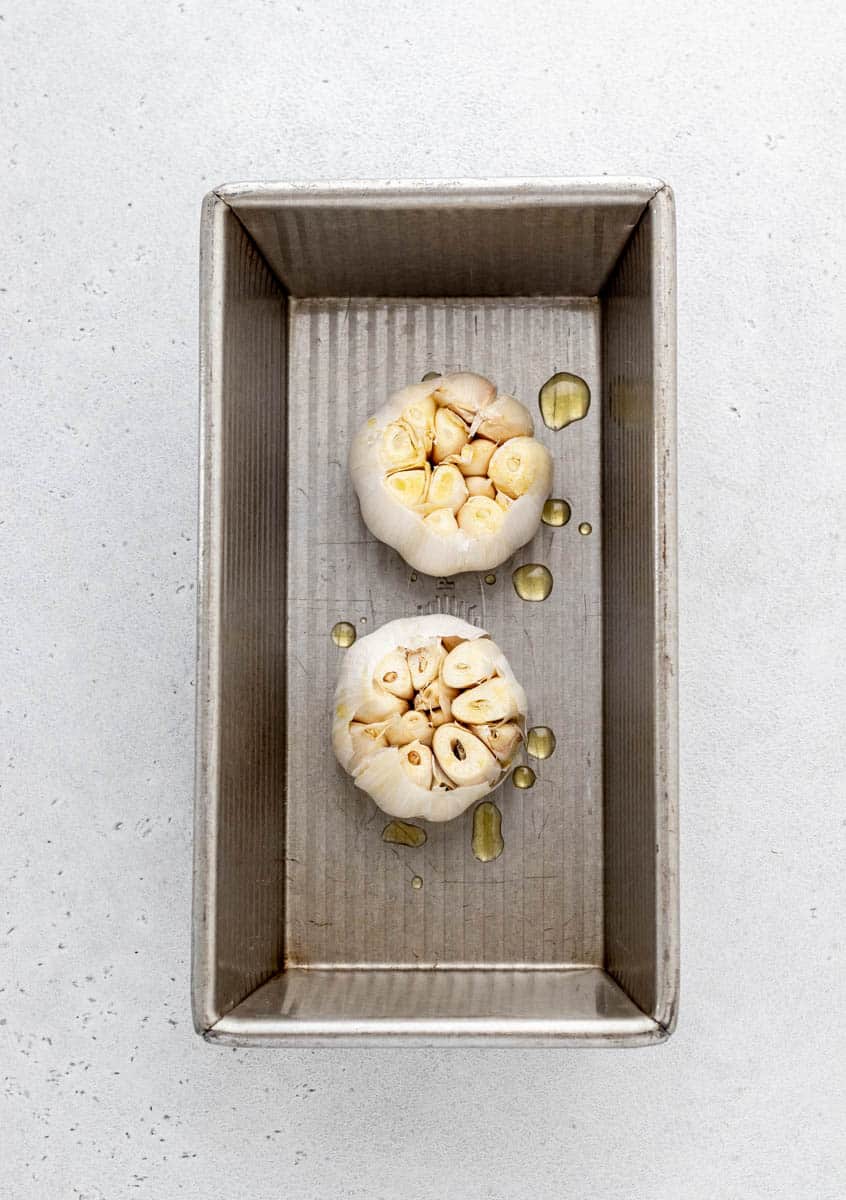
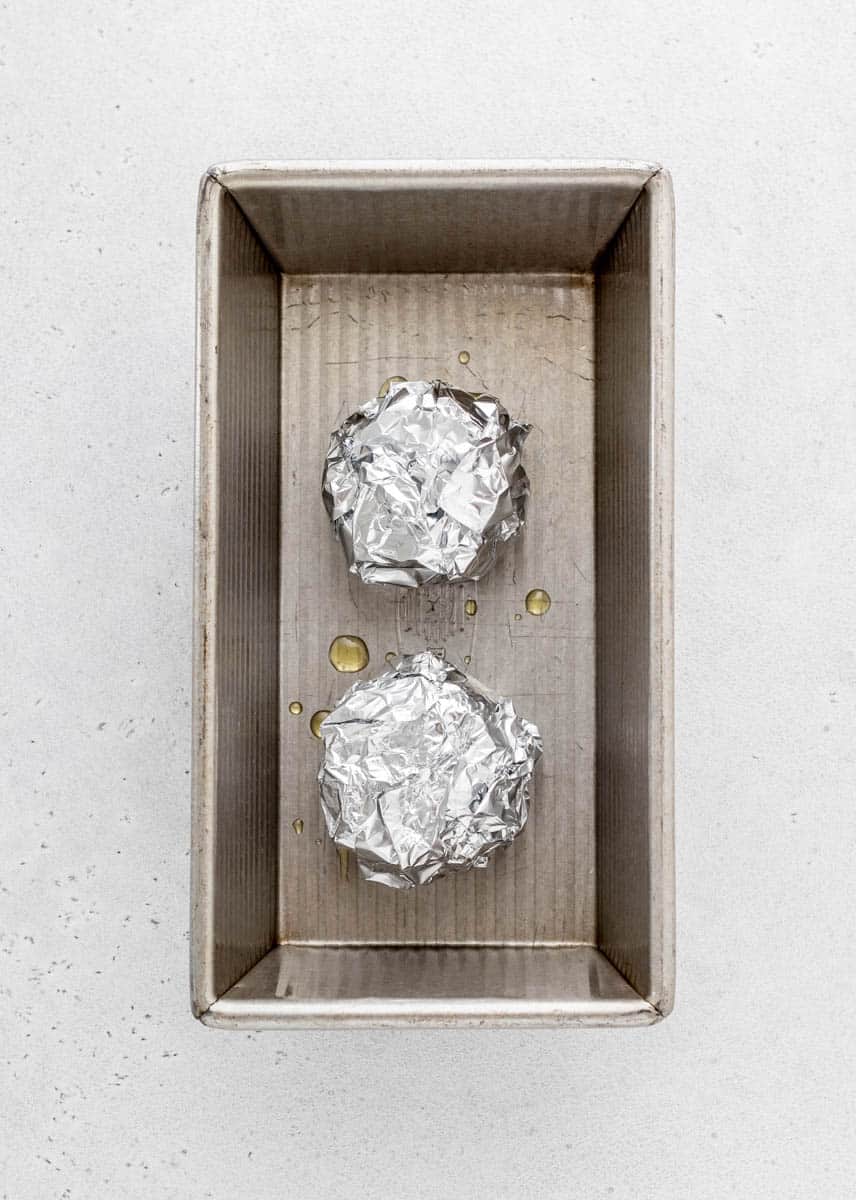

- Preheat oven to 375°F. Cut off the very top of the heads of garlic (about 1/4″) so that the tops of most of the cloves are exposed slightly. Coat with a little olive oil and wrap securely in aluminum foil. Roast garlic in oven for 1 hour. Remove and allow to cool.
- Once cooled, hold the head of garlic at the top with one hand, and use other hand to squeeze the soft, roasted garlic out of the head into the bowl of a food processor.
2. How to Make Roasted Garlic Hummus


- Next, add the chickpeas, tahini, olive oil, lemon juice, honey, salt, red pepper flakes and reserved chickpea liquid (also known as aquafaba).
- Blend on high speed until light and creamy, about 1 minute, stopping every once in a while to scrape down the sides with a spatula. If mixture is too thick, add in 1 more tablespoon aquafaba or warm water.
- Adjust to taste, adding more lemon juice for more zesty flavor, more red pepper flakes for additional spice or additional salt, if desired.
- To serve, top with a drizzle of olive oil and fresh parsley. Serve with pita, crackers, or raw veggies or along with your favorite meals!
Keep scrolling to the recipe card for the full printable recipe!
How to Make Hummus Smoother
To give homemade hummus a luxuriously creamy texture, I recommend removing as many of the chickpea skins as you can prior to blending the chickpeas with the other ingredients.
Now you can either pick them off one by one, which is super time consuming, OR you can try this trick I found for getting the skins off a lot more quickly and easily. (See below for step by step directions)!
How to Remove Chickpea Skins


- Place the drained chickpeas in a large microwave safe bowl.
- Sprinkle with 1 1/2 teaspoons baking soda and toss to distribute.
- Place bowl in the microwave for 2-3 minutes or until the chickpeas are hot.
- Add cold water to the bowl and rinse the chickpeas, gently rolling them between your fingers to help loosen the skins. The skins should float to the top of the water. You may need to repeat this step a couple of times until most of the skins have been removed. Discard the chickpea skins.
- Dump the chickpeas into the food processor and add the remaining ingredients for the creamiest hummus ever!
Tips for the Best Hummus
- To make this recipe even faster: I recommend roasting the garlic ahead of time. That way, you just have to toss all of the ingredients together and blend.
- Allow it to sit: If possible, let the flavors of the hummus come together in the fridge for a few hours before serving. It tastes even better after sitting for a while.
- To thin it out: The hummus tends to thicken up after being in the fridge for a few days. To make it creamy again, add a bit of warm water or additional olive oil and blend or stir until desired consistency is achieved.
- Adjust spice level: I typically add ½ teaspoon of red pepper flakes to keep it on the milder side to make it more kid-friendly. If you want even more of a spicy kick, increase the amount of red pepper flakes to ¾-1 teaspoon.

Recipe FAQs
Homemade fresh hummus doesn’t contain any preservatives so it will last in the fridge for 4-5 days.
With store-bought hummus, it typically depends on how it’s sold. If it’s sold, unrefrigerated and unopened, it should last 1-3 months in the pantry. After opening, it should be good in the fridge for about 4-7 days. If sold refrigerated and is left unopened, it should last 4-7 days. Once opened, it should be good for 3-7 days.
These are just general guidelines and you may find that your hummus will last beyond these recommended storage periods. Just be sure to keep a close eye on it for signs of it going bad.
It’s recommended that you avoid leaving hummus at room temperature for more than 2 hours (1 hour if it’s above 90°F). Past this point, bacteria may begin to form, making it potentially unsafe to eat. Discard leftover hummus past this timeframe (source).
Hummus can definitely be a great healthier option since it’s typically lower in calories and higher in protein than your average dip or spread. Chickpeas are rich in fiber, protein and iron, while extra-virigin olive oil and tahini contain heart healthy monounsatured fats. Homemade hummus is generally a better option than store-bought since you can control exactly what goes into it.
How to Store
Refrigerator: Store the leftover hummus in a tightly covered bowl or airtight container in the fridge for up to 5 days.
Freezer: Store this homemade hummus recipe in the freezer in a small air-tight container, covered ice cube tray or these Souper Cubes for up to three months. Be sure to leave a bit of space at the top since hummus expands when it freezes.
To thaw: Place in the fridge for a few hours to thaw before serving.

What to Eat with Roasted Garlic Hummus
If you’re wondering what to dip in this healthy garlic hummus or how to serve it up, there are so many different options!
This spicy hummus recipe is delicious with:
- Raw fresh veggies (i.e. carrot sticks, cucumber, bell peppers, radishes, broccoli, cauliflower, celery, etc.)
- Warm pita bread
- Crispy pita chips
- This Hummus Wreath
- Crackers
- Tortilla chips
- Pretzels
- Snap pea crisps
Other Ways to Serve Hummus
There are so many other creative ways to put hummus to use beyond simply using it as a dip.
Here are some good ways to use that hummus!
- As a sandwich spread instead of mayo (try it on this Panera Mediterranean Veggie Sandwich)
- Add a dollop to serve on a salad (like this Tossed Green Salad)
- Spread on pita or flatbread and top with fresh or roasted veggies (or try this Mediterranean Chickpea Salad)
- Use in a quesadilla
- Serve in a bowl along with rice or quinoa, grilled chicken and Greek salad (or this Greek Lentil Salad)
- Use it as a spread on chicken
- Serve in a veggie or Falafel Wrap
- Use as a base on pizza instead of tomato sauce and top with fresh or roasted veggies and sprinkle of feta (try these Mini Greek Pita Pizzas)
- Spread on a burger (Try with this Spicy Vegan Black Bean Burgers or Chickpea Burgers with Oats)!
- Thin it out with a bit of water and use it as a salad dressing
- Spread on tortillas and make roll ups with chicken and veggies for a fun lunch box option
Recipe Variations & Ideas
- To make hummus without tahini: If you’re not a fan of tahini or don’t have any on hand, simply leave the tahini out or sub in another nut or seed butter. You may wish to add an extra tablespoon of olive oil instead.
- Use dried chickpeas: If you prefer to skip the canned chickpeas, you can cook the chickpeas from dry. You’ll need about 1 1/2 cups cooked chickpeas for this recipe.
- Use additional spices and flavors: Try adding in a teaspoon or so of cumin and/or dried coriander. You can also add in a pinch of cayenne pepper, black pepper, finely diced jalapeno pepper, or drizzle of hot sauce to further pump up the spice level.
- If sensitive to spice: Leave out the red pepper flakes. You’ll be left with delicious roasted garlic hummus!
- For roasted red pepper hummus: Add in some roasted red peppers and blend along with other ingredients.

More Tasty Dip Recipes
- Buffalo Chicken Dip without Cream Cheese
- Easy Taco Dip with Ground Beef
- Chipotle Guacamole Recipe
- Yogurt Fruit Dip
- Plant Based Spinach Artichoke Dip
- Dairy Free Pesto
Did you try this recipe? Leave a star rating and comment below!

Easy Spicy Roasted Garlic Hummus Recipe
Ingredients
Optional for serving
- Drizzle of olive oil
- Sprinkle of fresh chopped parsley
Instructions
- Preheat oven to 375°F. Cut off the very top of the heads of garlic (about 1/4") so that the tops of most of the cloves are exposed slightly. Coat with a little olive oil and wrap securely in tin foil. Roast garlic in oven for 1 hour. Remove and allow to cool.
- Once cooled, hold the head of garlic at the top with one hand, and use other hand to squeeze the soft, roasted garlic out of the head into the food processor.
- Next, add the chickpeas, lemon juice, tahini, olive oil, honey, red pepper flakes, salt, and reserved chickpea liquid (this is called aquafaba).
- Blend on high speed until light and creamy, about 1 minute, stopping every once in a while to scrape down the sides with a spatula. If mixture is too thick, add in 1 more tablespoon aquafaba or warm water.
- Adjust to taste, adding more lemon juice for more zesty flavor, more red pepper flakes for additional spice or additional salt, if desired.
- To serve, top with a drizzle of olive oil and fresh parsley. Serve with pita, crackers, or raw veggies!
Notes
- To make this recipe even faster: I recommend roasting the garlic ahead of time. That way, you just have to toss all of the ingredients together and blend.
- Allow it to sit: If possible, let the flavours of the hummus come together in the fridge for a few hours before serving. It tastes even better after sitting for a while.
- To thin it out: The hummus tends to thicken up after being in the fridge for a few days. To make it creamy again, add a bit of warm water or additional olive oil and blend or stir until desired consistency is achieved.
- Adjust spice level: I typically add ½ teaspoon of red pepper flakes to keep it on the milder side to make it more kid-friendly. If you want even more of a spicy kick, increase the amount of red pepper flakes to ¾-1 teaspoon.
- Serving size: The nutritional information is based on about 2 tablespoons of hummus.
Nutrition
This recipe was originally posted in August 2022 and the text and photos were updated in December 2024.


Leave A Review: