
These adorable little Greek pita pizzas are the perfect healthy bite! We start with mini pitas, then adding hummus and your favorite Greek salad toppings, like feta cheese, kalamata olives, and cucumbers. They’re fresh, require minimal cooking, taste totally delicious and make the perfect appetizers! {Vegetarian}

Table of Contents
The Cutest Pita Appetizers!
We’re a huge fan of pita pizzas for their ease and convenience (and overall deliciousness!), so I thought it would be fun to make some cute mini Greek pita pizzas. We love Greek salads and knew those flavors would go great in the same format.
The very best thing about these little pizzas is that they require almost no cooking! Just toast the pitas to warm them up, and add all your favorite toppings.
Serve them as a party appetizer or a light lunch, and you’ll never go wrong.
For more pita pizza recipes, be sure to check out these Pesto Pita Pizzas!

Why We Love These Mini Greek Pita Pizza Apps
- Ready in less than 30 minutes
- Completely customizable with different types of hummus and fresh veggies
- Makes a great healthy snack, appetizer, or even a light lunch
- Naturally vegetarian (and easily vegan with some dairy-free feta)
- Colorful and creative snack for pickier eaters
Ingredients for Mini Greek Pita Pizzas

- Pitas: I typically use whole-grain mini pitas, but you can also sub in smaller pitas (the really mini ones), sandwich thins or regular sized pitas.
- Olive oil: Helps the pita get browned and crispy in the oven. I generally use extra virgin olive oil.
- Hummus: This is the “sauce” of the pizza. You can use store-bought or homemade hummus if you have some on hand. Regular or roasted garlic flavor (we love this Spicy Garlic Hummus) both work well.
- Vegetables: Diced tomatoes, cucumber, red onion and olives add extra color and flavor. Use cherry tomatoes or seeded Roma tomatoes.
- Feta: For a touch of creamy saltiness. Use regular or reduced fat feta. You could also sub in goat cheese if desired.
How to Make Make Greek Pita Pizzas

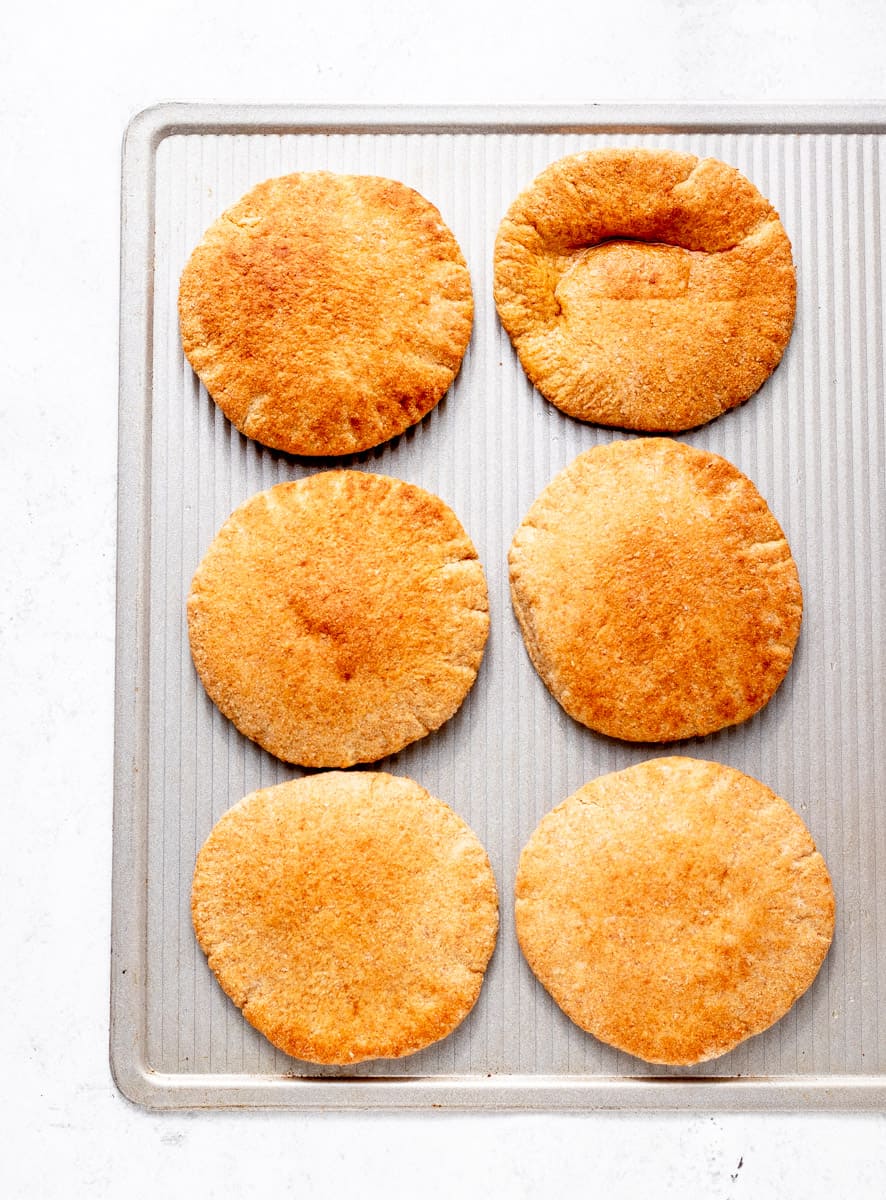


- Step 1 – First, preheat the oven to 400 degrees F. Place 6 mini whole-wheat pitas or mini slider bun halves on a baking sheet. Brush some olive oil evenly over each pita.
- Step 2 – Bake them in the oven for 10 minutes or until lightly browned and crispy.
- Step 3 – Next, spread hummus on top of the pita. You can use homemade or store-bought if you’re in a pinch.
- Step 4 – Finally, top them up with the Greek salad-inspired toppings. Serve and enjoy!
Expert Tips
- You can use any type of mini pita for this recipe. I typically use the Ozery Bakery Mini Pitas as I find that they’re the perfect size for a snack or side. You can also use half a thin bun as well.
- Keep a close eye on the pitas in the oven to ensure that they don’t burn. Every oven is different so you may require more or less time depending on your oven and the size of pita that you use.
- Be sure to cut the cucumber, tomatoes and red onion into small pieces and distribute them evenly over the pitas so that there are hints of each of the veggies in every bite.

Recipe FAQs
You can freeze some types of pita pizzas, but I don’t recommend freezing these Greek pizzas since the cucumber may have a funny taste and texture once thawed. Because we use raw vegetables with higher water content, these pizzas are best consumed fresh.
You can make these pizzas in advance, however, for the freshest pizzas, I recommend baking the pitas in advance and then spreading with the hummus and topping with the veggies just before serving.
How to Store
You can store these pitas covered in the fridge for up to three days. The pitas tend to soften after sitting in the fridge for a while, but still taste good when not consumed fresh out of the oven.
How to Serve Greek Pita Appetizers
Serve these mini pita pizzas alone as a snack or appetizer or along with some fresh veggies and tzatziki (we love this healthy tzatziki sauce).
They also taste great paired with a side salad (like this Greek cucumber noodle salad) and my Mediterranean chicken kebabs for a complete meal. So refreshing!
Recipe Variations
- Add more protein: Sprinkle some diced chicken breast on top.
- Use a larger pita: If you prefer, you can also make this same recipe on larger regular sized pitas instead of mini ones. You may need to increase the amount of hummus, veggies and cheese if you use larger pitas.
- Heat them up: For a warmer bite, sprinkle mozzarella cheese on top on broil until melted and golden brown. Add the fresh veggies and serve.
- Marinate the veggies: A tangy vinaigrette would add a really nice freshness. Try tossing the veggies with the lemon vinaigrette from this Greek quinoa salad just before serving.
- Add herbs: Some fresh parsley, mint, or cilantro would add just enough freshness.

More Mediterranean-Inspired Recipes
- Greek Lentil Salad
- Panera Mediterranean Veggie Sandwich
- Avocado Appetizers
- Sheet Pan Chicken Pitas
- Chicken Feta Burgers
Did you make this recipe? Scroll down to leave a star rating and review!

Mini Greek Pita Pizza Appetizers
Ingredients
- 6 mini whole wheat pitas or sandwich thin halves
- 1 tablespoon olive oil
- 1/2 cup homemade or store-bought hummus
- 1/2 cup quartered cherry tomatoes
- 1/3 cup chopped cucumber
- 3 tablespoons sliced kalamata olives
- 3 tablespoons finely chopped red onion
- 1/4 cup crumbled feta cheese
Instructions
- Preheat oven to 400 degrees F. Place 6 mini whole-wheat pitas or three sandwich thin halves on a baking sheet. Brush some olive oil evenly over each pita.
- Bake in the oven for 10 minutes or until lightly browned and crispy.
- Remove from oven and spread a thin layer of hummus over each round, going close to the edge.
- Top each round with equal amounts of diced tomato, cucumber, olives, red onion and feta. Serve immediately.
Notes
- You can use any type of mini pita for this recipe. I typically use the Ozery Bakery Mini Pitas as I find that they’re the perfect size for a snack or side. You can also use half a thin bun as well.
- Keep a close eye on the pitas in the oven to ensure that they don’t burn. Every oven is different so you may require more or less time depending on your oven and the size of pita that you use.
- Be sure to cut the cucumber, tomatoes and red onion into small pieces and distribute them evenly over the pitas so that there are hints of each of the veggies in every bite.
- If you’d like to add some extra protein to these pita pizzas, you can add some diced chicken breast to them as well.
Nutrition
This recipe was originally posted in August 2018 and was updated in October 2021 to include better tips and photos. The text, formatting and photos were updated again in August 2025.


Leave A Review: