
Skip the candy bars — this homemade larabar recipe is about to become your new favorite healthy snack! Made with just four simple ingredients and requiring only 10 minutes of prep time, this is snacking made easy! {Gluten-free & vegan}
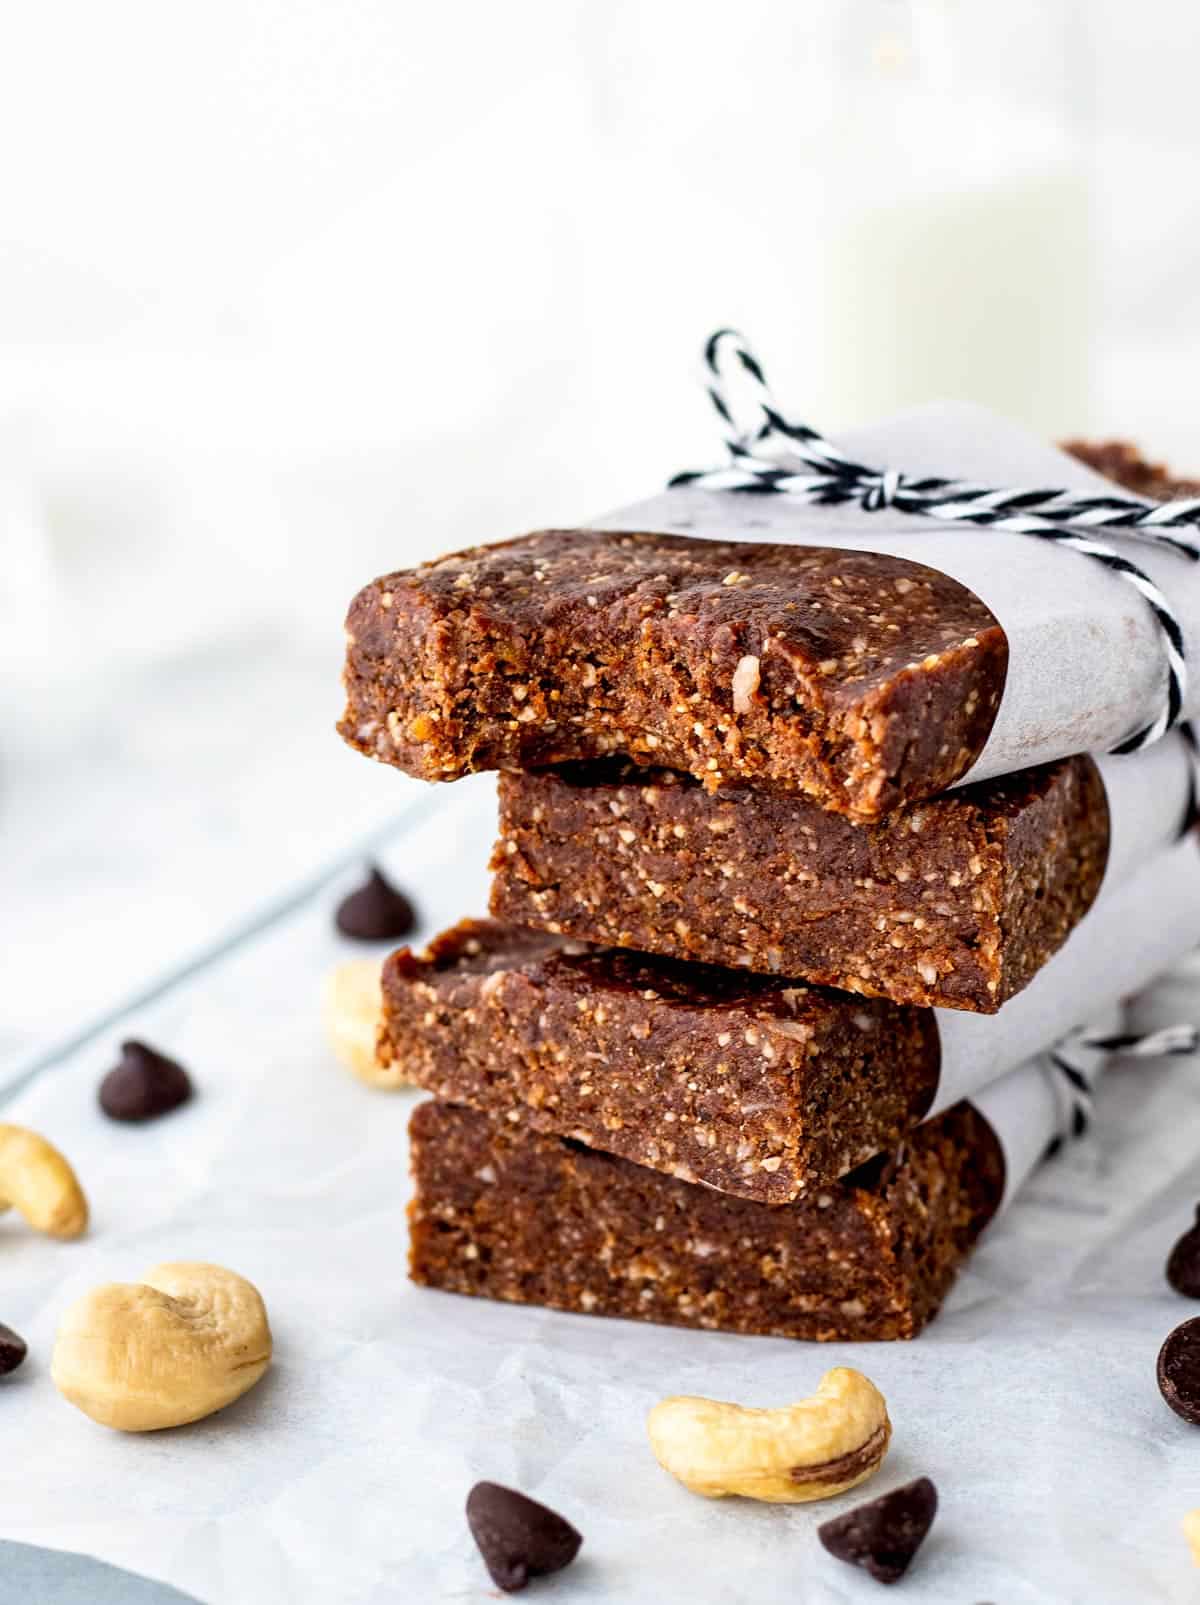
Table of Contents
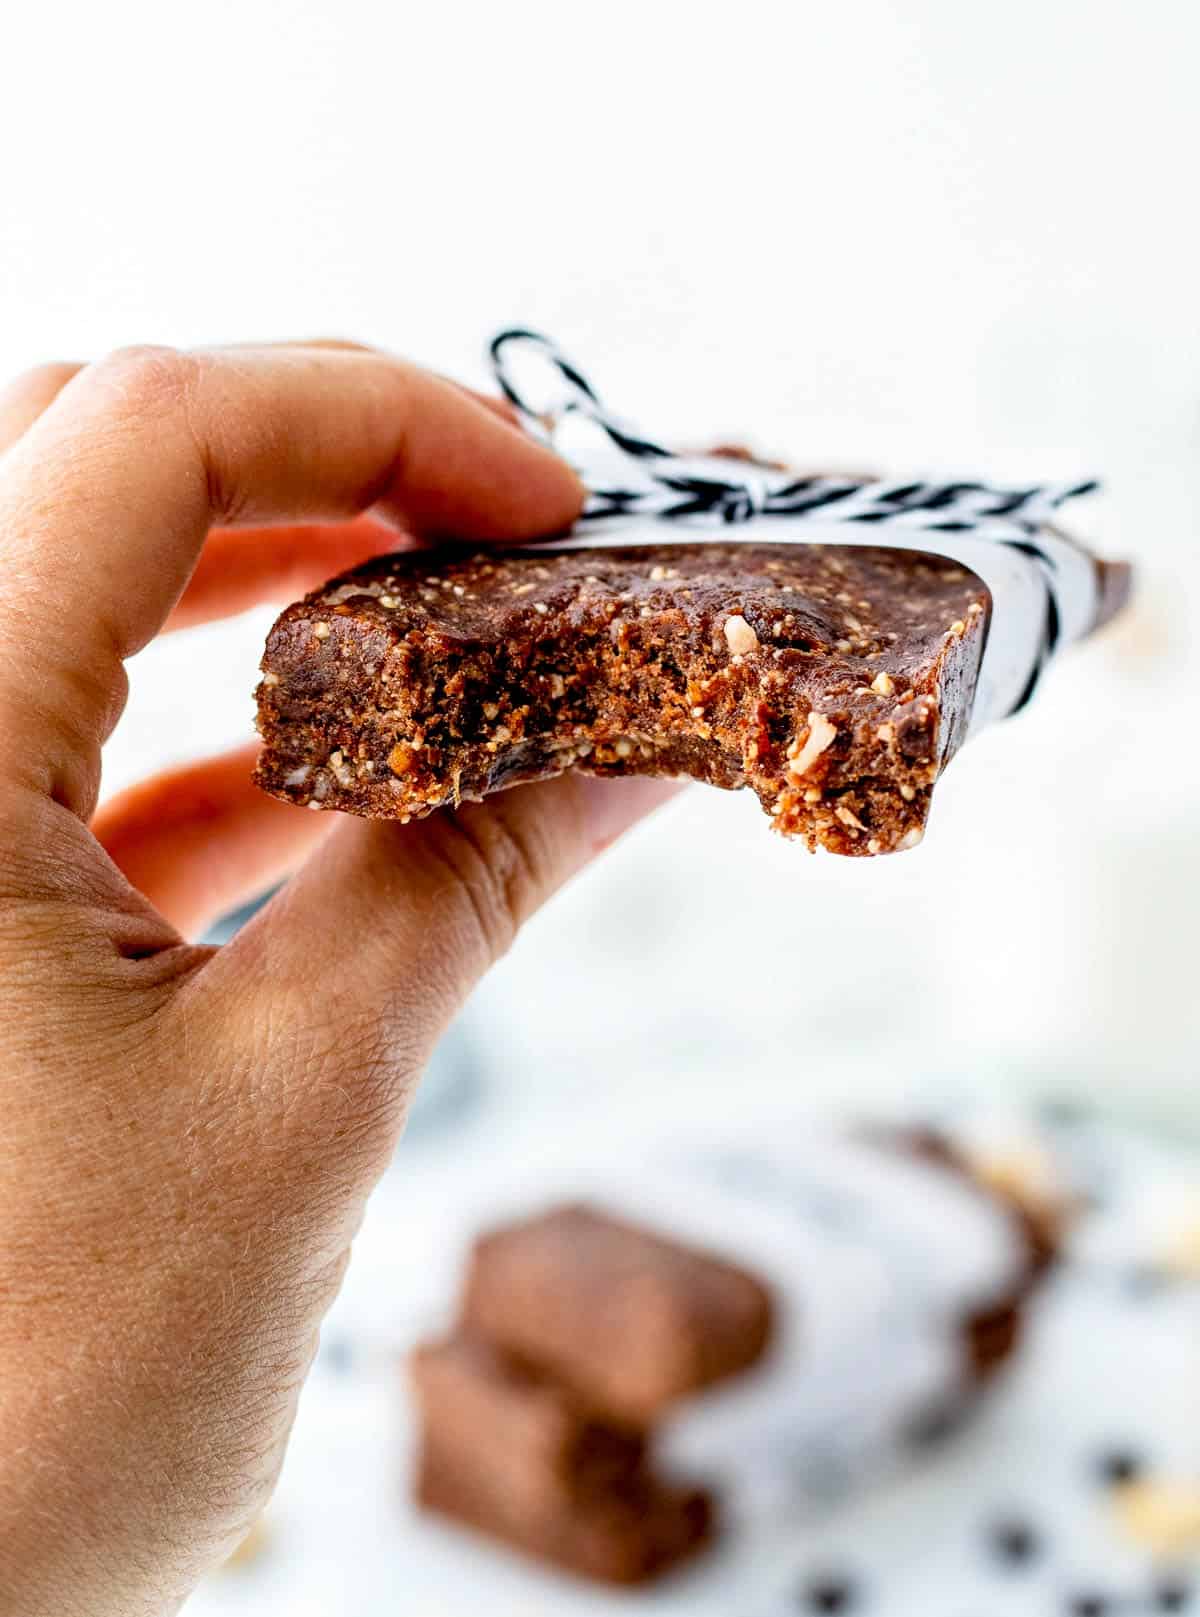
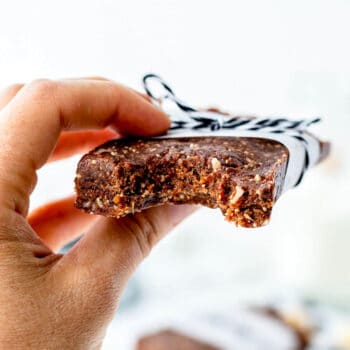
Homemade Larabar Recipe
I love Larabars, but whenever I have the choice, I always prefer making my own larabars as opposed to buying the store-bought energy bars so that I can control exactly what’s going into them.
Not to mention, who knows how long those bars have been sitting on the store shelves?! Stale bars? No thank you!
That’s where this homemade Larabar recipe comes into play! Similar to this lemon larabar recipe, this homemade version is just as delicious (if not more!) than store-bought and tastes so much more fresh, but contains no processed ingredients.
It’s rich, chocolatey, nutritious and energizing!
These bars are a no-bake option which means that it’s super easy to whip up a big batch with no oven required. They’re perfect for a mid morning or afternoon snack, road trips, and are also a great pre or post workout option!
If you’re looking for more no-bake recipes, be sure to also check out my Healthy Rice Krispie Treats, Chickpea Cookie Dough Bars and Healthy Granola Bar Recipe!
Why We Love these DIY Larabars
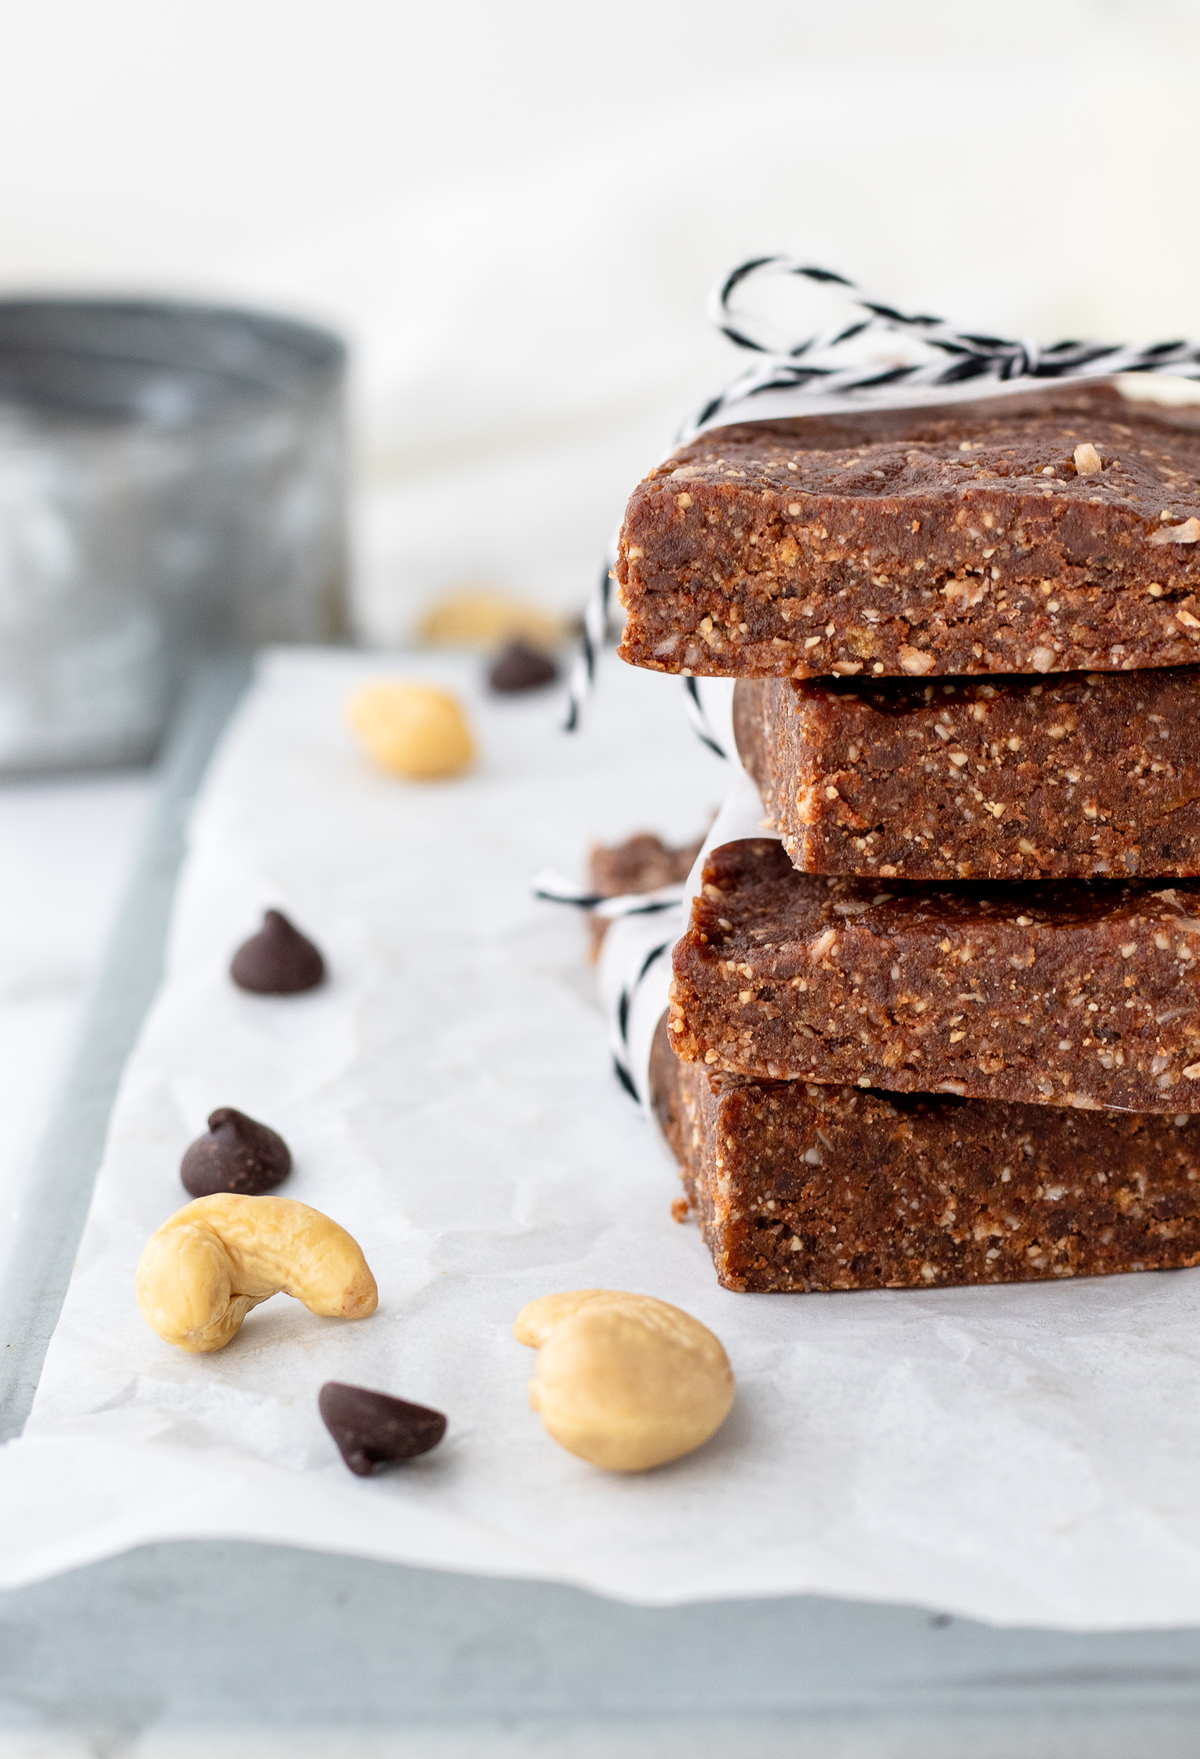
- Great for meal prep: If you’re anything like me, I always like to have grab and go snacks readily available. This simple recipe makes enough for 8 large bars or 16 smaller ones, perfect to fuel you up throughout the week!
- Quick and easy: Four basic ingredients and 10 minutes is all that you need to make this larabar copycat recipe. Blend everything together, press it into a pan and you are done!
- Appropriate for a wide range of dietary needs: Gluten-free and vegan, these lara bars are perfect for those with intolerances and for individuals who may be following a plant-based lifestyle.
Ingredient Notes

- Cashews: Use roasted unsalted cashews or raw cashews in a pinch. They’re a great source of fiber, healthy fats and protein, and you can minimize sodium intake by purchasing the unsalted variety.
- Dark Chocolate Chips: You can also use chopped dark chocolate, which is a great source of antioxidants. Isn’t everything just better with a little chocolate?!
- Coconut Flakes: Use unsweetened coconut flakes to reduce added sugar. The flakes provide a great texture, delicious coconut flavor and are a source of fiber.
- Dates: Whole dates are a great natural way to add sweetness without the need for added sugar. They also help to bind the other ingredients together, giving these bars the ultimate chewy texture! Pitted soft medjool dates tend to work best, but you can use other dates if that’s what you have.
How to Make Homemade Larabars
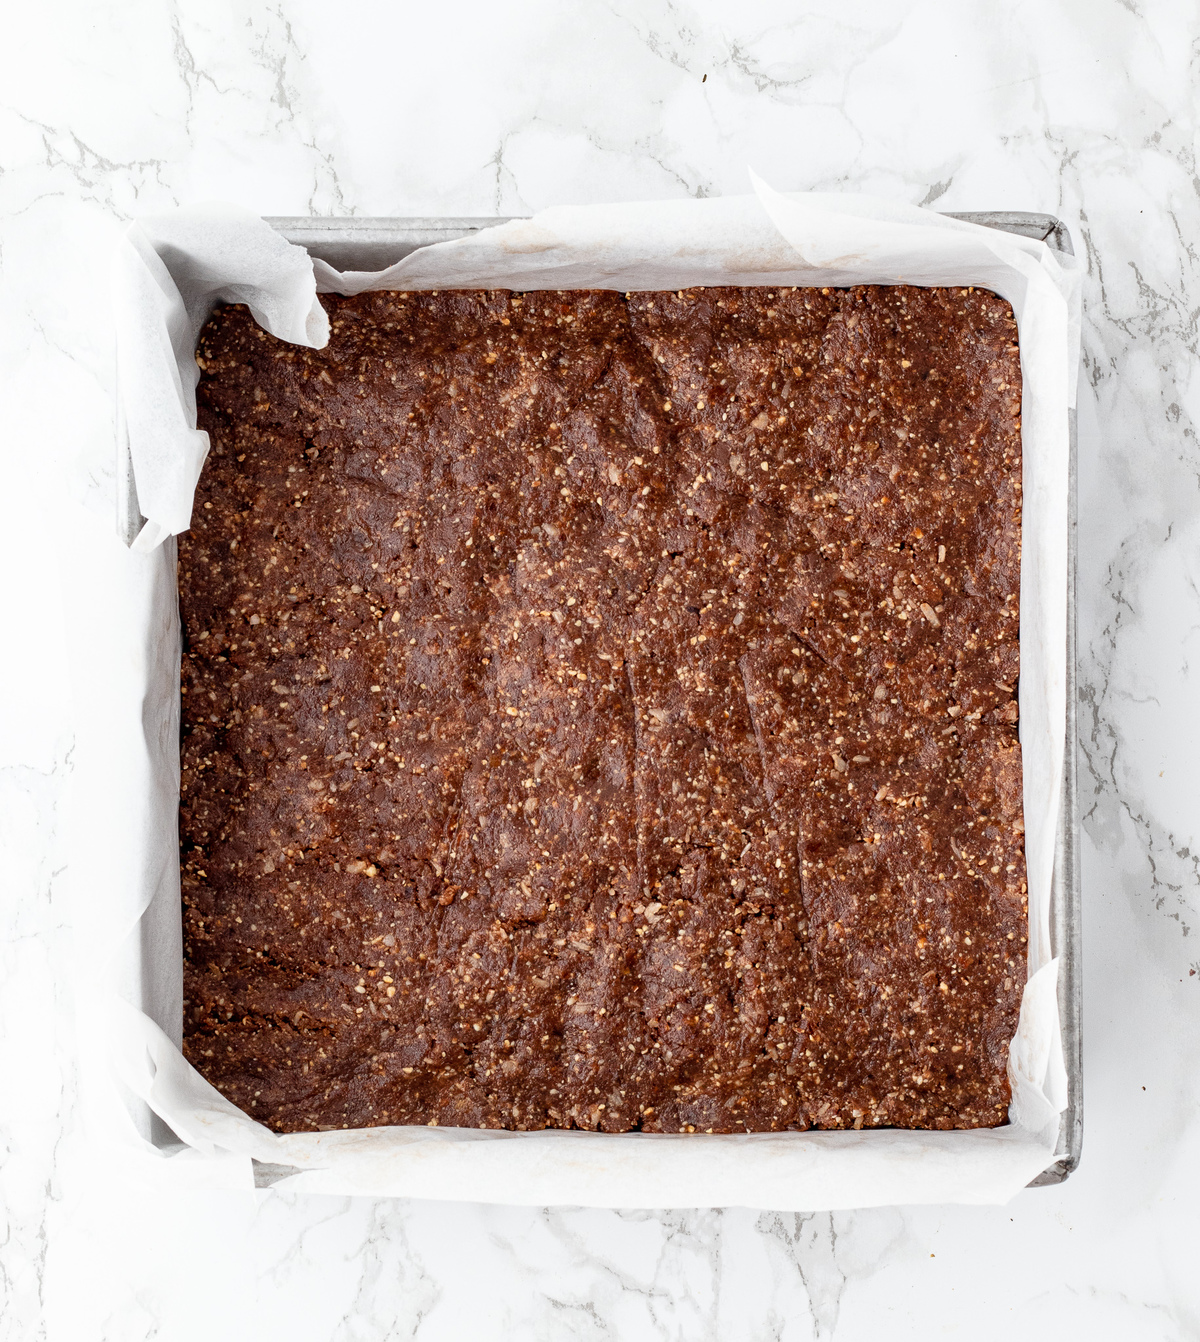
- Line an 8×8 inch baking dish with with a piece of parchment paper so that the paper hangs over the edges. Set aside.
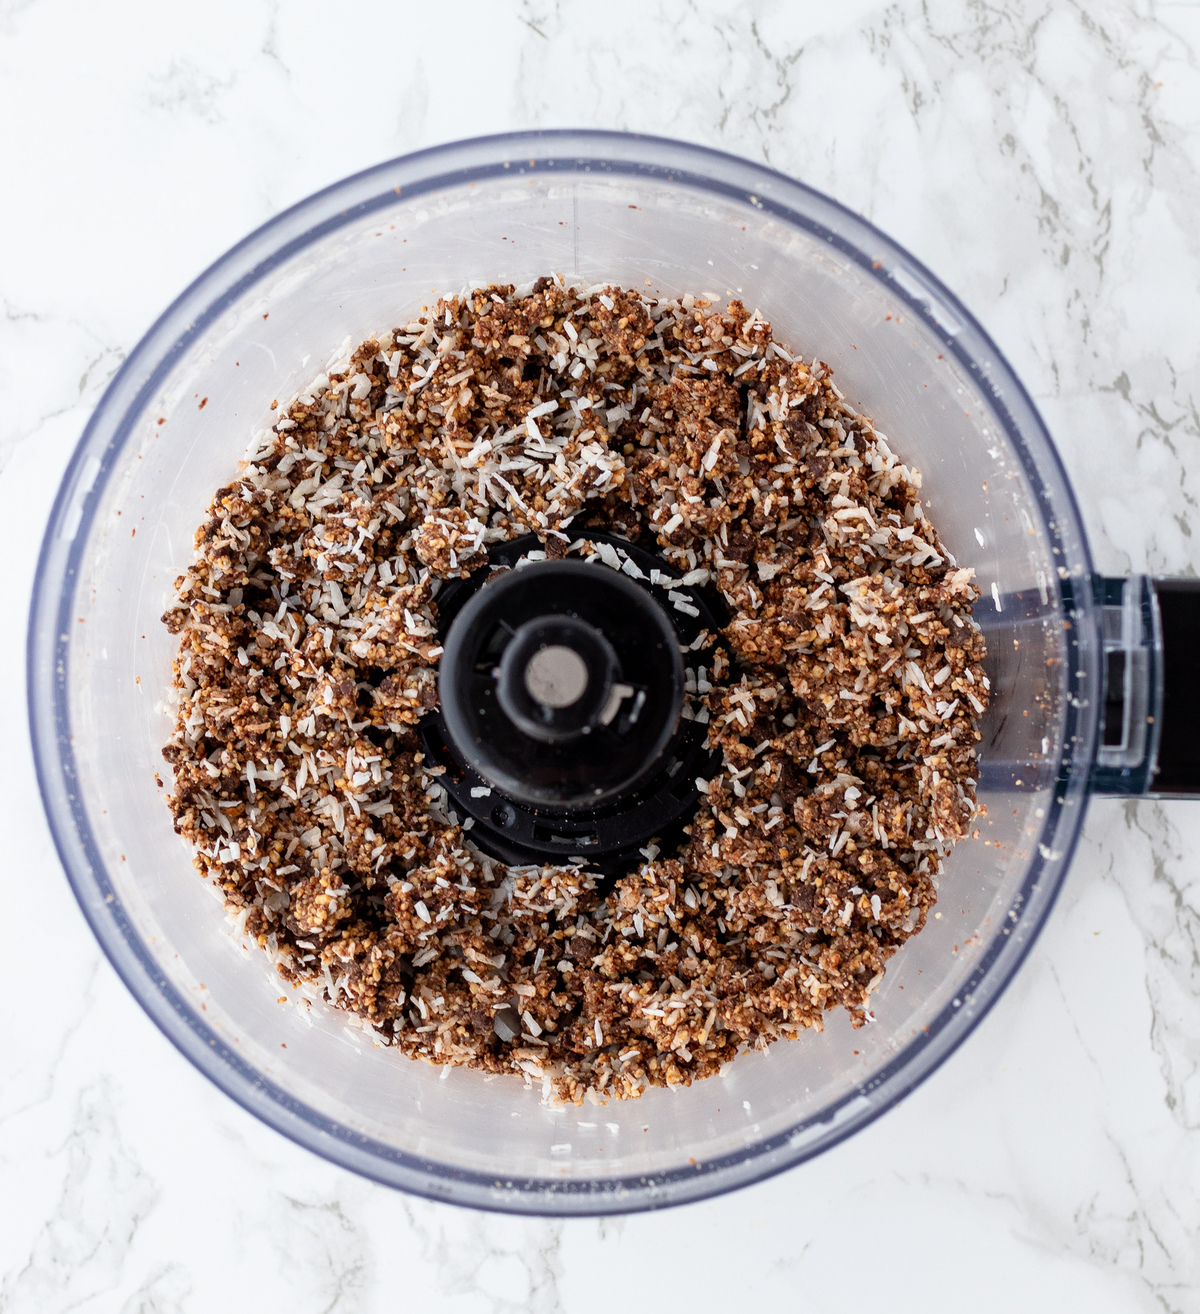
- Fit a food processor with a metal blade. Add the cashews to the processor and pulse until they are uniformly finely chopped (think fresh bread crumb texture.)
- Add the chocolate chips and coconut and pulse again until the chocolate chips are also finely chopped and the ingredients are combined. Pour the nut mixture into a large mixing bowl and set aside.
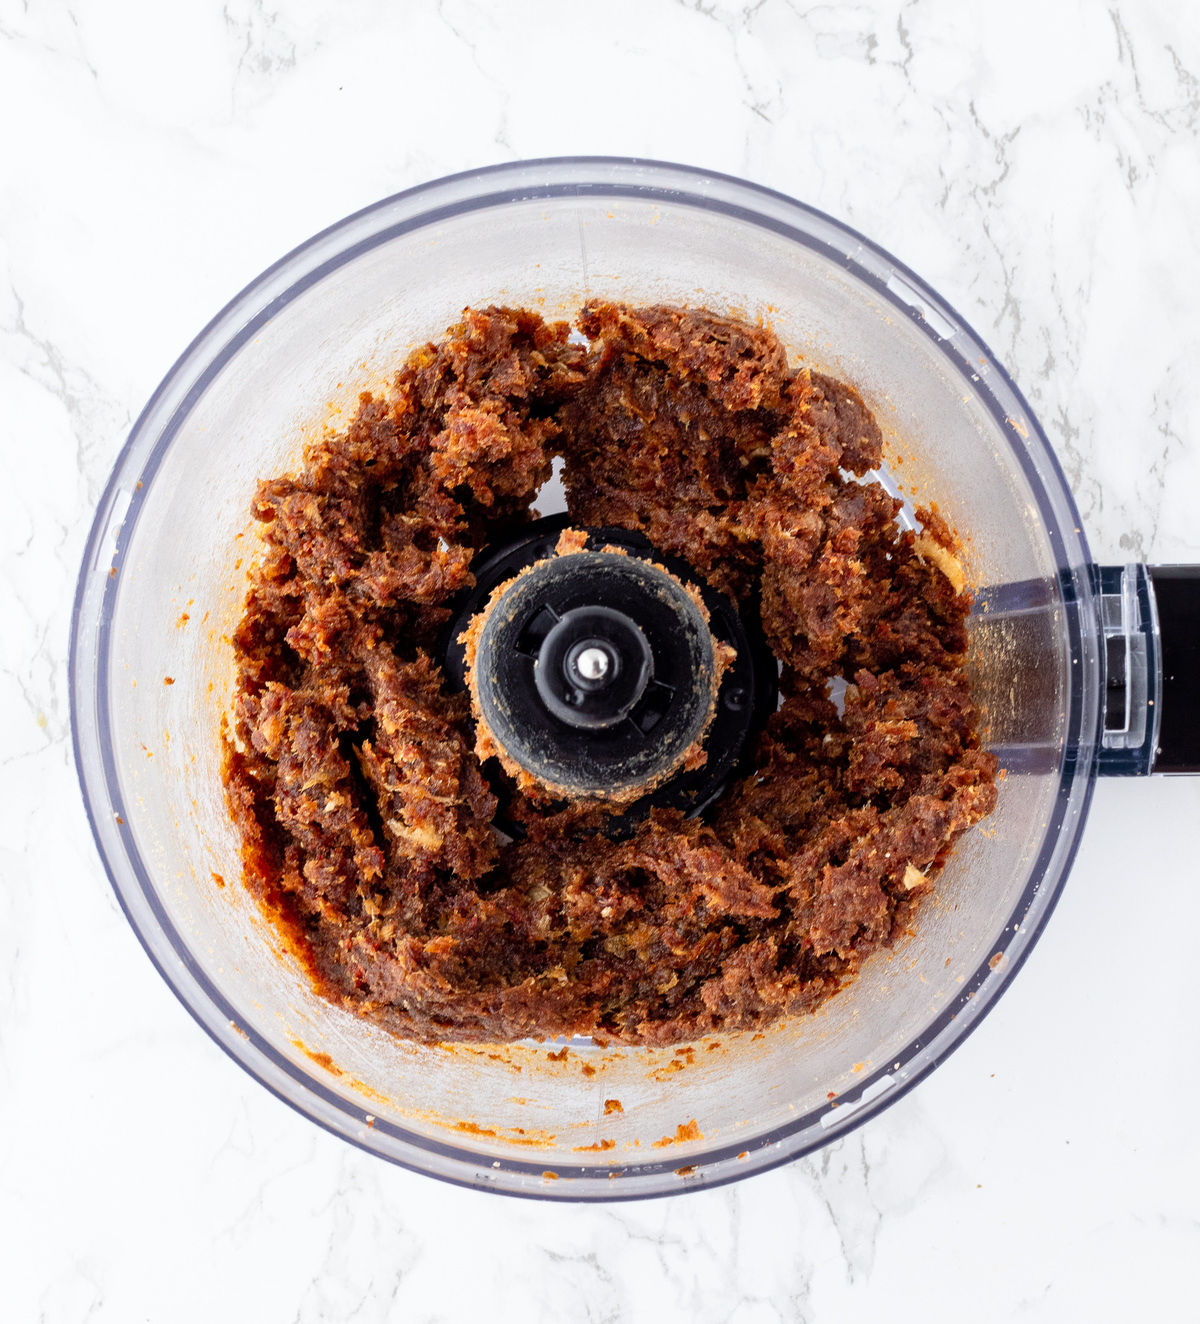
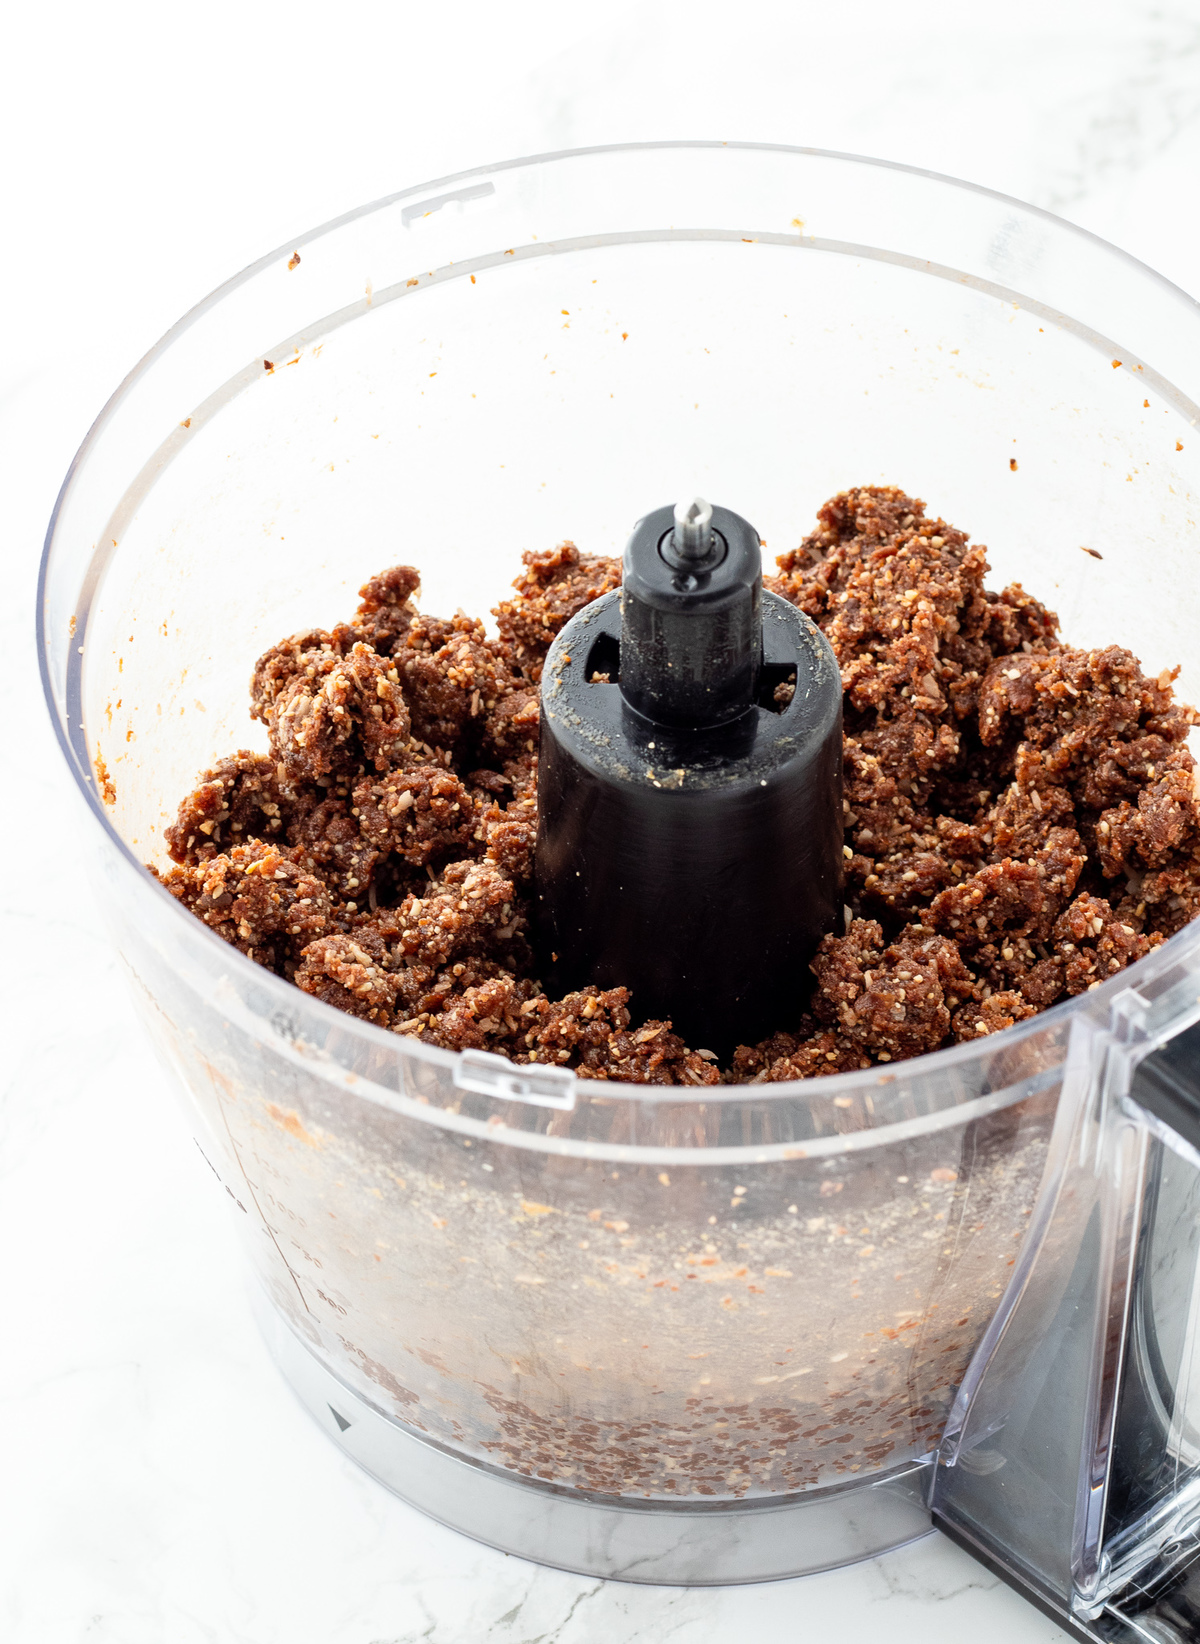
- Add half of the dates to the food processor and process until a paste forms and clumps together. Add the remaining dates and repeat.
- Next, add half of nut mixture to the food processor with the dates and pulse until combined. Add the other half of the nut mixture and process until the mixture is incorporated and sticks together.
- If you find that the mixture is not fully breaking down, add one tablespoon of water at a time until the mixture adheres together but isn’t too sticky.
- When all of the ingredients have been processed, wet your hands or use a moistened spatula and press the mixture as evenly as possible over the bottom of the pan.
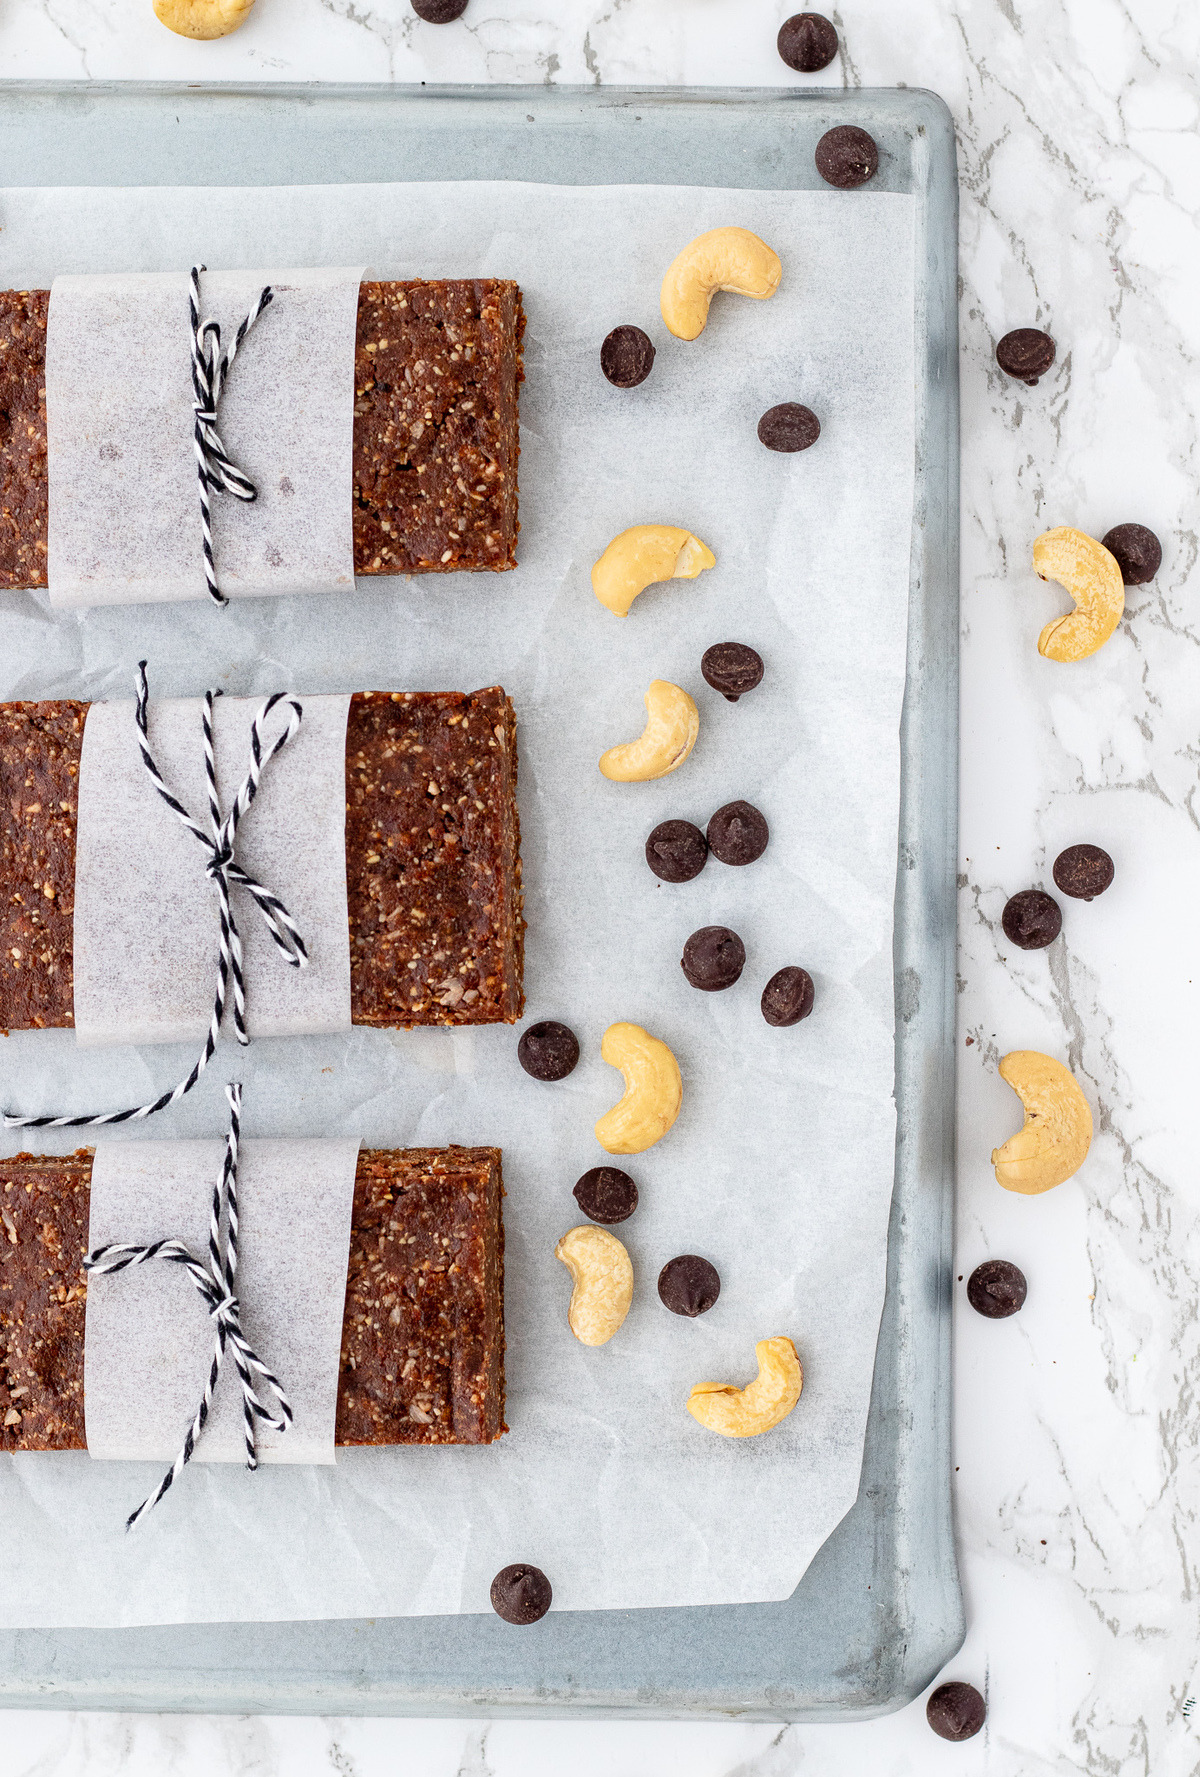
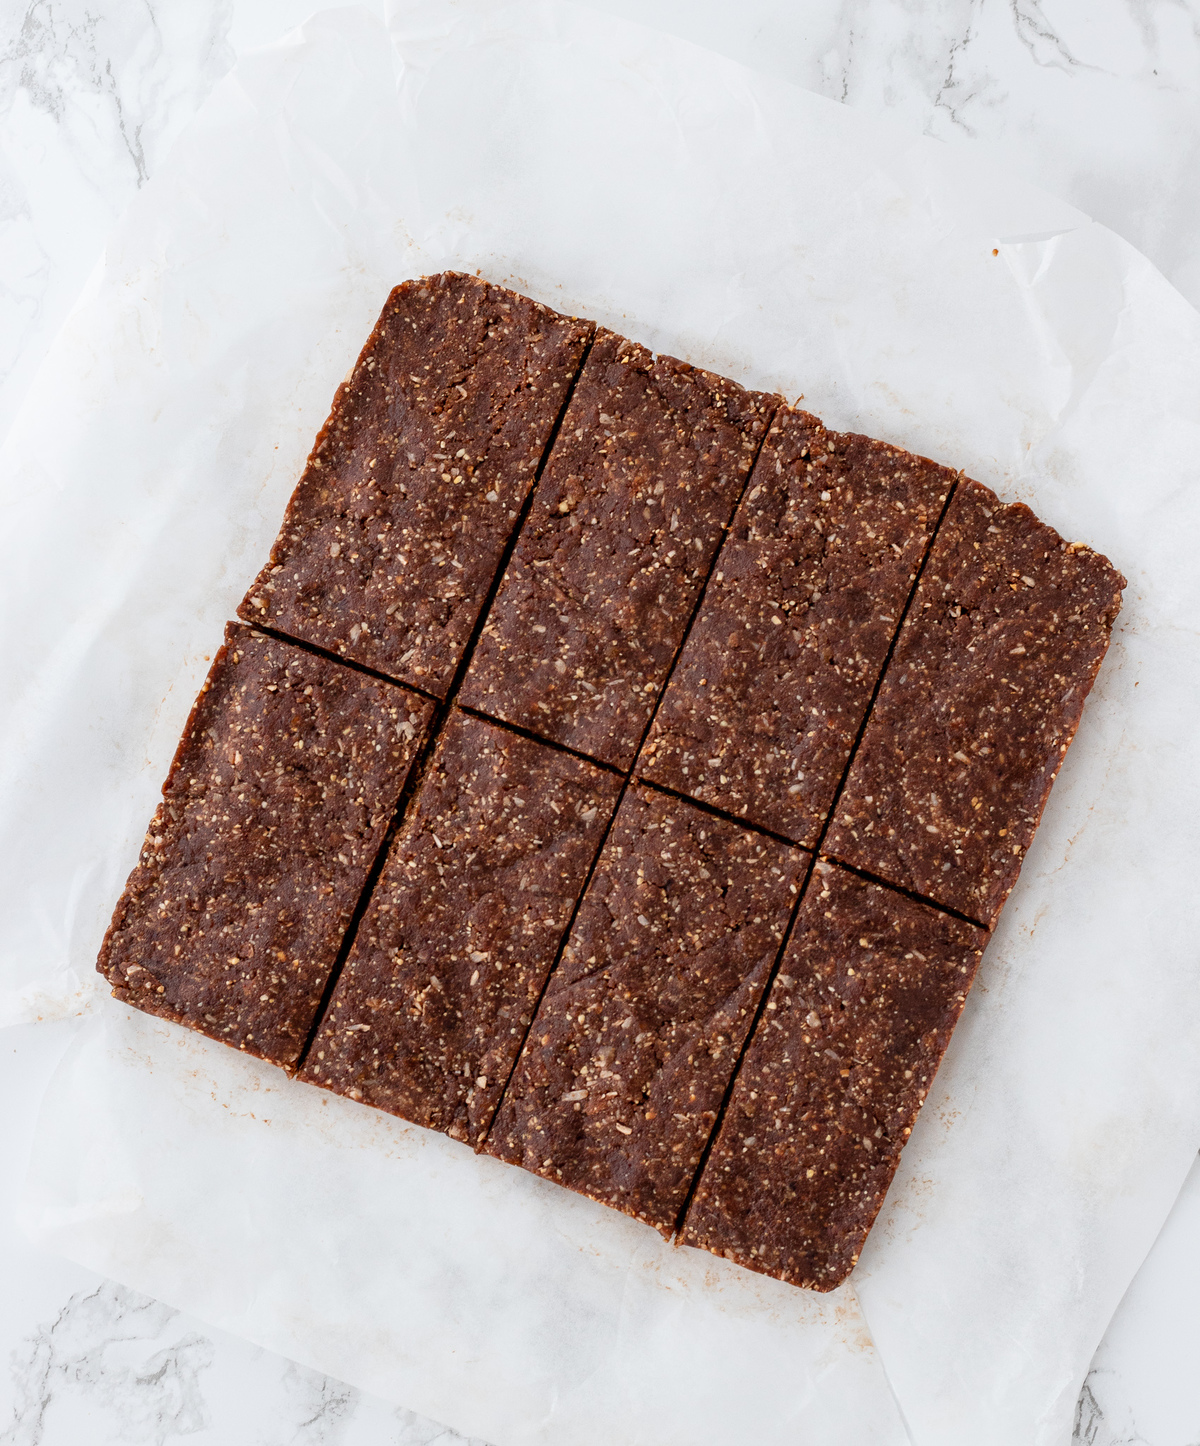
- Freeze for at least 20 minutes before cutting into bars. You can either cut them into 8 large bars or 16 smaller ones.
Keep scrolling to the recipe card below for the full printable recipe!
Recipe Notes:
- Use moist pitted dates if possible. If you find the dates that you have on hand are too hard, you can soak them in boiling water for about 5-10 minutes to help soften them and make them easier to blend.
- Use roasted cashews. Raw will work too, but roasted brings out a nice flavour in the bars.
- Adjust consistency accordingly. If the larabar recipe mixture seems too dry, add a tablespoon or so of water. If it seems too wet, add some additional nuts and coconut.
- When placing the bar mixture in the 8×8 dish, wet your hands to help prevent your hands from sticking to the mixture when pressing into the pan. You can also dampen a spatula and use that to press down on the mixture. To help smooth out the bars even further, fold the excess parchment over the bars to cover them and use something flat and heavy to press down firmly on the mixture until it is smooth.
- To slice: Use the excess parchment paper like a sling to transfer the firm bars from the pan to a large cutting board. Slice into 8 large bars or 16 smaller squares.
Storage Guidelines
To store: An unrefrigerated bar will be good for 48 hours, covered, at room temperature. Beyond that, it’s recommended that you store the bars in the refrigerator in an airtight container for up to two weeks. Line the container with wax paper to prevent them from sticking to the bottom.
To freeze: Alternatively, you can wrap them up individually in plastic wrap and freeze them for up to 3 months.
To defrost: You can either eat these snack bars partially frozen, or allow them to come to room temperature for about 20 minutes before consuming.
Recipe FAQs
A million times yes! These copycat larabars not only taste better and fresher, but are also kinder on your wallet! They have a great shelf life and are perfect for a pre or post workout snack to boost your energy.
Dates are one of the key ingredients required to make larabars. They’re perfectly sticky and sweet, and help bind the other ingredients together. Other dried fruits like raisins or dried apricots don’t have the same structure and therefore, should not be used as a direct replacement for dates.
Yes, homemade larabars work out to be cheaper than purchasing individual bars at your local grocery store, especially if you purchase the ingredients on sale or from the bulk section!
Serving Suggestions
These homemade larabars are a great snack all on their own! If you’re planning to serve them for breakfast, you could also pair the bars along with any of the following for a more balanced and satisfying meal:
- Baked Egg White Bites
- Raspberry Protein Smoothie
- Banana Smoothie without Yogurt
- Yogurt (try this fruit on the bottom yogurt recipe)
- Fresh fruit
Recipe Variations
- Use your favorite nuts: I like to use cashews in these bars, but you can use whatever nuts you have on hand. Roasted or raw almonds, peanuts and macadamia nuts will all work well.
- Add some nut butter: Add some almond butter or peanut butter for a peanut butter chocolate chip flavor.
- To make nut-free: Use sunflower seeds instead of nuts.
- For extra protein: Add some of your favorite protein powder to the mixture when blending.
- Add extra dried fruit: Try dried cranberries or dried cherries for a tasty cherry pie flavor.
More Easy Bar Recipes
- Healthy Oatmeal Breakfast Bars
- Healthy Protein Bar Recipe
- Chickpea Cookie Dough Bites
- Key Lime Protein Bars
- Sweet Potato Bars
Did you make this recipe? Scroll down to leave a star rating and review!
Homemade Chocolate Larabar Recipe {4-ingredients}
Ingredients
- 1 cup roasted unsalted cashews
- 1/2 cup dark chocolate chips or chopped dark chocolate
- 1/2 cup unsweetened coconut flakes
- 2 cups whole pitted dates (moist ones work best)
Instructions
- Line an 8×8 inch baking pan with parchment paper so that the paper hangs over the edges. Set aside.
- Fit a food processor with a metal blade. Add the cashews to the processor and pulse until they are uniformly finely chopped (think fresh bread crumb texture.) Add the chocolate chips and coconut and pulse again until the chocolate chips are also finely chopped and the ingredients are combined. Pour the nut mixture into a large mixing bowl and set aside.
- Add half of the dates to the food processor and process until a paste forms and clumps together. Add the remaining dates and repeat.
- Next, add half of the nut mixture to the food processor with the dates and pulse until combined. Add the other half of the nut mixture and process until the mixture is incorporated and sticks together. If you find that the mixture is having trouble breaking down, add one tablespoon of water at a time until the mixture adheres together but isn't too sticky.
- When all of the ingredients have been processed, wet your hands or use a moistened spatula and press the mixture as evenly as possible over the bottom of the pan. Freeze for at least 20 minutes before cutting into bars.
- To slice: Use the excess parchment paper like a sling to transfer the firm bars from the pan to a large cutting board. Slice into 8 large bars or 16 smaller squares.
Notes
Nutrition
This recipe was originally posted in August 2020 and was updated in August 2023 to include more helpful tips.


I toasted the nuts and the coconut and added some dried mango pieces. Also added hemp seeds, chia seeds, and flax seed for added protein and fiber. Seriously delicious!!
Oh yum!! That sounds amazing! Love the addition of the hemp, chia and flax too! I appreciate you taking the time to leave a review :)
Delicious. The first time I made these, I added a tablespoon of water because my dates were on the dry side. They were much too sticky. This time I just kept mixing until everything was blended evenly, which took a little longer without the additional moisture, and they are perfect. Thanks for the recipe!
Thanks for sharing this tip Jennifer! Working with dates can be a bit finicky sometimes, but I’m glad you were able to find the right consistency :) Thanks so much for returning to share this feedback!
Simple and delicious!
These are the best bars I have EVER tasted! I used to eat larabars and these don’t even compare! They are soft and chewy and taste like candy! I will be making these as soon as I run out of my last bar! Thank you for sharing this recipe! (I used roasted salted cashews because that’s what I had and ground unsweetened coconut which made for easier mixing. Delish!
Aren’t they delicious?! So addictive!! So happy you enjoyed the recipe and I’m glad to hear you’ll be making another batch :) Thanks so much for your feedback!