
If you’re looking for a healthier fruity yogurt, why not try making your own? This homemade Raspberry-Fruit-on-the-Bottom yogurt makes the perfect healthy make-ahead snack option that you can just grab-and-go! Perfect for a breakfast or a snack on the run! {Gluten-free, dairy-free and vegan options}
Lately, I’ve been on the hunt for some new quick and healthy snack ideas. As a busy mom, I’m always thinking about what to feed our little guy, but sometimes I get so caught up thinking about what to feed him that I forget to feed myself.
He always seems to eat when his tummy gets hungry, but me? Not so much.
That’s why I find that having easy grab and go snacks around is the best option to keep that energy level up! Because Lord knows, we need it.
One day, I got thinking about my berry chia seed jam and how I haven’t made it in FOREVER. So I used that recipe as inspiration to come up with a brand new super easy make-ahead snack idea.
Homemade Raspberry Fruit-on-the-bottom yogurt.
Sounds amazing, right?
Although convenient, I’ve never been a fan of the store-bought fruit-on-the-bottom yogurts since I know that what they essentially are, is sugar-on-the-bottom of a yogurt container with very minimal actual fruit.
The beauty of making your own fruit-on-the bottom yogurt is the fact that you can control EXACTLY what goes into it and can pack it with good-for-you ingredients.
Like raspberries and chia seeds, for instance.
With these nutritious ingredients, you get that extra kick of vitamin C, potassium, and fibre to make for a well-rounded snack, especially when paired with the protein and calcium-rich yogurt.
So you’re probably thinking, easy and healthy make-ahead snacks?? Tell me more.
Here’s how to make this super easy snack happen.
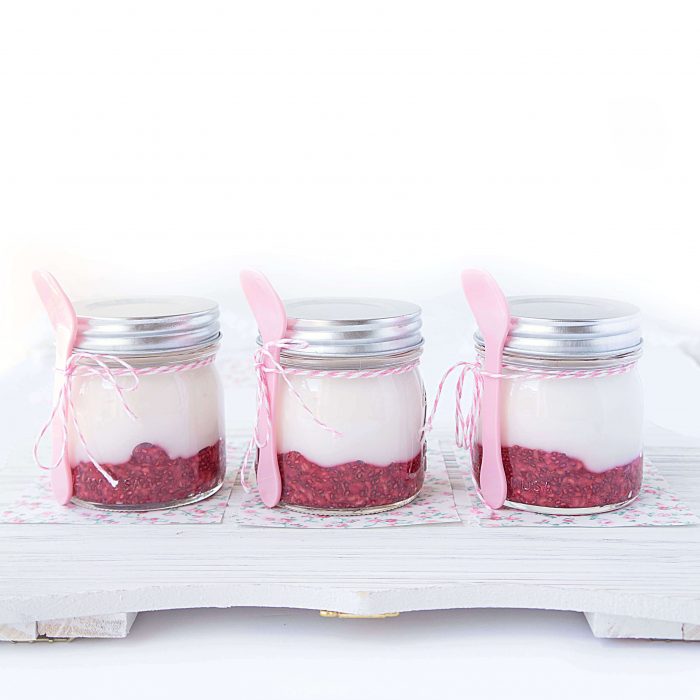
Table of Contents
How to Make Homemade Raspberry Fruit-on-the-Bottom Yogurt
So in your mind, this may sound complicated, and you may be thinking, why the heck would I make my own fruit-on-the-bottom yogurt when I can just buy a pack of it at the store?
But believe me when I say, this stuff is SO much better. It has a great flavour and texture, is much more filling and is so easy to make!
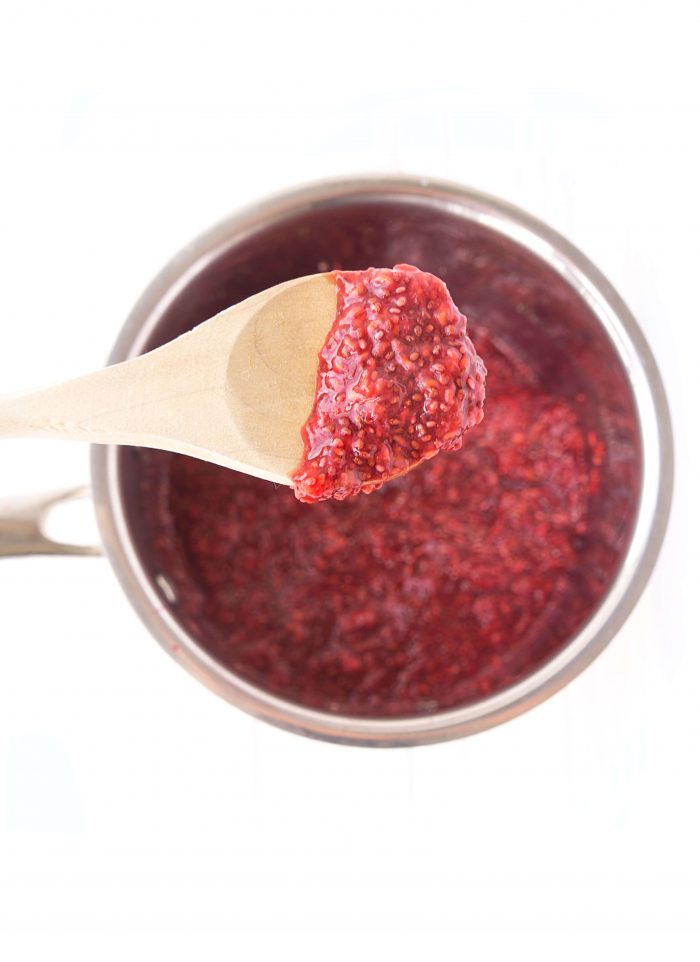
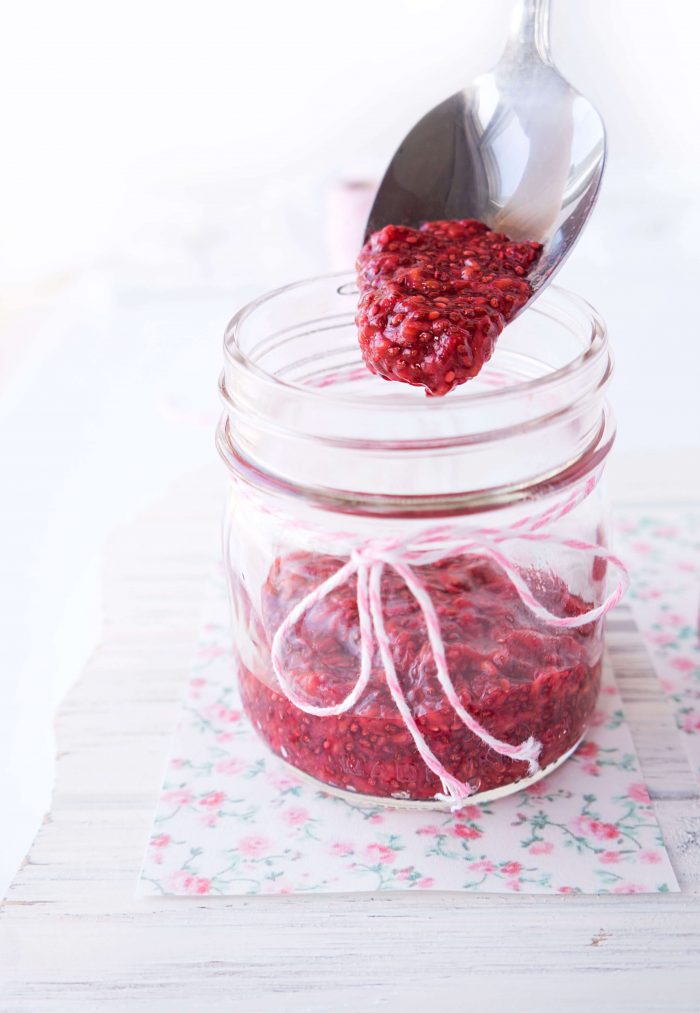
First, you’ll require some fresh or frozen raspberries. Add them to a small saucepan along with some maple syrup and stir for several minutes until it comes to a light simmer and the raspberries start to break down. Mash the raspberries slightly.
Next, stir in the chia seeds. Allow to simmer for 10-15 minutes, stirring frequently to prevent the mixture from sticking to the bottom of the pot. Once it thickens into a jam-like consistency, remove from the heat and stir in the vanilla extract. Allow it to cool.
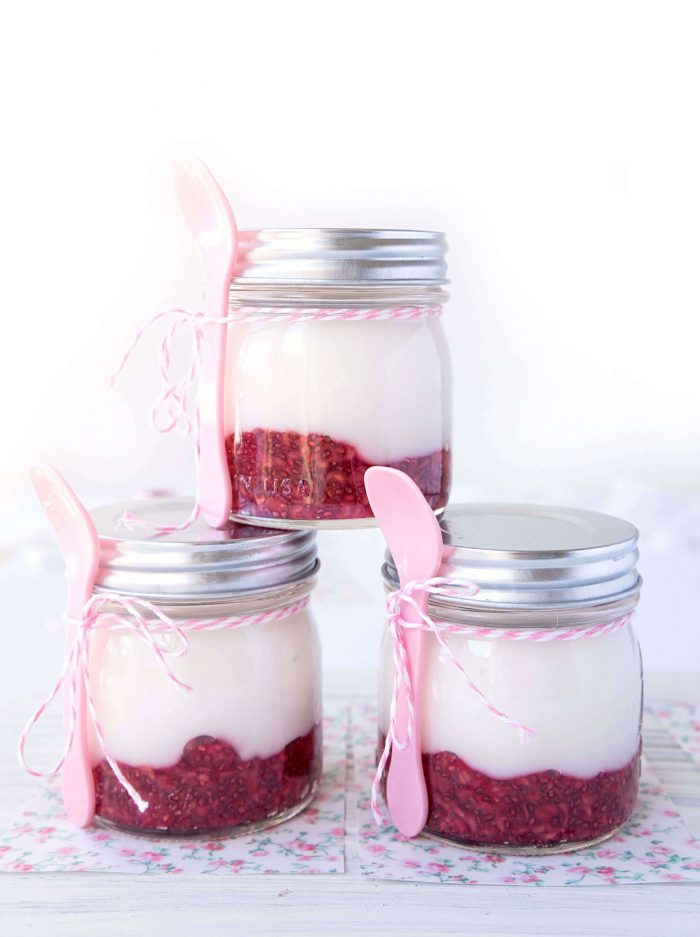
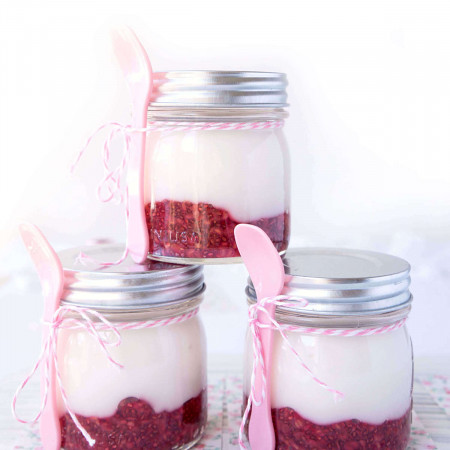
Now this is the part where you’ll need to get out some cute mason jars, or some bowls or containers (preferably with a lid) of choice. Just FYI — this recipe makes enough for about four servings.
I find the smaller mason jars work best for these yogurt jars since they fit the yogurt and fruit mixture perfectly. Plus, by using the clear glass mason jars, you can see the fruit and yogurt layers which it makes it look like some fancy treat.
SO much better than looking at a plastic store-bought yogurt container in your lunch bag. BOR-ING.
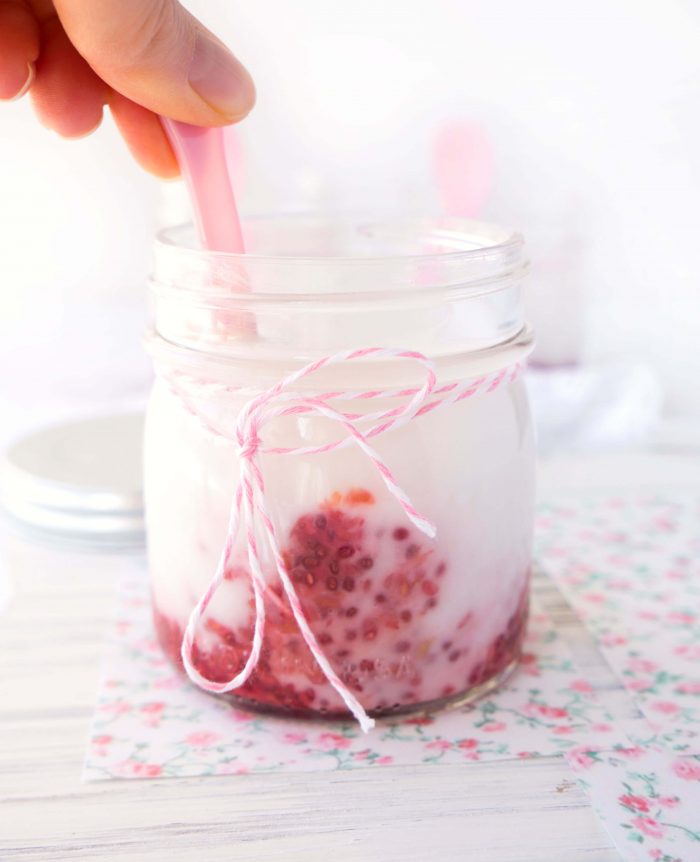
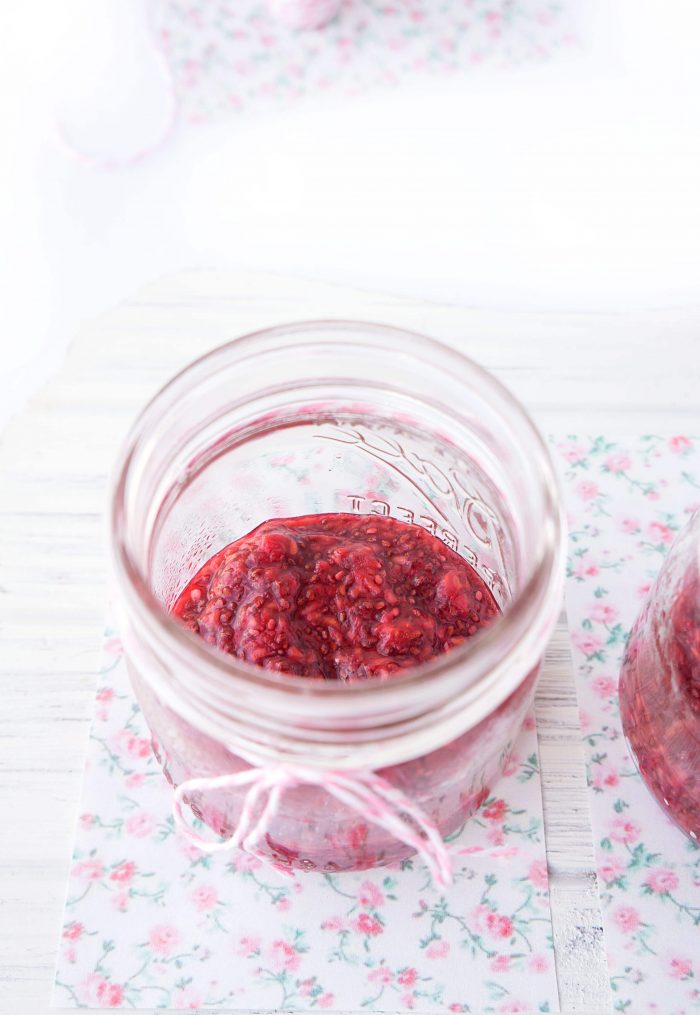
Next, you’re going to open the lid of the jar and put about three tablespoons of the raspberry chia seed mixture into the bottom of each jar.
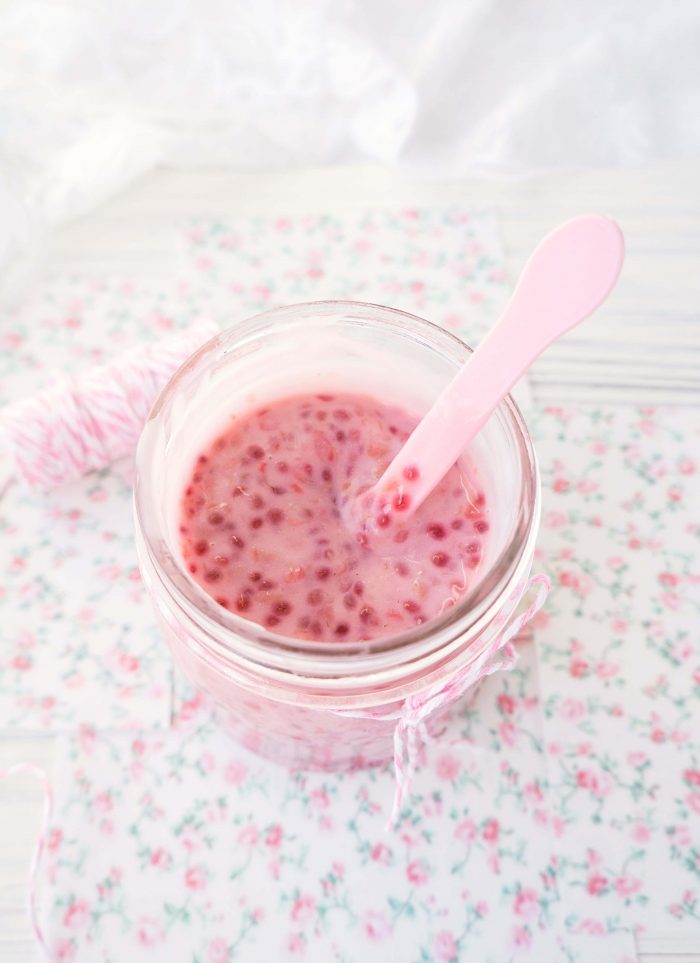
Next, place half a cup of your preferred yogurt on top of the chia seed mixture.
Secure the lid and place in fridge for later use.
Storage guidelines
I would recommend consuming the pre-made yogurt jars within a week of placing them in the fridge. However, another option is, you could make a double or triple batch of the raspberry chia seed mixture and freeze it in individual ice cube tray compartments.
When you want to make this yogurt, simply pop out your desired number of raspberry cubes, place them in the jar or container you intend to use and allow the mixture to thaw overnight.
Simply add the yogurt to it when you’re ready to eat it or to take it with you on the go.
How easy is that?!
What type of yogurt should you use for these jars?
It really is up to you on the type of yogurt you use depending on your preferences or dietary restrictions. Personally, I’ve tried these jars with both a plain 0% Greek yogurt and plain coconut yogurt as a dairy-free option and they were both equally good!
However, you could also sub in a regular non-Greek yogurt, Skyr yogurt, or another dairy-free substitute such as an almond or soy yogurt. I would recommend going for a plain variety though, especially if you’re looking for an option with less added sugar.
Keep in mind that these jars aren’t as sweet as your typical fruit-on-the-bottom yogurts, but I find that the raspberries, maple syrup and vanilla extract flavour it up just enough to give it a nice pleasant taste and texture.
If you feel that it could use a bit more sweetness, you could always add a little additional sweetener or fresh fruit of choice.
This homemade raspberry-fruit-on-the-bottom yogurt makes such a convenient and tasty snack, you’ll definitely want to keep it on the snack rotation!
More healthy snack recipes
- Easy Yogurt Fruit Dip
- Raspberry Banana Protein Smoothie
- 8 Healthy Make-Ahead Sweet and Salty Snack Ideas
- Easy Granola Recipe {4 Different Ways}
- 4-Ingredient No-Bake Peanut Butter Protein Bars
- Larabar Recipe {4-ingredients}
Did you make this recipe? Scroll down to leave a rating and review!
Homemade Raspberry Fruit-on-the-Bottom Yogurt
Ingredients
- 2 cups fresh or frozen raspberries
- 3 tbsp. pure maple syrup
- 2 tbsp. chia seeds
- 1/2 tsp. vanilla extract
- 2 cups plain Greek yogurt (or sub in preferred yogurt)
Instructions
- In a medium-sized pot, bring the raspberries and maple syrup to a light simmer. Reduce heat to medium low, stirring frequently, and continue to simmer for about 5 minutes. Mash the berries with a potato masher or fork. Leave several berries whole for added texture, if desired.
- Stir in the chia seeds until thoroughly combined and cook the mixture for about 10-15 minutes, or until it thickens to desired consistency. Stir frequently so that the mixture doesn’t stick to the pot.
- Once the mixture has thickened up, remove from heat and stir in the vanilla extract. Allow it to cool for several minutes.
- Next, place about three tablespoons of raspberry mixture into four mason jars or containers.
- Top with half a cup of yogurt. Place on the lid and store in the fridge until ready to eat.
Notes
Nutrition
This post may contain affiliate links which means that I may make a small commission at no extra cost to you. I only promote products that I love and feel will benefit my readers :)


Question on the calorie count. Is that just for the raspberry mixture or does that include the yogurt too? I’m trying to gain weight which is hard when I have two little ones running me ragged and need something rich in calories.
The nutritional information is based on about 1/4 cup of the raspberry mixture and 1/2 cup of plain non-fat Greek yogurt. If you want to make it higher in calories, you could always sub in a full-fat yogurt instead of non-fat. You could even add some peanut butter for some extra fat and calories. It would be like a PB & J yogurt cup :) Hope that helps!
what a fun & simple idea! This is right up my alley!
Thanks Rebecca! They’re so much fun and easy to make too!