
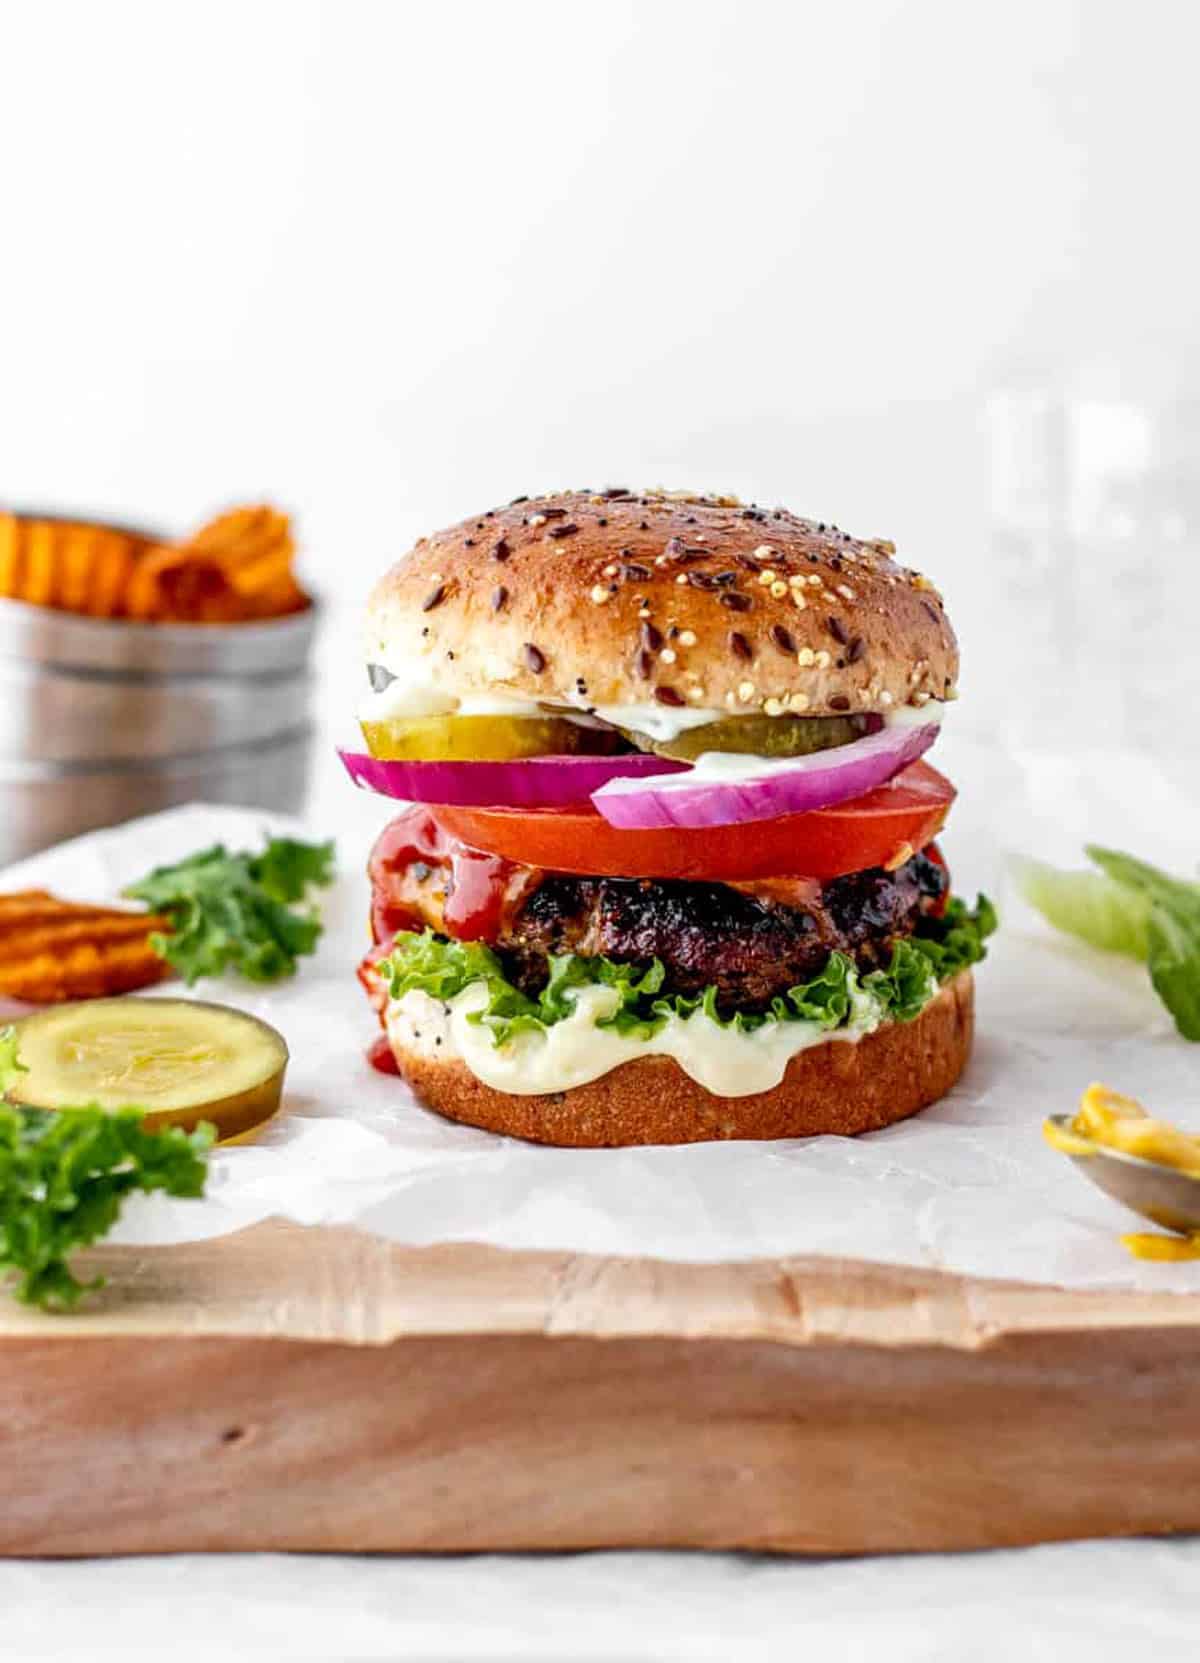
This easy Worcestershire sauce burger recipe is perfectly seasoned and ready in under 20 minutes! Made with breadcrumbs, egg, and a mustard crust, these juicy, homemade hamburgers come out tender, juicy and flavorful every time, whether they’re grilled or pan-fried. {Gluten-free-friendly}
Juicy Burger Recipe – So Simple & Delicious!
Once grilling season is here, I know we’re all on the hunt for the BEST burger recipes, and this juicy hamburger recipe with Worcestershire sauce is hands down one of my favorites and a guaranteed crowd-pleaser.
You’ll love the use of Worcestershire sauce, which provides a deep umami flavor that also helps tenderize leaner meat. It’s the secret to getting all the juiciness and flavor of a really good burger, without splurging on high-quality ground beef with higher fat content!
For more burger night ideas, try my Vegan Spicy Black Bean Burgers, Zucchini Turkey Burgers, or browse my Healthy Summer Dinner Recipes!
Why We Love These Worcestershire Burgers
- Super juicy: The combination of ingredients keeps these patties moist and tender. No dry burgers here!
- Ready in 20 minutes: Mix, shape, and cook! Patties can also be prepped the night before.
- Healthier than prepackaged patties: Less than 200 calories and 26g of protein per patty, and much lower in sodium and saturated fat.
- Gluten-free friendly: Just swap in gluten-free breadcrumbs and you’re good to go.
Before You Get Started: Tips for the Best Burgers
A few things that make a real difference before you fire up the grill:
- Use 80/20 ground beef. This provides just enough fat to make these burgers juicy.
- Don’t overmix. Overworking the meat makes patties dense and tough.
- Keep the mixture cold. The fat should stay solid until it hits the heat, which creates flavor pockets inside the patty.
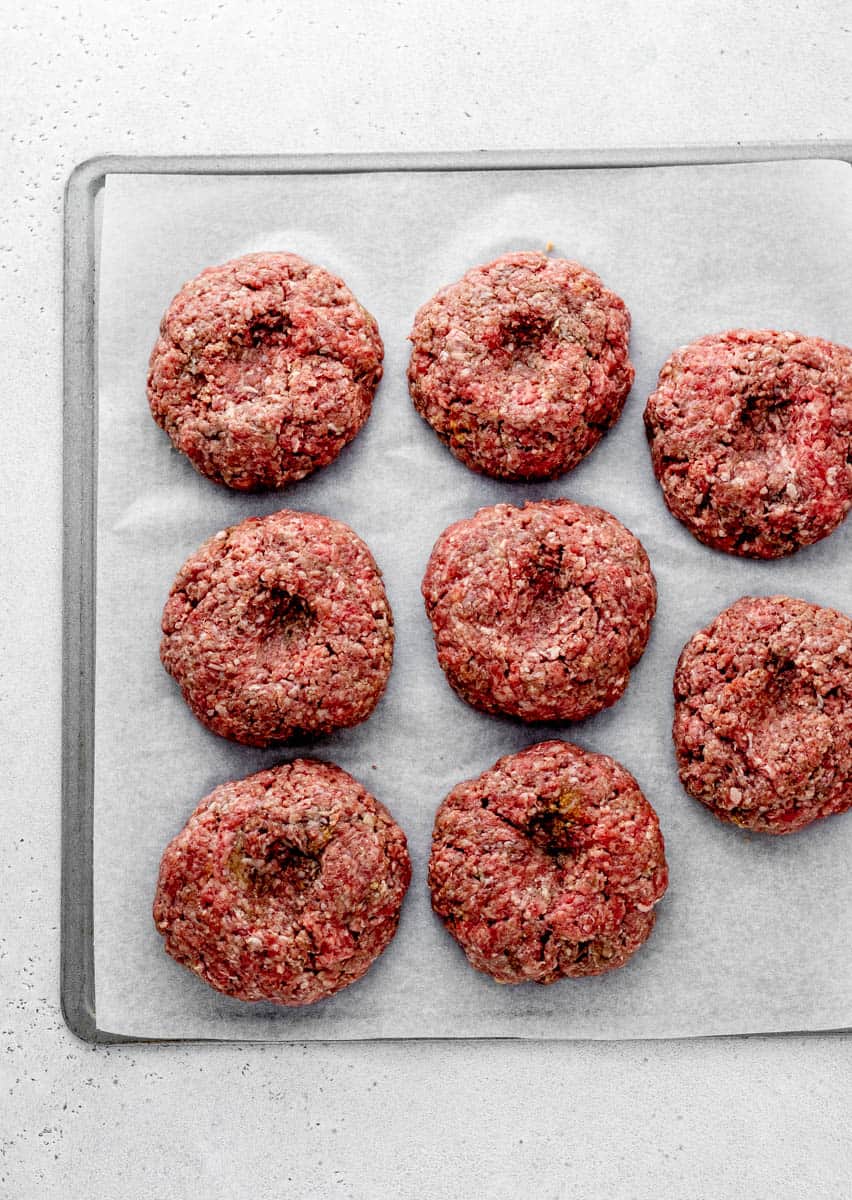
- Make a thumbprint. Press a deep dent in the center of each patty with your thumb to prevent it from puffing up as it cooks.
- Don’t skip the mustard. Burgers with Worcestershire sauce are amazing, but made even better with a mustard crust!
- Only flip once. Wait a few minutes for grill marks to form before flipping. This gives you that seared crust and keeps the patties from falling apart!
Ingredient Notes
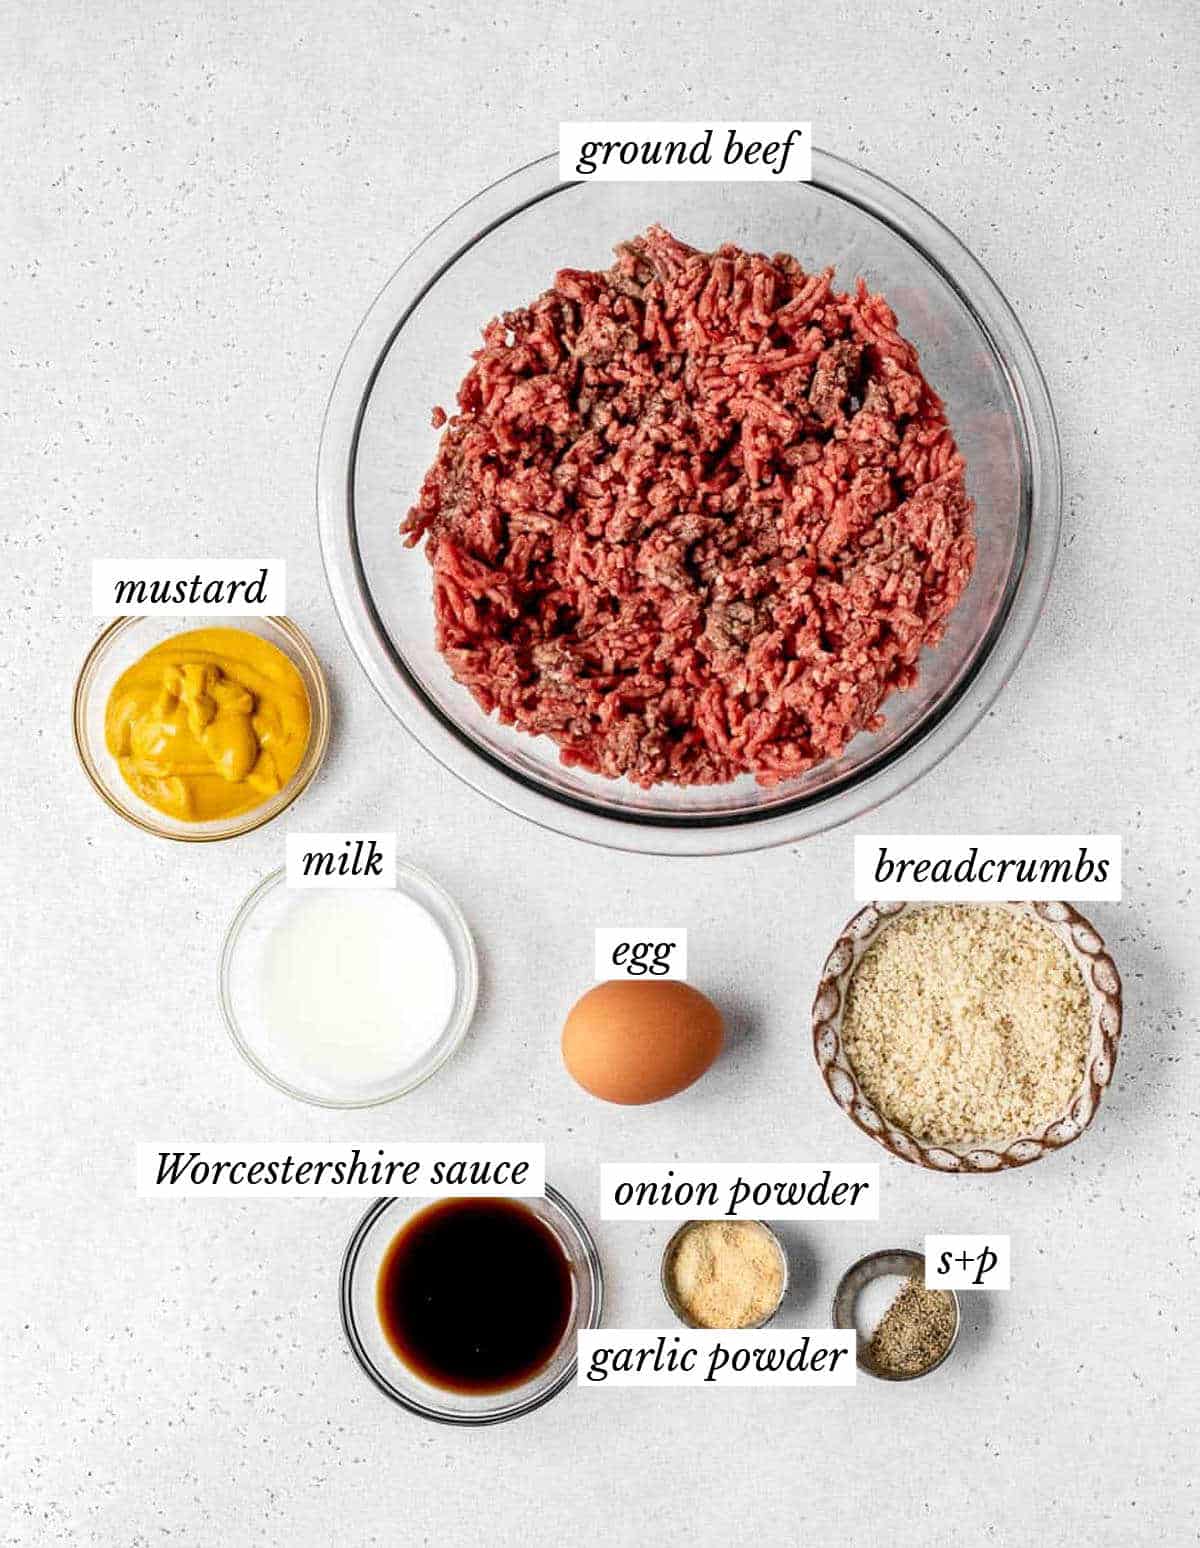
- Ground Beef: Lean ground beef is the healthiest option, but ground chuck is also a great option if you can find it.
- Panko breadcrumbs: This easy Worcestershire sauce burger recipe with breadcrumbs can also be made with gluten-free breadcrumbs.
- An egg and milk: The egg binds the ingredients together and adds extra moisture, and the milk helps to keep the burgers juicy when cooked.
- Worcestershire sauce: The savory, umami star of the show! Adds tanginess to each bite.
- Seasoning: You’ll need garlic powder, onion powder, salt, and pepper.
- Yellow mustard: Brushed on before cooking, it locks in the juices and gives the burgers a tasty crust.
How to Make Worcestershire Sauce Burger Recipe
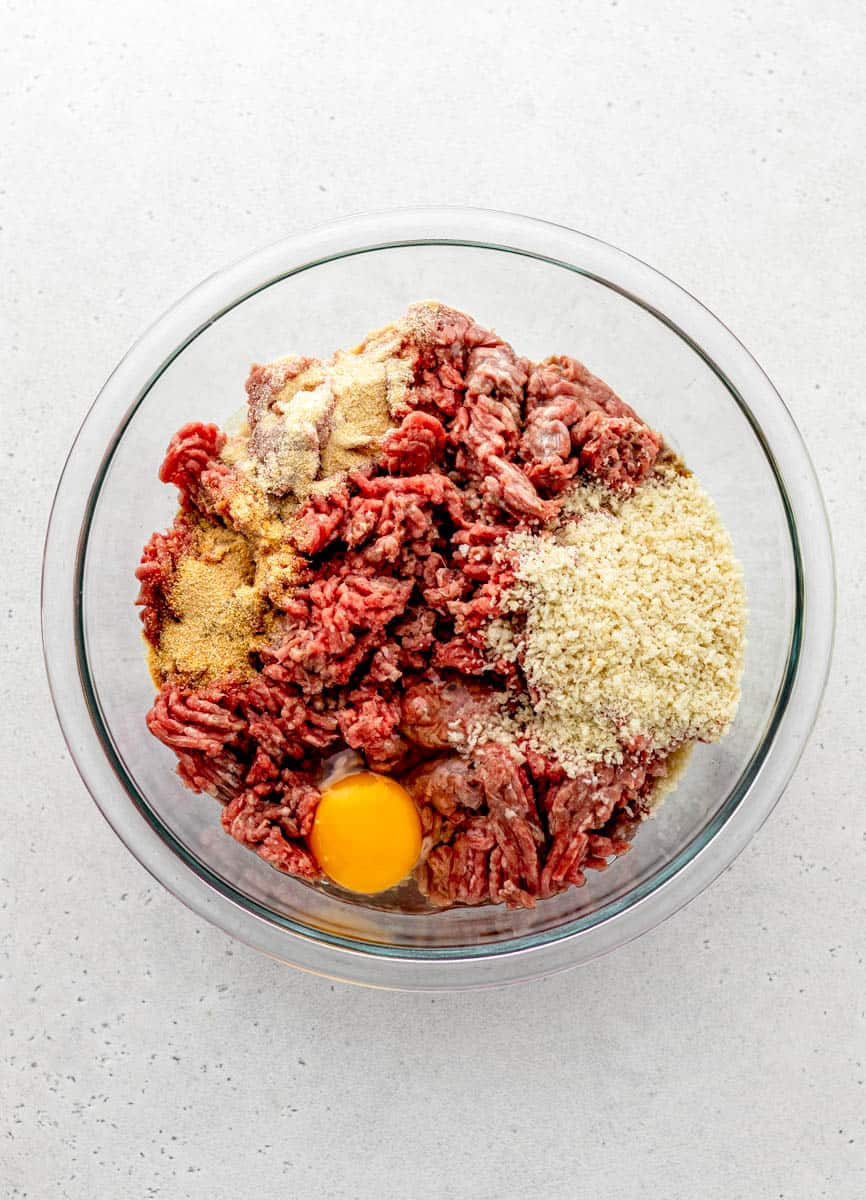
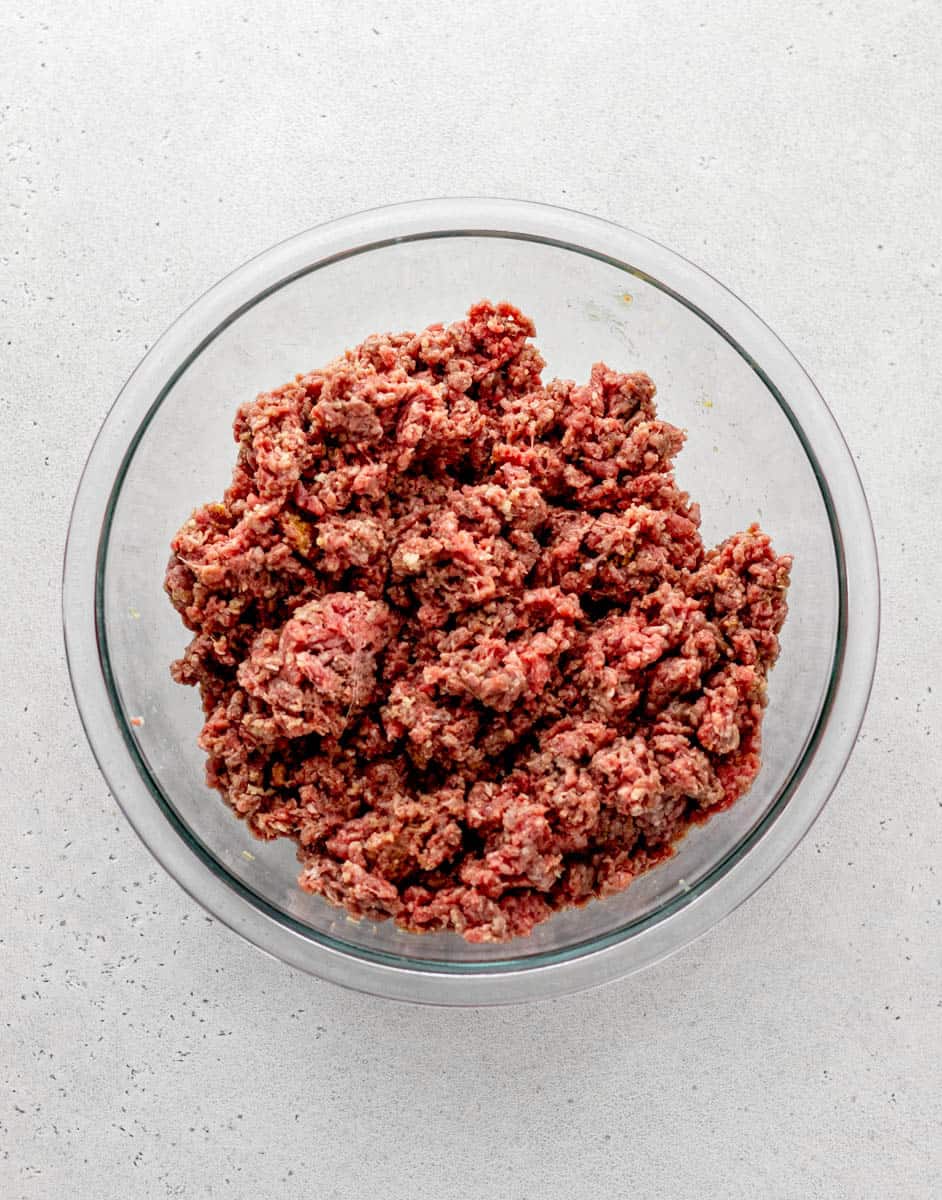

- Step 1: Make the patty mixture In a large bowl, combine the ground beef, breadcrumbs, egg, Worcestershire sauce, milk, garlic powder, onion powder, salt, and pepper, and mix by hand until just combiend.
- Step 2: Divide the mixture. Press the meat into an even disk in the bowl, then divide into 8 equal portions (about ¼ lb each). You can also measure out the meat using a kitchen scale if preferred.
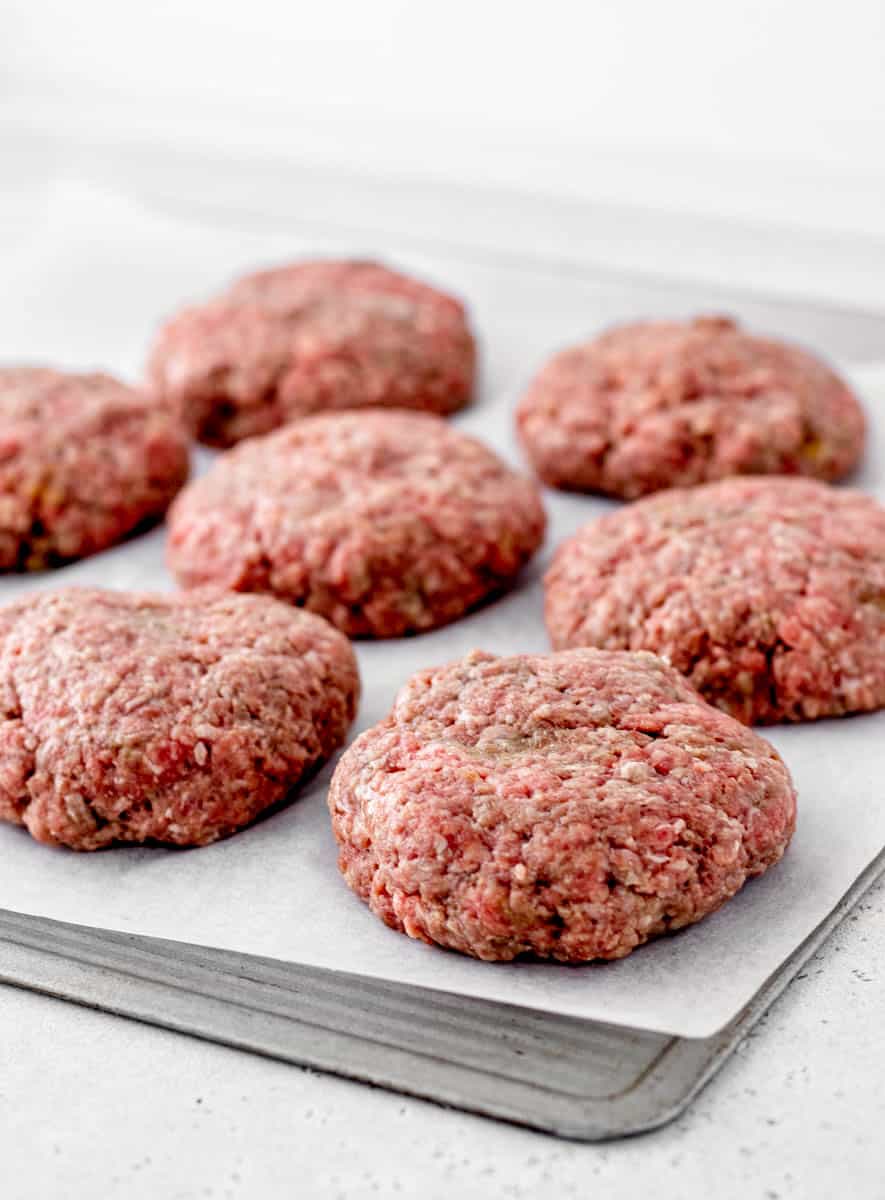
- Step 3: Shape the patties. Form the patties slightly larger than your buns, since they’ll shrink a bit during cooking. Press a thumbprint into the center of each one.
- Step 4: Cook. Preheat your grill or cast iron skillet to medium-high heat (350-400°F) and brush lightly with oil. Place patties on the heat and spread about 1½ teaspoons of mustard onto the uncooked side of each one. Cook for 3-4 minutes per side, or until they reach your desired doneness. Don’t press on them, or you’ll release their juices!
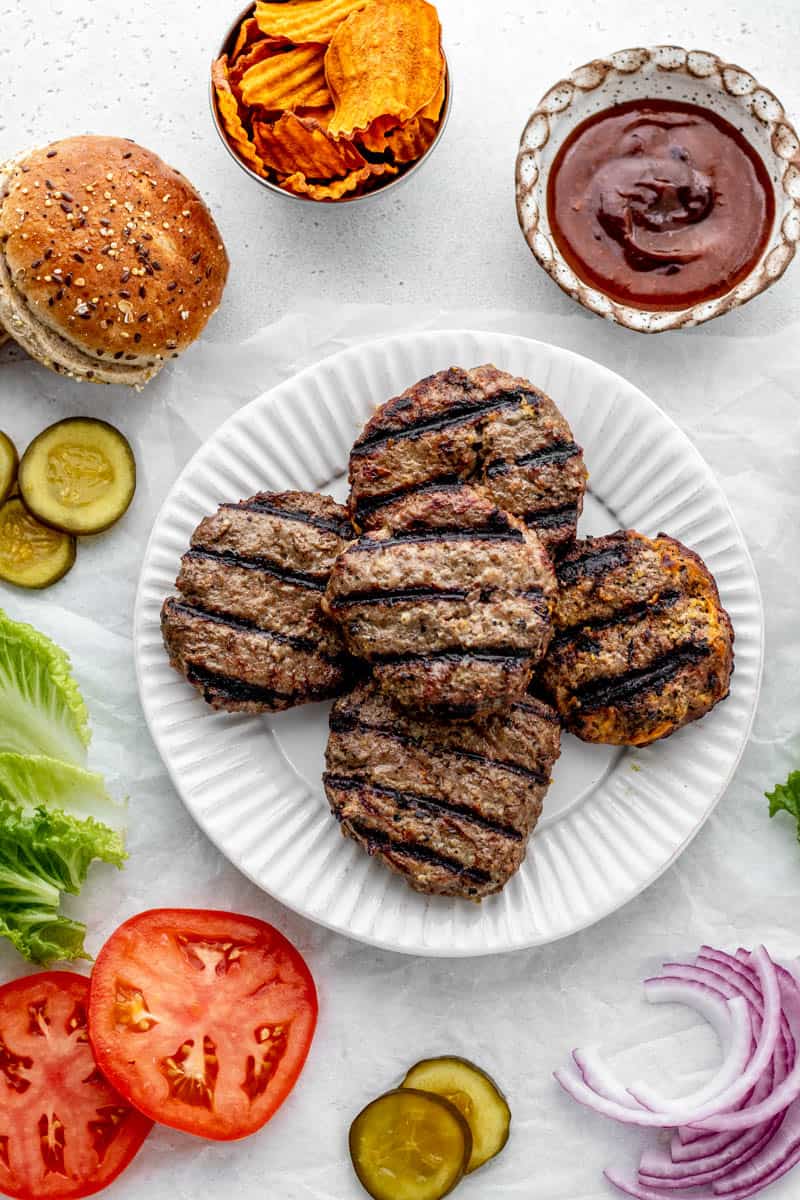
- Step 5: Rest and serve. Let the burgers rest for 5 minutes before serving. This is key in any homemade hamburger recipe, as it lets the juices redistribute so they stay in the patty and not on your plate. Enjoy them piled high with your favorite toppings!
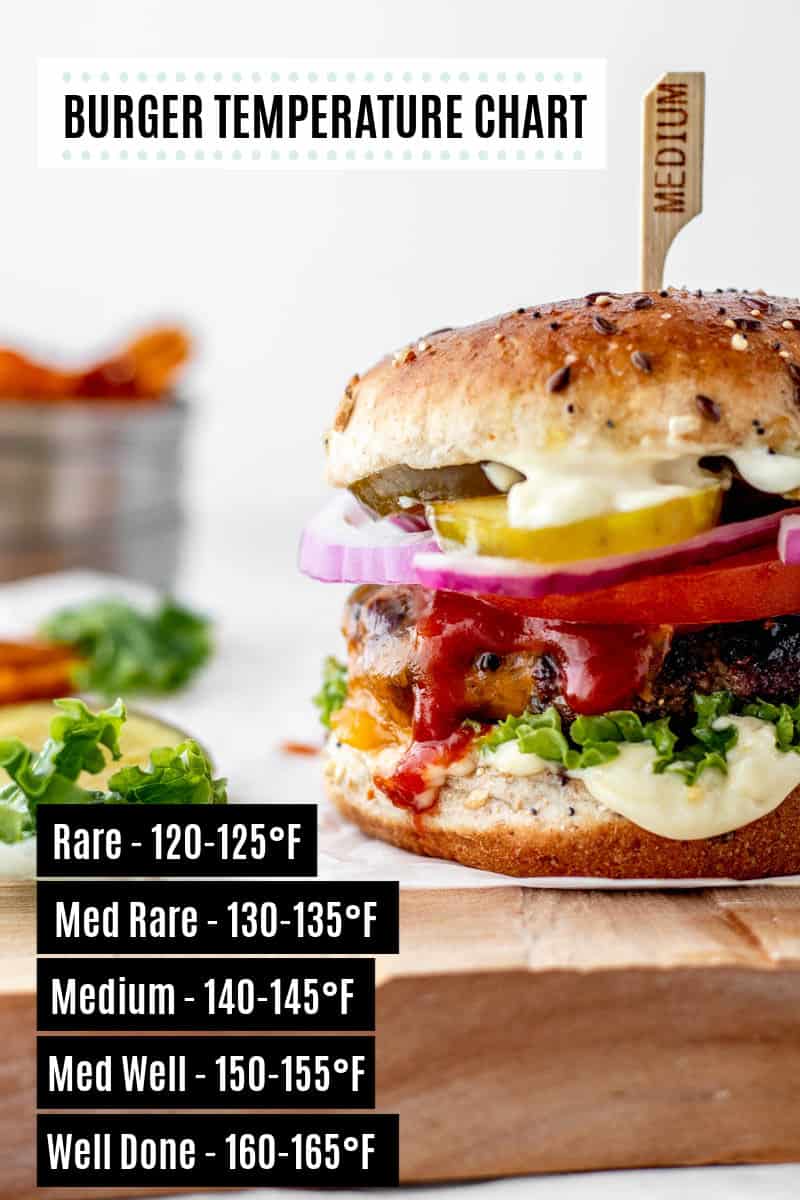
Burger Temperature Guide
For food safety, the USDA recommends cooking ground beef to an internal temperature of 160°F / 71°C to kill any potentially harmful bacteria. Use a digital meat thermometer for accurate results.
To avoid overcooking, pull patties off the heat at 155°F, and they’ll continue to cook to 160°F as they rest.
Medium – 140-145°F
Medium – well 150-155°F
Well done -160°F +
Storage and Make Ahead Tips
Make ahead: Shape the patties in advance and refrigerate with parchment between each one.
Fridge: Uncooked patties can be stored in an airtight container for up to 3 days, and cooked burgers for up to 4 days.
Freezer: Flash-freeze raw patties in a single layer on a tray, then transfer to a freezer bag. This helps prevent them from freezing in a clump. These can be kept frozen for up to 3 months. You can also freeze leftover burger patties the same way. Thaw in the fridge overnight.
Reheating: Warm cooked patties in a 400°F oven for 3-4 minutes per side to keep them juicy.
Serving Suggestions
These simple burgers are a good fit for cookouts and easy weeknight dinners. They pair really well with baked sweet potato fries with cinnamon, healthy dill potato salad, coleslaw with walnuts and cranberries, or a simple tossed salad.
For something light and refreshing, a nectarine salad is a great summer pairing.
Burger Topping Ideas
Keep it classic or load them up. Some of my family’s favorite combinations include:
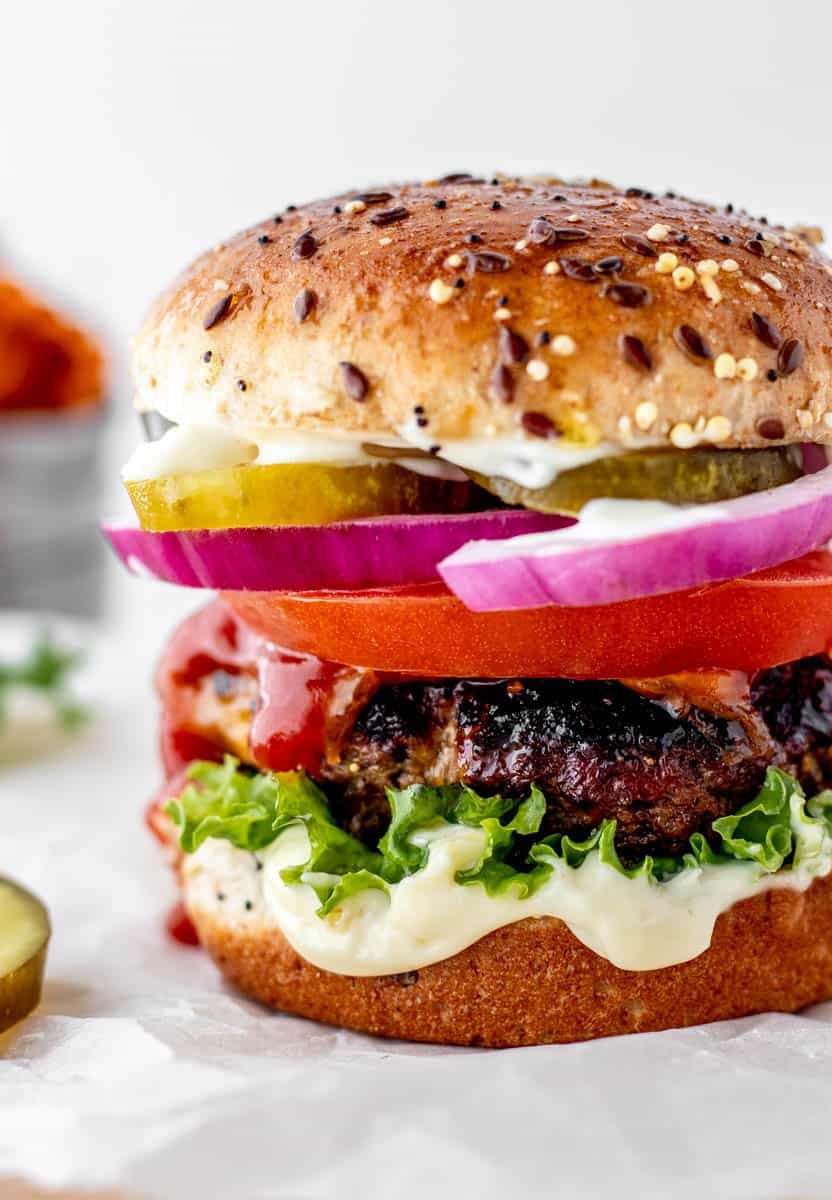
- Classic: lettuce, tomato, red onion, pickles, ketchup, mustard
- Smash burger-style: sliced cheese, caramelized onions, healthy Big Mac sauce, or barbecue sauce
- Fresh and bright: pesto (try it with dairy-free pesto), Mediterranean bruschetta, tzatziki
- Indulgent: sautéed mushrooms, roasted garlic aioli, crispy onions
Make it Your Own
- Different protein: Swap the beef for ground turkey, chicken, lamb, or bison.
- Spicy burgers: Add a pinch of cayenne pepper to the mixture.
- Extra flavor: Mix crumbled feta or caramelized onions directly into the patties.
- Gluten-free: Use gluten-free panko breadcrumbs with no other changes needed.
- The oven or air fryer method: Cook in a 400°F oven for about 15 minutes, or in an air fryer for about 10 minutes. Keep in mind that the grill or stovetop gives you the best sear and crust!
More Healthy Beef Recipes
Did you make this recipe? Scroll down to leave a star rating and review!
Easy Worcestershire Sauce Burger Recipe {with Bread Crumbs}
Video
Ingredients
- 2 pounds lean ground beef or ground chuck
- 1/4 cup panko bread crumbs
- 1 large egg
- 2 tablespoons Worcestershire sauce
- 2 tablespoons milk
- 1 teaspoon garlic powder
- 1 teaspoon onion powder
- 3/4 teaspoon salt
- 1/2 teaspoon black pepper
- 1/4 cup yellow mustard
Instructions
- Add the ground beef, bread crumbs, egg, Worcestershire sauce, milk, garlic powder, onion powder, salt and pepper to a large bowl. Mix by hand until the ingredients are evenly distributed, but stop once the mixture looks even to avoid over mixing.
- Press the meat down in the bowl to form an even disk-like shape. Use a knife to divide the hamburger mixture into 8 – 1/4 pound patties.
- Line a baking sheet with parchment paper or foil. Using your hands, gather the burger mixture one at a time and press firmly into evenly shaped patties. Be sure to shape them just slightly larger than the buns you plan to use since they will shrink slightly during cooking.
- Place the patties on the baking sheet. Use your thumb or the back of a spoon to press a dent in the centre of each patty so they don't puff up as they cook.
- Preheat a gas or charcoal grill or a cast iron skillet to medium-high heat (approximately 350-400 degrees F). Brush with a little oil to prevent sticking.
- Place the burgers on the oiled grill or in the skillet and spread about 1 1/2 teaspoons mustard on the uncooked side of each patty. Grill or fry the patties on the stove for 3-4 minutes per side, or until you achieve desired doneness.
- Allow the burgers to rest for about 5 minutes. Place the hot patties on hamburgers buns, and top with desired toppings. Serve warm.
Notes
- Use the right meat: I recommend using an 80/20 ratio — 80% beef to 20% fat. This provides just enough fat to make the burgers juicy.
- Avoid over mixing the meat mixture: This can create a dense and heavy texture.
- Keep the meat mixture cold until you’re ready to cook the patties: If the fat stays solid until the moment it hits the heat, it will quickly expand, creating flavour pockets inside each patty.
- Make the patties uniform in size. This will help them cook more evenly. You can use a burger mold or a lid to make uniform patties.
- Make a thumbprint in the middle of the patty. Using your thumb, make a deep depression in the centre of each patty to keep the burger from puffing up and bulging in the middle while cooking. If they plump up, you’ll be more tempted to press it down with the spatula.
- Don’t skip the mustard step: Spreading the uncooked burgers with mustard infuses extra flavour and helps form a crust for extra crispy burgers.
- Grease the grill/pan: Use a bit of oil to grease the grill or pan to prevent the burgers from sticking.
- Only flip burgers once: This is the secret to getting a flavourful sear and nice crust. If you’re grilling, don’t move or flip the patties until they’ve developed grill marks (which usually takes at least 3 minutes). This can also help prevent the homemade burgers from falling apart and losing their round shape.
- Don’t press on the patties while they cook: When you do this, you’re basically squeezing the juices out of the hamburgers into the grill plates or pan. You don’t want those juices to go to waste!
Nutrition
This recipe was originally posted in June 2022 and the text, formatting and some photos were updated in June 2026.


This recipe was an unexpected and easy home run! I put two small slices of white bread in the blender for bread crumbs and doubled the recipe keeping each patty at about 1/4 pound. The only “hot” spice II included was the pepper.
My teenage daughter had two hamburgers which is a feat for her given puberty and her ever-changing tastes and appetite.
My 10 and 7 year old boys had three and two burgers, respectively. This is no small feat either given they both often have finicky tastes, unpredictable appetites, and texture and taste sensitivities due to ADHD and Autism. My four year old had almost one burger by himself.
Dinner was late the night I made these. Ketchup was the only condiment my kids knowingly used and lettuce the only topping added. I cooked the patties on a gas stove top in a large saucepan with the heat setting between 5 and 6. I used a little bit of vegetable oil to prevent sticking. There was no burning, no smoke, and no sticking at all.
After everyone’s first burger, we ran out of hamburger buns and turned to sliced white bread. None of this changed the pace my kids kept eating at throughout dinner. Three of the kids asked for seconds (which isn’t common unless they really like a recipe).
We had leftovers that held together and warmed up comfortably after 30 seconds in the microwave over the next two days.
I realize my kids’ tastes and appetites don’t speak for everyone. This is a recipe I’ve added to our recipe book with all four kids’ permission.
I appreciate you sharing such a kind and thorough review! I’m so happy the burgers were a hit with your family! I understand what a win it is when you actually find a recipe that the whole family enjoys, so I’m happy you’ll be making this one on repeat :)