
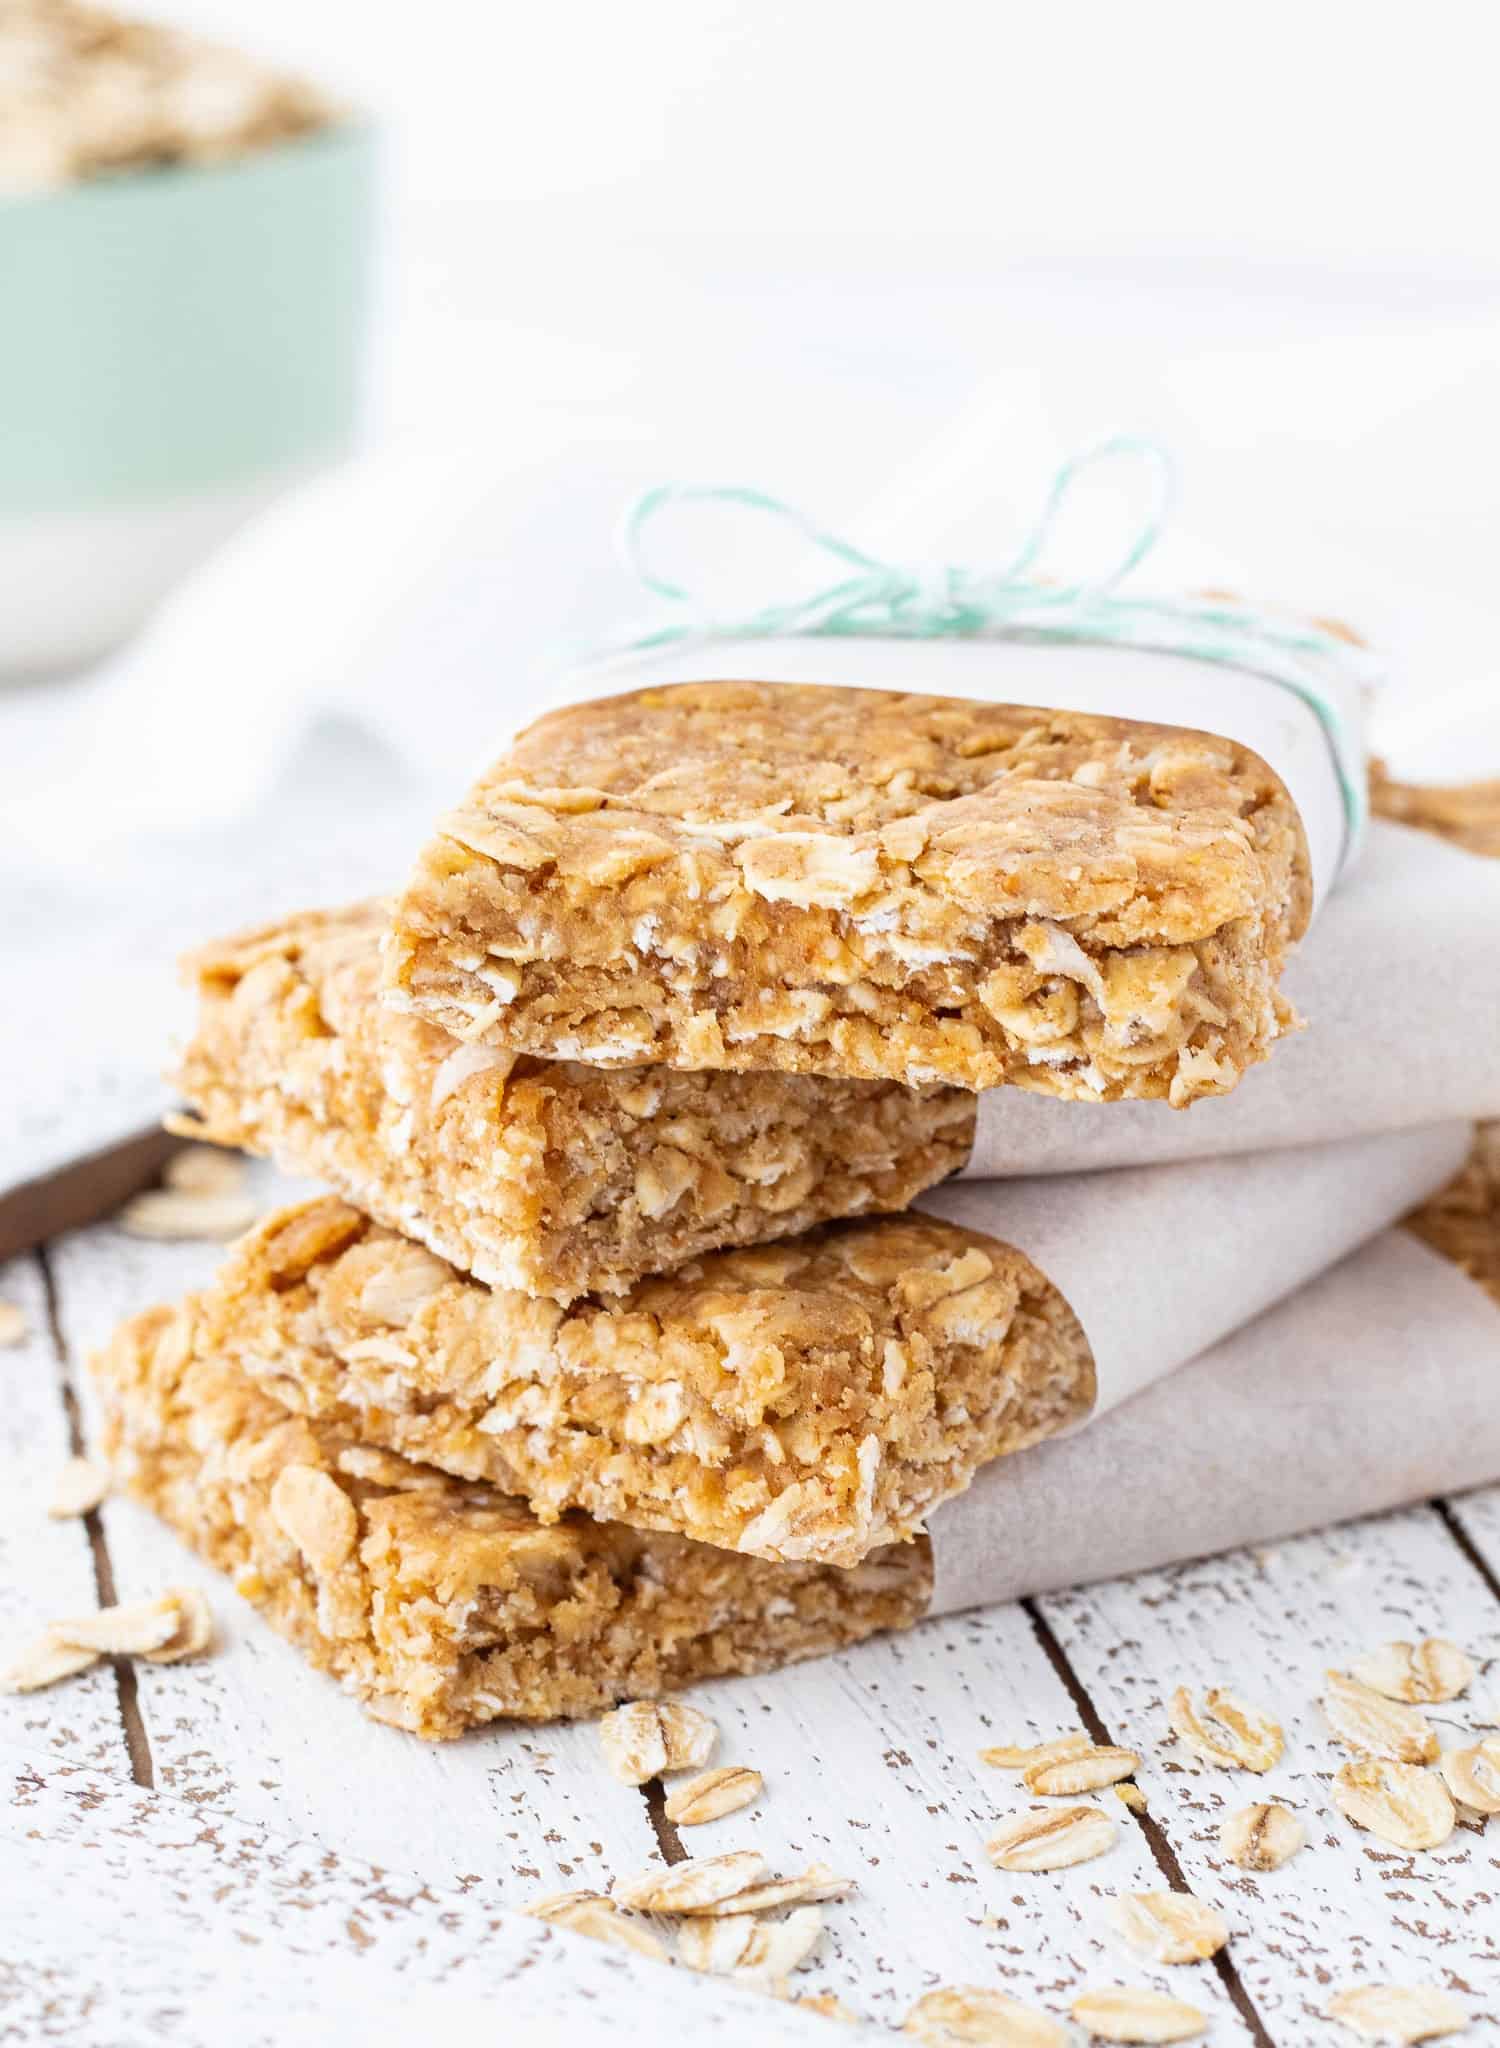
These healthy no bake peanut butter protein bars made with oatmeal contain only four simple ingredients, have 12 grams of protein per bar, and are super easy to prepare! Made in less than 15 minutes, these peanut butter bars are the perfect healthy snack for on-the-go. Ditch the overpriced store-bought bars and make your own! {Gluten-Free & Vegan-Friendly}
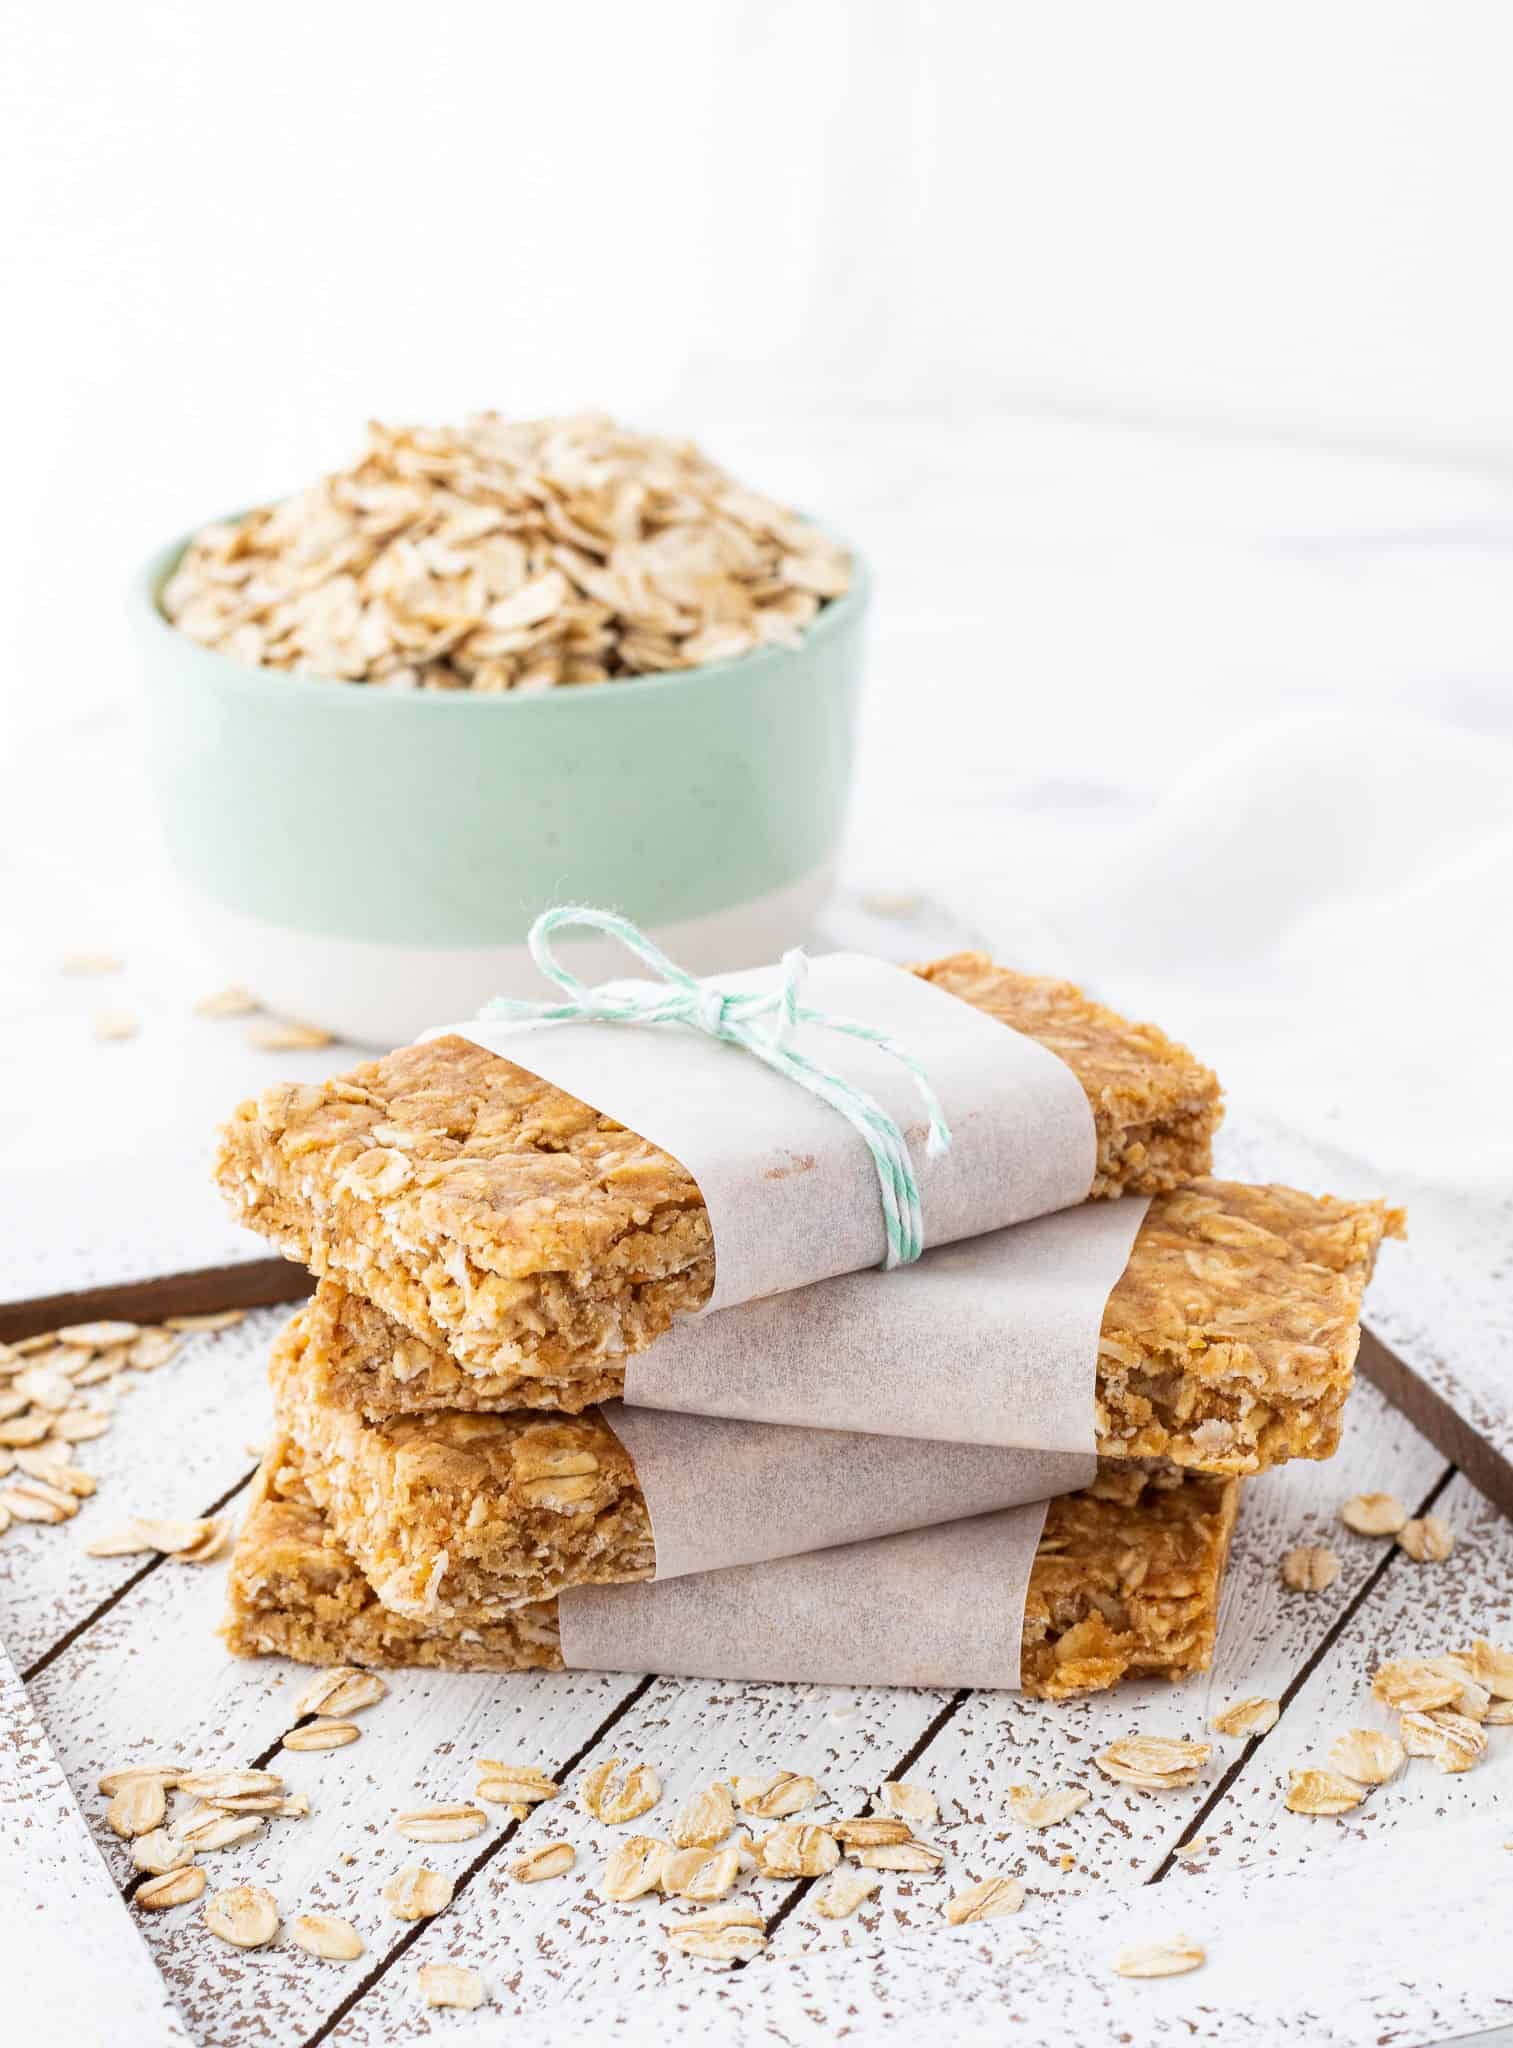
Table of Contents
Low Sugar Protein Bars
Have you ever tried to find minimally processed snacks to take on the go? It’s surprisingly hard. They’re either loaded with sugar or preservatives, or way too expensive to eat everyday!
That’s why I LOVE these homemade peanut butter protein bars. They’re no-bake, yummy, low sugar, unprocessed and so easy to make!
Plus they’re soft and chewy with just enough sweetness without being too sweet. Perfect for an energy-packed snack or quick breakfast on the go!
For more protein bar recipes, check out these Peanut Butter Chocolate Chip Protein Bars, Chickpea Protein Bars and Key Lime Protein Bars too!
Why You’ll Love This Low Sugar Protein Bar Recipe
- Ready in about 10 minutes
- Easy no bake protein bars (no fussing with the oven)
- Created by a Registered Dietitian to be low in sugar and rich in protein, fiber, and healthy fats
- Freeze or refrigerate for easy snacks all week!
- Can contain just 2 grams of sugar per bar (if you skip the syrup)
- Made with inexpensive pantry staples
- Kid-friendly flavors the whole family will enjoy
- Customizable to suit your flavor preferences
What Readers Are Saying
“Great recipe! For kids and adults post workout!” – Ceci
“Thank you so much for this quick recipe. I love protein bars and I hate all the additives they put in store bought ones. These are so quick and delicious. I did add dark chocolate chips too…. YUMMY!!!” – Lauren
“Added some choc chips and coconut flakes :)” – Jess
“I loved this recipe; I might use a different protein powder or 1/4 cup Natural PB and 1/4 cup sweetened PB for a better flavor. I loved the texture!” – Tierra
Ingredient Notes
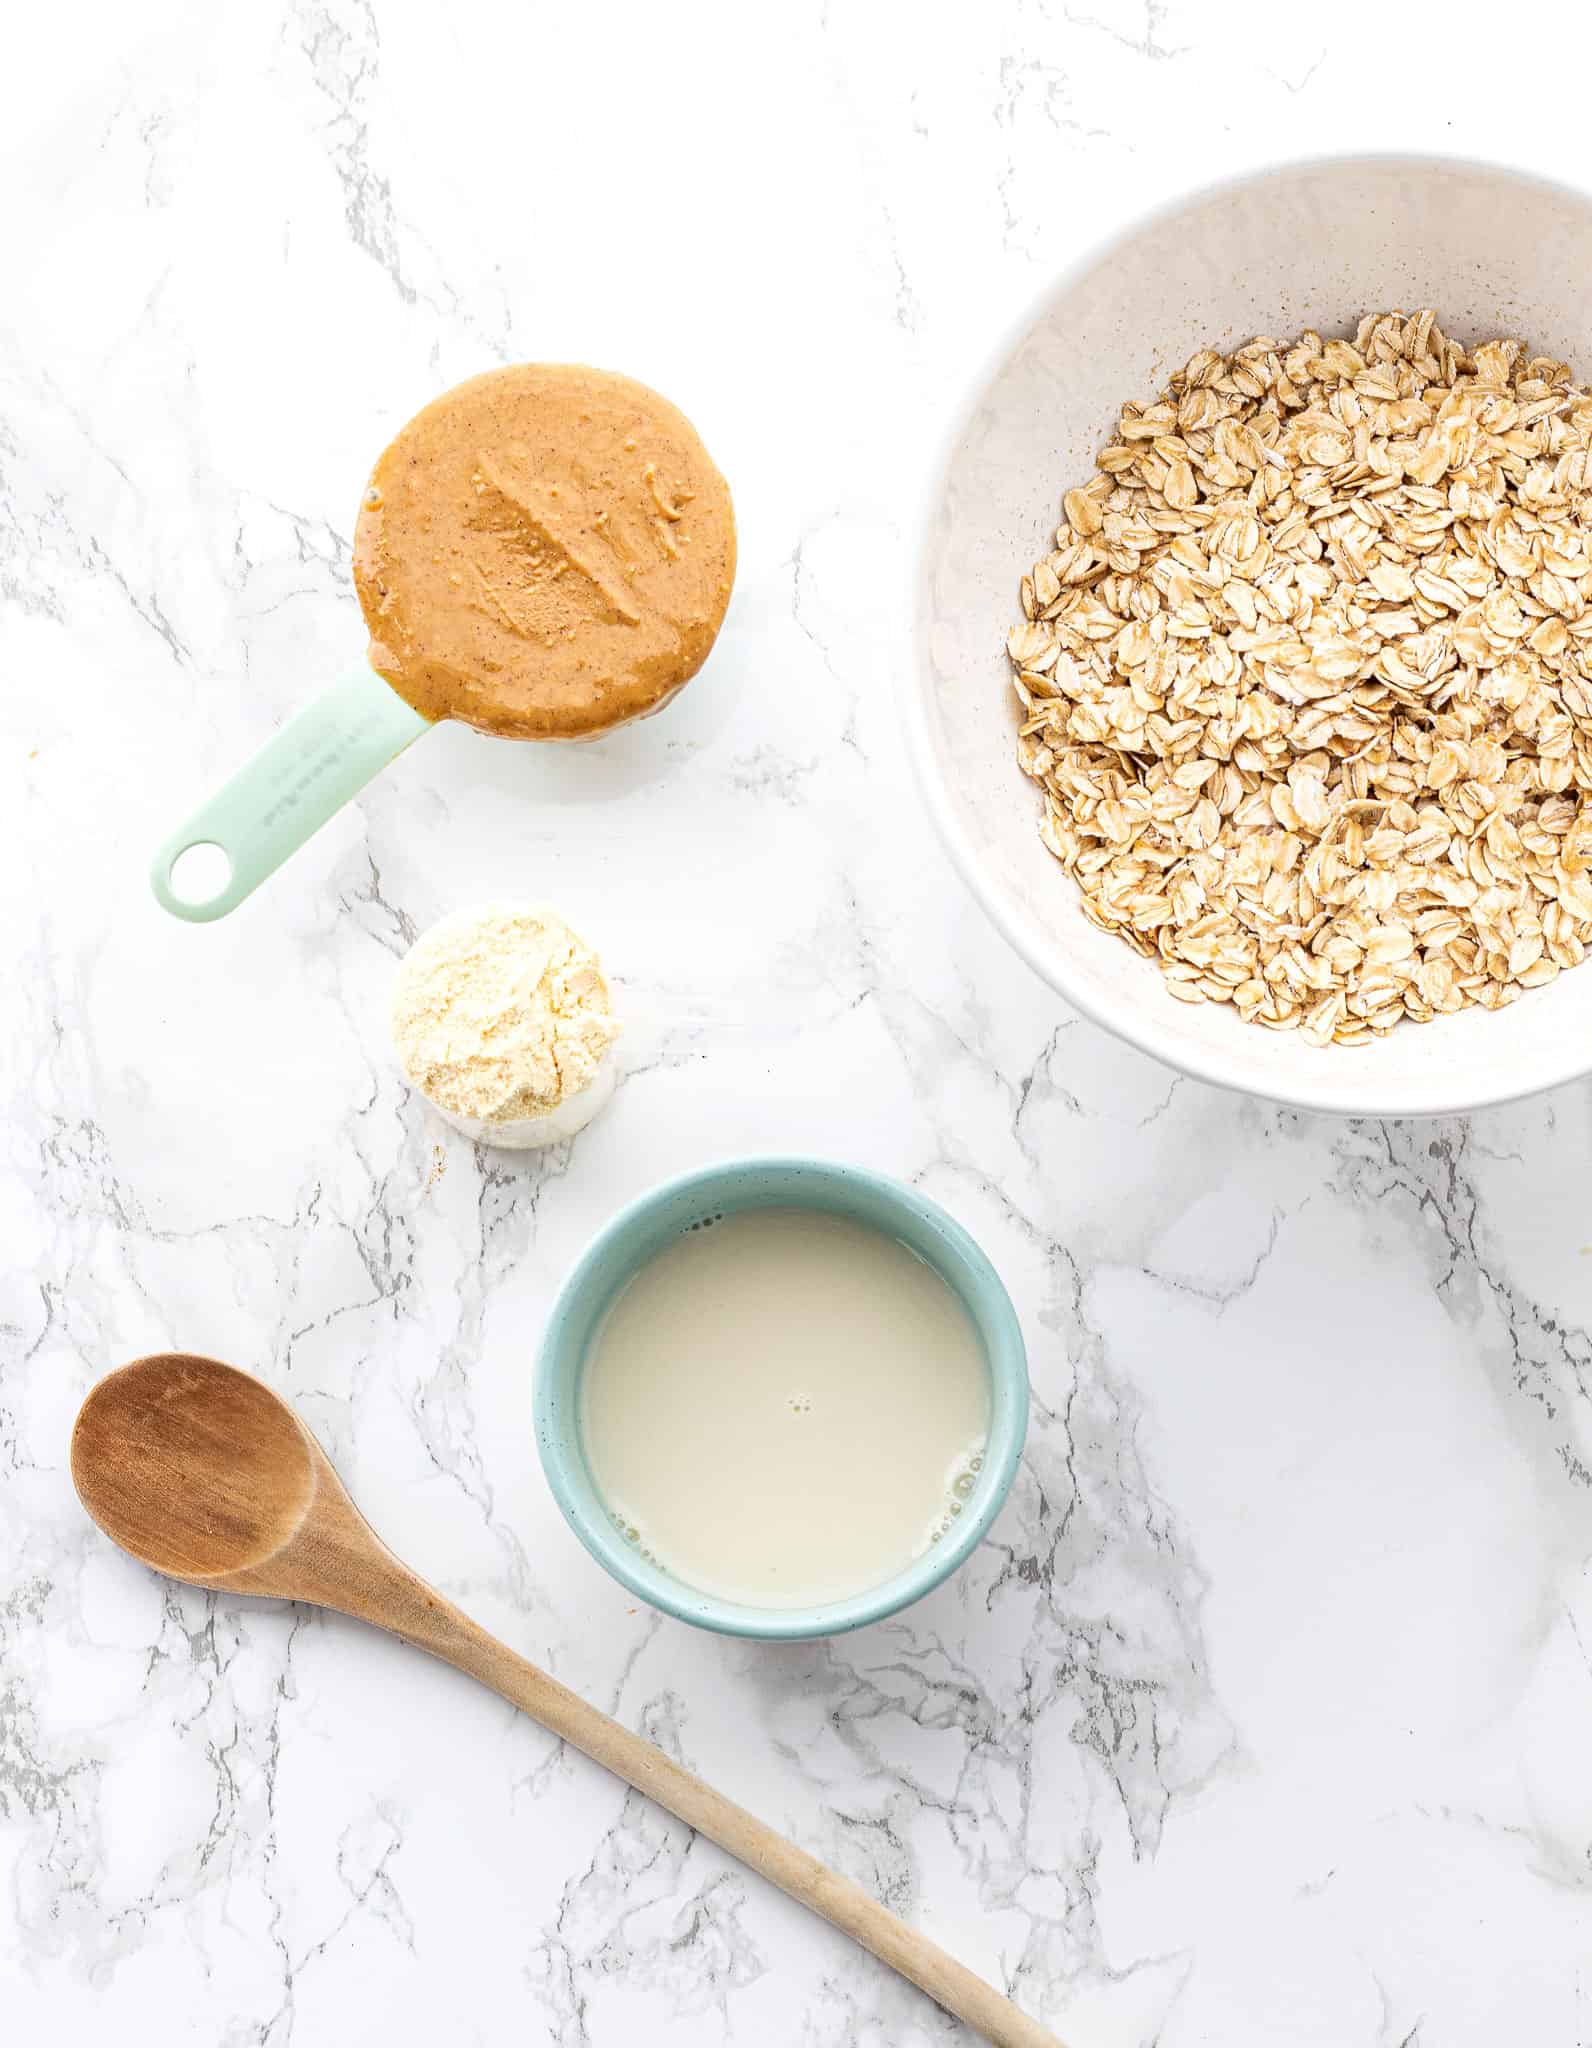
- Oats: I typically use large flake oats (also known as rolled oats) for a chewier consistency. You can also use quick oats if that’s what you have.
- Peanut butter: Helps to bind the protein bar together and incorporate healthy fats and extra protein. Use natural peanut butter for best results. The only ingredient on the list should be “peanuts” and possibly salt. You can also sub in almond butter or cashew butter.
- Vanilla protein powder: Contributes protein and natural sweetness. You can use whey or a plant based vanilla protein powder.
- Almond milk: Helps add moisture to the bars so they aren’t too dry. Use unsweetened almond milk or sub in regular cow’s milk or another milk alternative, if preferred.
- Pure maple syrup (optional): If you prefer sweeter bars, you can add in 1-2 tablespoons of maple syrup. Honey or brown rice syrup can also be used if preferred.
How to Make Healthy Protein Bars – Step-by-Step Instructions


- To start, in a large bowl, mix together the oats and vanilla protein powder.
- Next, add the peanut butter, almond milk, and maple syrup, if desired. Stir until well combined and slightly sticky.
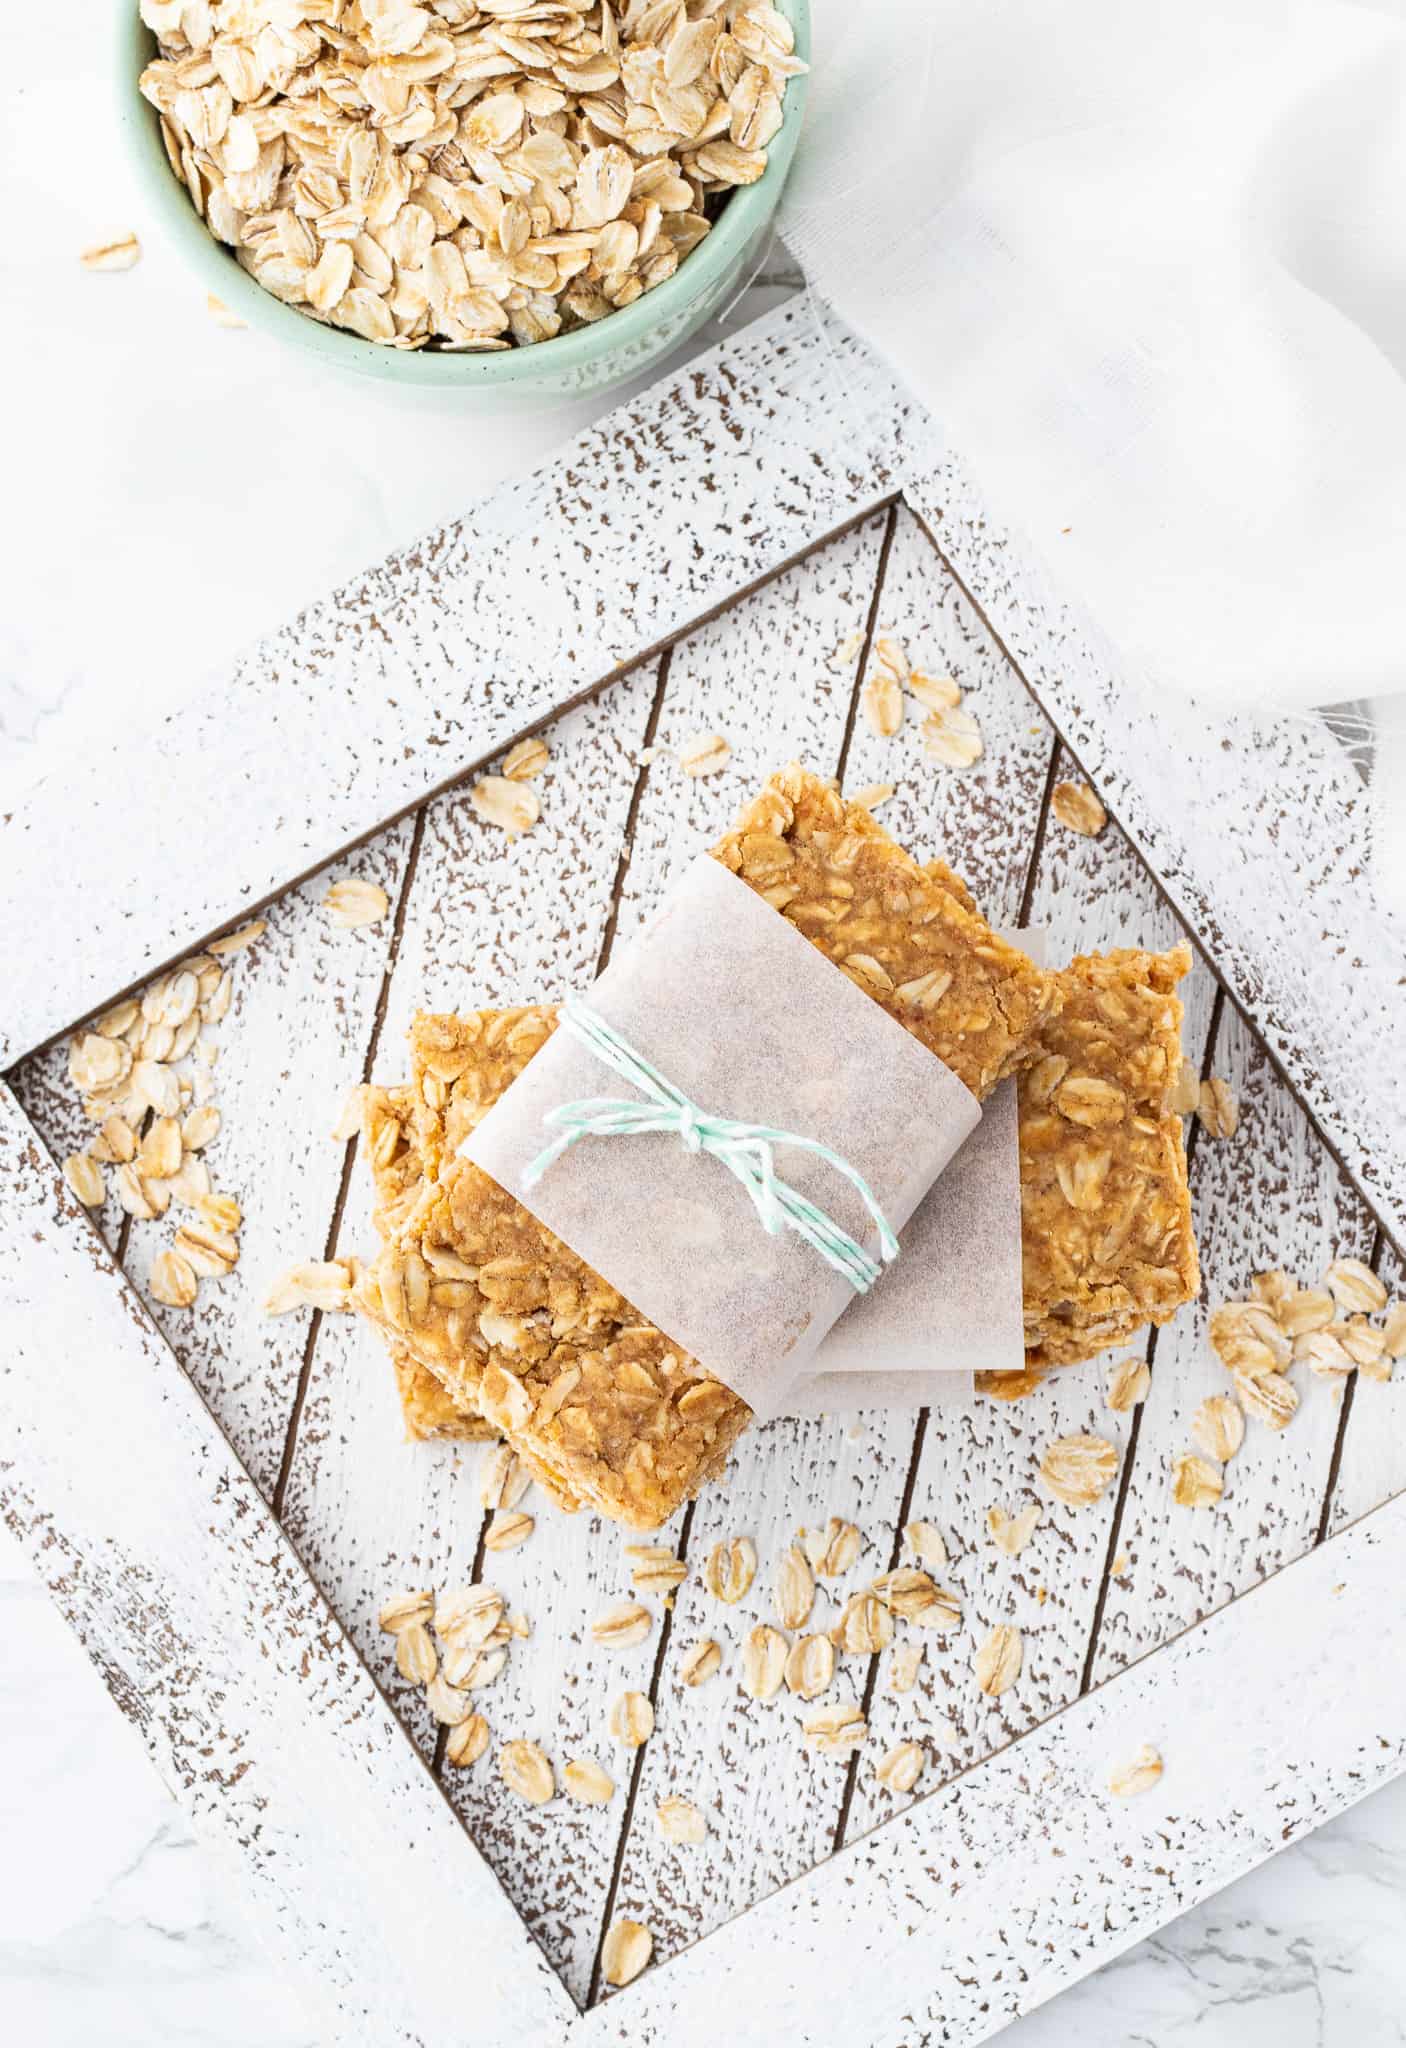
- Line a 9-inch square pan with parchment paper and press the mixture into the pan with a spatula or your fingers until equally distributed, ensuring that you’re pressing it into the corners of the pan. Place the pan in the freezer for 30 minutes.
- Remove from freezer and cut the mixture into 8 equal-sized bars. You may need to let it thaw out for a few minutes before you can cut through the bars.
TIP: The mixture should be sticky enough that it binds together, but not so sticky that it becomes gooey. Add one tablespoon of additional almond milk at a time if you feel that mixture requires more moisture or a bit more oatmeal if it’s too sticky.
Keep scrolling to the recipe card at the bottom of the post for the full protein bar recipe!
Tips for the Best Protein Bars
- Adjust milk and peanut butter as necessary: You may need to adjust how much almond milk and peanut butter you add based on the type of protein powder and nut butter used. Generally, I find that vegan protein powders produce a thicker consistency and usually require slightly more liquid than a whey protein powder.
- Wet the spatula with a bit of water before pressing down the mixture in the baking dish to prevent it from sticking to the spatula.
- Experiment with add-ins: Feel free to play around with these bars and customize them with chocolate, dried fruit or other tasty add-ins (see below for some suggestions)!
Storage Guidelines
- Room temperature: You can store these bars at room temperature for up to 24 hours.
- Refrigerator: Store the bars individually wrapped in saran wrap or in an airtight container in the fridge for up to a week.
- Freezer: You can store them in the freezer for up to three months. If storing them stacked, be sure to separate them with some parchment paper to prevent them from sticking together.
Recipe FAQs
You can use a whey or plant based vanilla protein powder for this recipe. I typically look for one with the least amount of processed ingredients and no artificial sweeteners.
The key to making good tasting protein bars is using a protein powder that you actually ENJOY. Because if you don’t like the taste of the protein powder, you probably won’t like the taste of the bars. I’m a big fan of Good Protein Powder when making protein bars and other recipes calling for protein powder.
This really is a personal preference. If you choose to omit it, the bars will be only lightly sweetened by the protein powder. This option is especially good if you’re looking to reduce the added sugars in your diet. Some individuals, however, may wish to have a sweeter bar so in that case, I would recommend adding the maple syrup.
Keep in mind that the maple syrup will add a few extra grams of sugar to each bar. Even with the addition of the maple syrup though, these bars will still be lower in sugar than your typical store-bought bar.
Protein bars are a good option for a pre or post-workout snack to aid recovery and rebuild muscle, while replenishing your energy storage units. Additionally, you can eat them as a mid-morning or mid-afternoon snack to keep those energy levels up throughout the day and bridge the gap between meal times.
Finally, you can eat protein bars as a quick breakfast on the go, however I recommend pairing them with some fruit or veggies for a more balanced meal.

Optional Add-Ins:
This peanut butter protein bar recipe is designed to be very basic, so you can jazz it up any way that you please! You can either eat the bars as is, or feel free to add in the following options:
- Mini dark chocolate chips
- Pumpkin seeds
- Flax seed
- Hemp hearts
- Chia seeds
- Flaked coconut
- Dried fruit
- Drizzle or layer of melted chocolate on top
- Vanilla extract
- Sprinkle of sea salt
You can also drizzle them with a little melted chocolate for a sweet, crunchy note. Totally optional!
Recipe Variations & Substitutions
- To make these gluten-free: Use certified gluten-free rolled oats to ensure there is no cross-contamination with gluten.
- To make vegan: For plant based protein bars, use a vegan vanilla protein powder.
- To make nut-free: Sub in wow butter, sunflower seed or pumpkin seed butter instead of the peanut butter and use regular cow’s milk, rice milk or soy milk instead of almond milk.

More Healthy Bars
- 3-Ingredient Banana Oatmeal Bars
- Healthy Granola Bar Recipe
- Homemade Larabars
- Lemon Larabar Recipe
- Healthy Oatmeal Breakfast Bars
- Healthy Sweet Potato Bars
Did you make this recipe? Scroll down to leave a star rating and review!

Healthy Peanut Butter Oatmeal Protein Bars {Low Sugar}
Video
Ingredients
- 2 cups large flake oats (use certified gluten-free if necessary)
- 2 scoops vanilla protein powder (about 1/2 cup)
- ½ cup natural peanut butter
- ½ cup unsweetened almond milk, (or a little more if the mixture still seems dry. You want it to be slightly sticky so that it all binds together).
- 2 tablespoons maple syrup (optional)
Instructions
- In a large bowl, mix together the oats and vanilla protein powder.
- Next, add the peanut butter, almond milk, and maple syrup, if desired. Stir until well combined and slightly sticky. The mixture should bind together but not be gooey.
- Line a 9-inch square baking pan with parchment paper and press the mixture into the pan with a spatula until equally distributed. Place the pan in the freezer for 30 minutes.
- Remove from freezer and cut the mixture into 8 equal-sized bars using a sharp knife. You may need to allow mixture to thaw out for a few minutes before you can cut through the bars.
- Place each bar in a little Ziploc bag or saran wrap and store in fridge or freezer.
Notes
- My favorite protein powder to use in these bars is this vegan Good Protein powder. It’s so delicious and comes in lots of different flavors. My favorite flavors to use in these bars are Vanilla Milkshake and Salted Caramel. Use the discount code ELYSIAC30 for 30% off your first order!
- Adjust milk and peanut butter as necessary: You may need to adjust how much almond milk and peanut butter you add based on the type of protein powder used. Generally, I find that vegan protein powders produce a thicker consistency and usually require slightly more liquid than a whey protein powder. If the mixture feels too dry and crumbly, increase the milk and/or peanut butter.
- Wet the spatula with a bit of water before pressing down the mixture in the baking dish to prevent it from sticking to the spatula.
- Experiment with add-ins: Feel free to play around with these bars and customize them with chocolate, dried fruit or other tasty add-ins (see below for some suggestions)!
- To store: You can store these bars in the fridge for up to a week or in the freezer for up to three months.
Nutrition
UPDATED: This recipe was originally posted in January 2016, and was updated with helpful tips in December 2024.


Wouldn’t it be a risk with spoiled milk if you use that? What would substituting water do to the recipe?
I typically use unsweetened almond milk which tends to have a longer shelf life and also store the protein bars in the fridge (for up to a week) or the freezer. If you’re concerned about milk spoilage, you could certainly try using water. I’m sure it wouldn’t alter the flavor too much. Let me know how it goes if you try it with the water!