
These healthy rice krispie treats without marshmallows are made with peanut butter and topped with dark chocolate for a protein and fiber-rich breakfast, snack or treat that you and your kids will love. Delicious homemade no bake cereal bars that are a great healthier alternative to store-bought! {Gluten-free, vegetarian & dairy-free}
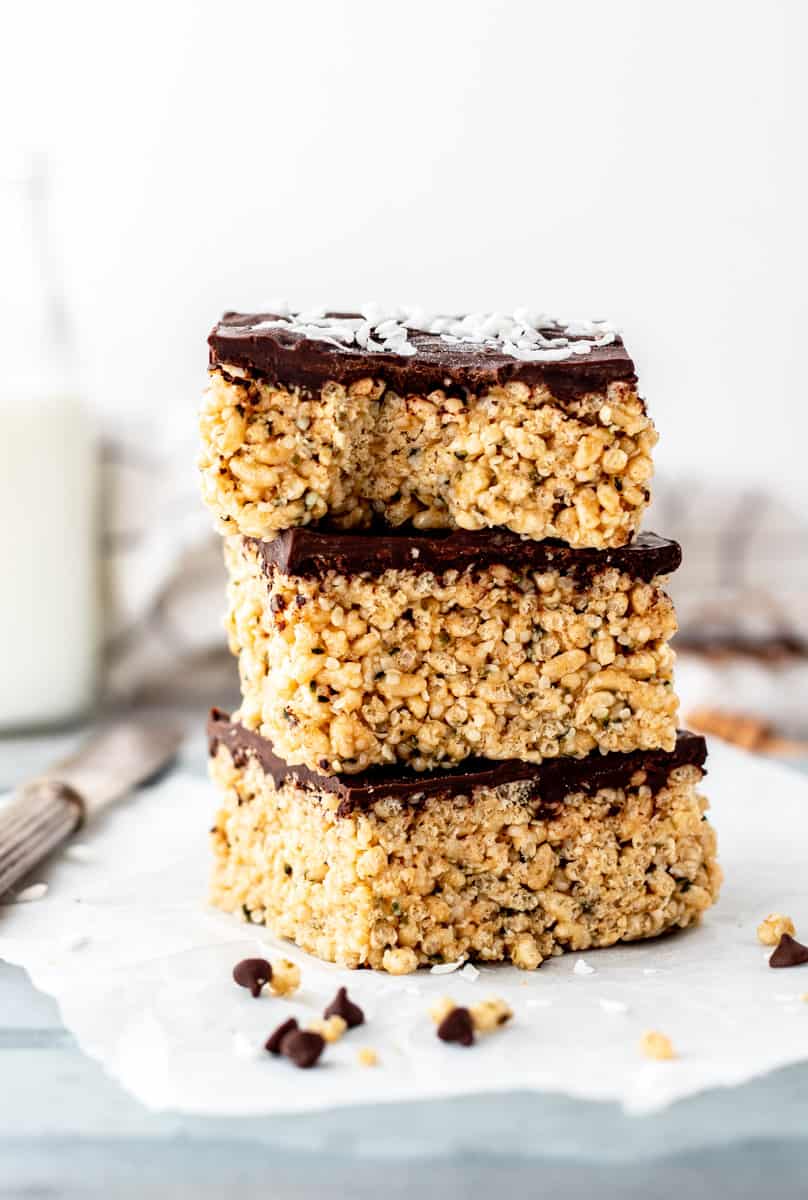
Table of Contents
Healthy Rice Krispie Treat Recipe
These homemade healthy rice krispie treats without marshmallows have been such a game changer for easy snacks and breakfasts. They’re perfectly crispy, the whole family loves them, and they’re a great option if you’re always on the go!
Similar to energy balls, I love making up a batch of these healthy cereal bars to store in the freezer for a quick grab and go option. They’re super handy and have that addictive crunch just like rice crispy squares, but are made without marshmallows!
With a few simple ingredient swaps, we transformed these crispy bars into a more nutritious option that’s loaded with fibre, protein, healthy fats and antioxidants….and of course that tasty chocolate peanut butter flavor too!
Such an easy and delicious way to give you that boost of energy you need to face the day!
For more no-bake bar recipes, be sure to try my healthy granola bar recipe and peanut butter protein bars too!
Why We Love These Chocolate Peanut Butter Rice Krispie Treats
- Make Ahead: These cereal treats have a pretty good shelf life, so you can make up a batch up on the weekend and enjoy the throughout the week. They freeze great too, so be sure to make a double batch!
- No-Bake: This is a huge win in my books! Just mix everything together, chill, cut into squares for an easy no-bake dessert!
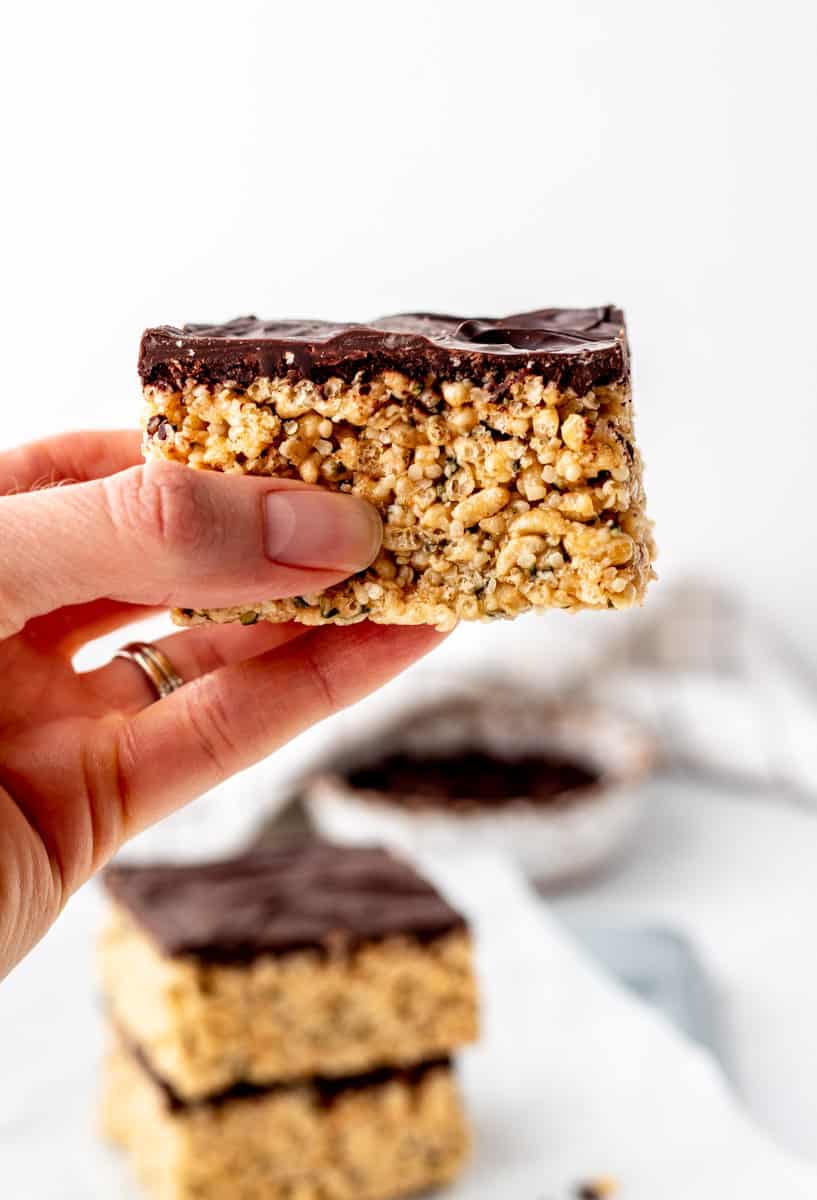
- More nutritious: Unlike your regular rice krispie treat, these homemade cereal bars are made from scratch with simple ingredients so you can control exactly which ingredients you put into them! By using puffed brown rice cereal, we incorporate a source of whole grains, while the hemp hearts and peanut butter provide protein and healthy fats. The dark chocolate offers a dose of antioxidants that’s great for the heart. These treats contain less processed ingredients since they’re made without marshmallows and corn syrup, but are equally delicious!
Ingredient Notes
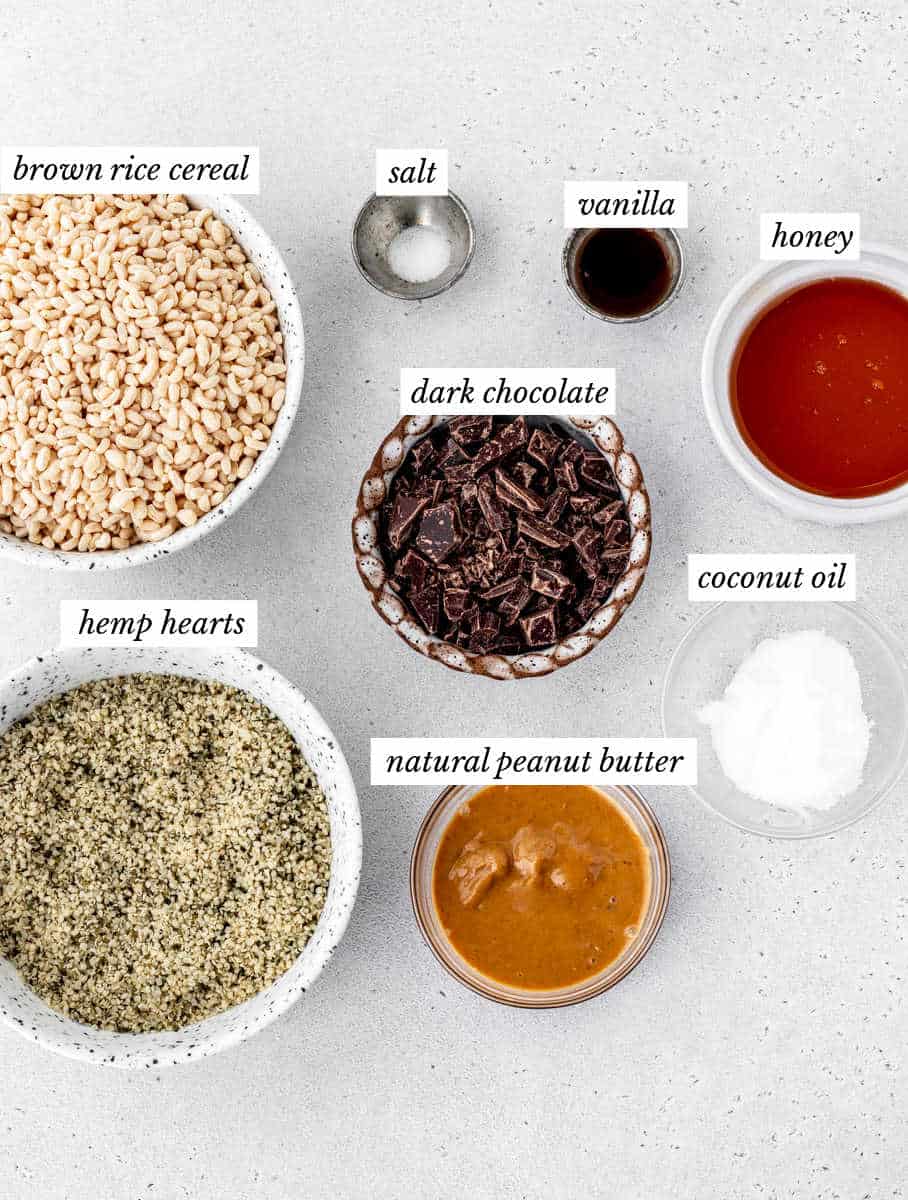
- Peanut Butter: Use natural creamy peanut butter for these cereal bars. It has a more oily consistency which helps it to combine more easily. I don’t recommend swapping in regular peanut butter in these bars.
- Coconut Oil: This adds moisture and helps to bind everything together since it solidifies once stored in the fridge. I also love the flavor that it adds.
- Honey: Honey helps to bind everything together and adds the perfect amount of sweetness. Use a runny honey as it will be easier to mix in with the rest of the ingredients. You could also try substituting maple syrup or brown rice syrup for vegan rice krispie treats.
- Vanilla extract and salt: For some added flavor.
- Hemp Hearts: Hemp seeds are a great way to boost the protein and healthy fats in these bars to make it a more satisfying treat, while also offering a slight nutty flavour. I always love to keep hemp hearts on hand!
- Crispy rice cereal: I like to use crispy brown rice cereal as it tends to be higher in fiber, vitamins and minerals than rice krispies. You can make these bars with other favorite breakfast cereals too like cheerios or whole-0’s.
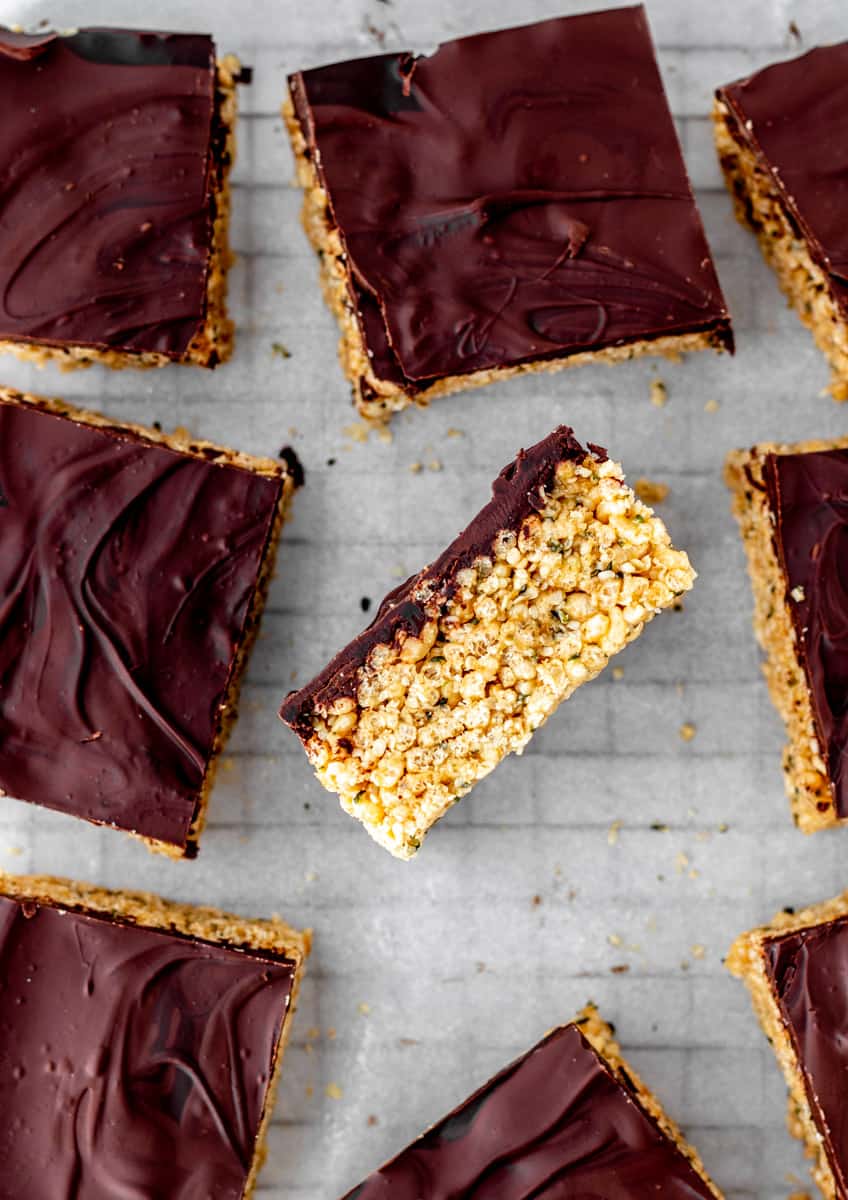
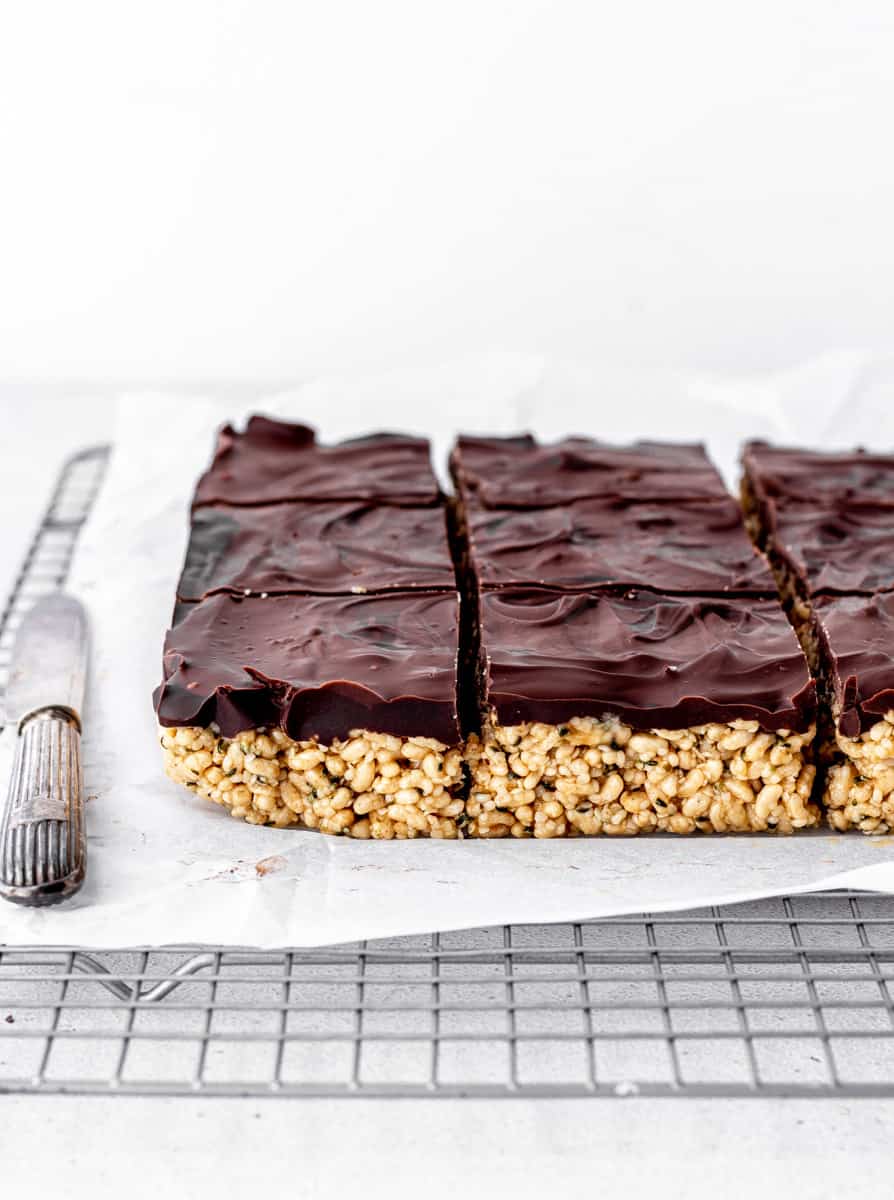
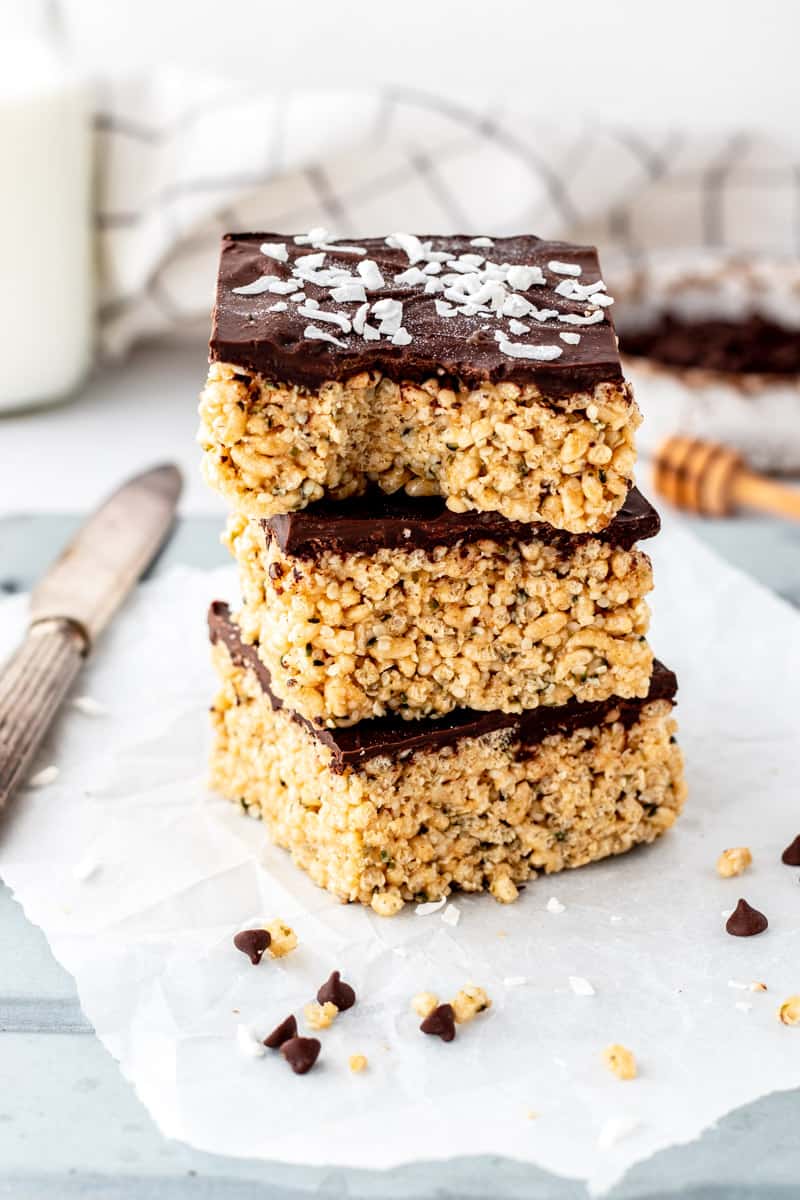
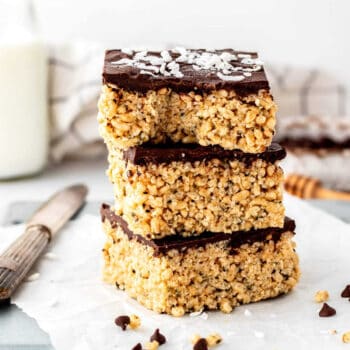
- To top: Melted dark chocolate and coconut flakes are optional toppings, but totally kick the flavour up a notch! You can use chopped dark chocolate from a bar or dark chocolate chips for ease. Aim for chocolate with more than 70% cocoa for greater health benefits.
How to Make Rice Krispie Treats Without Marshmallows
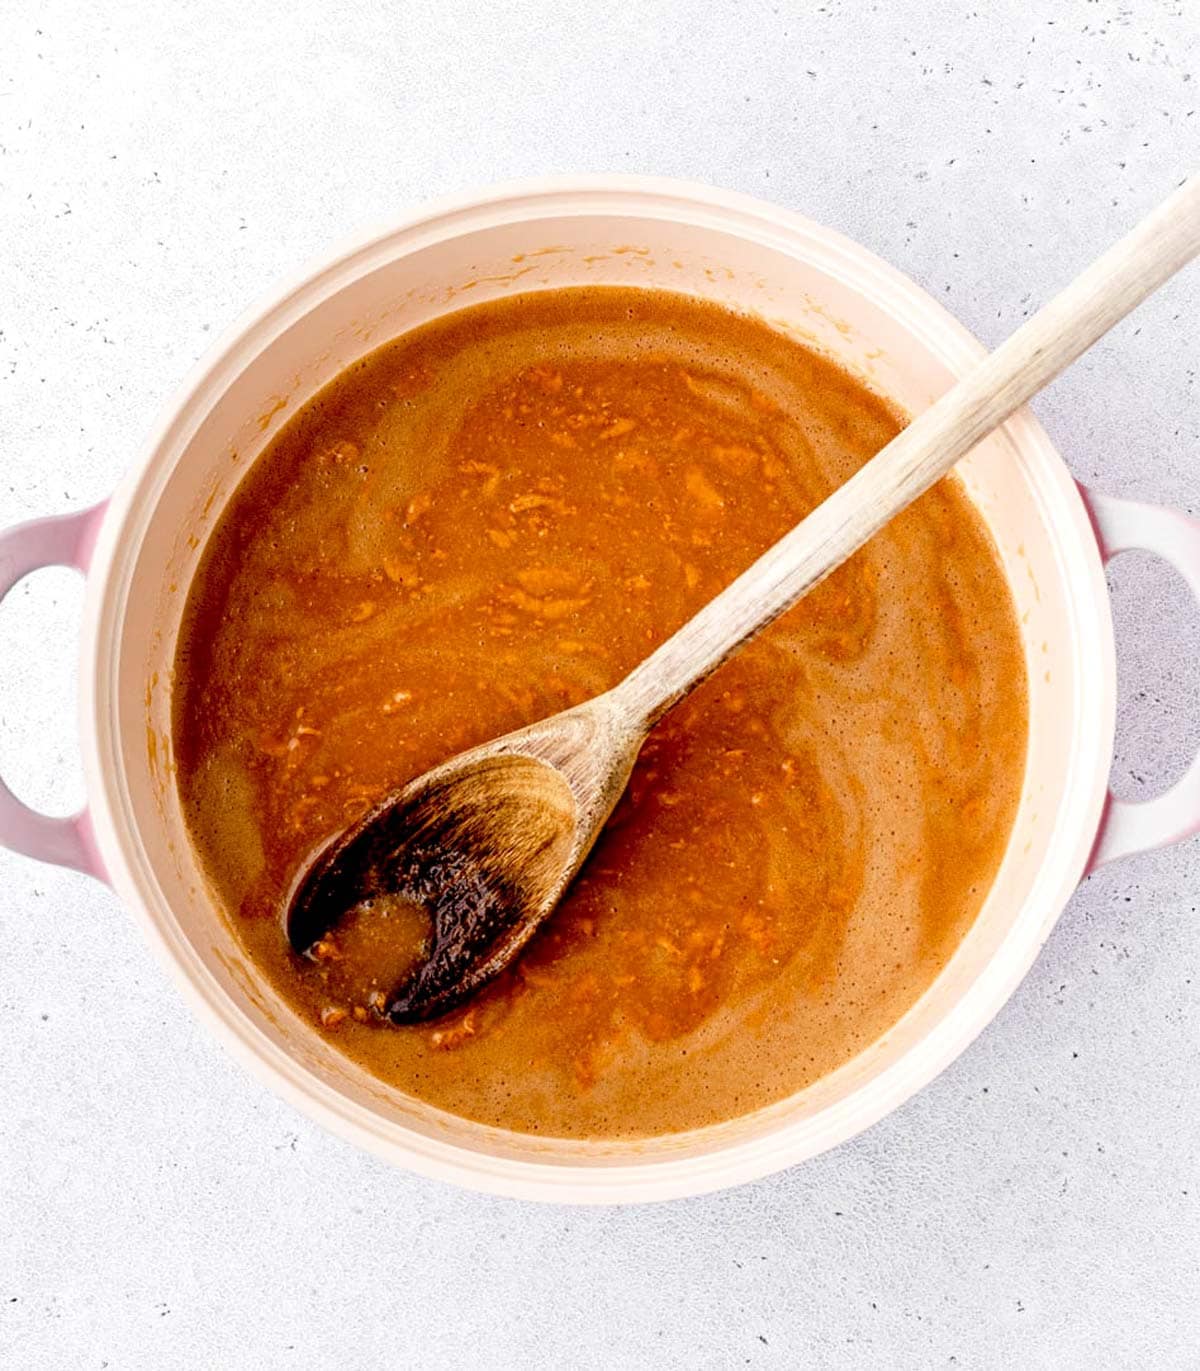
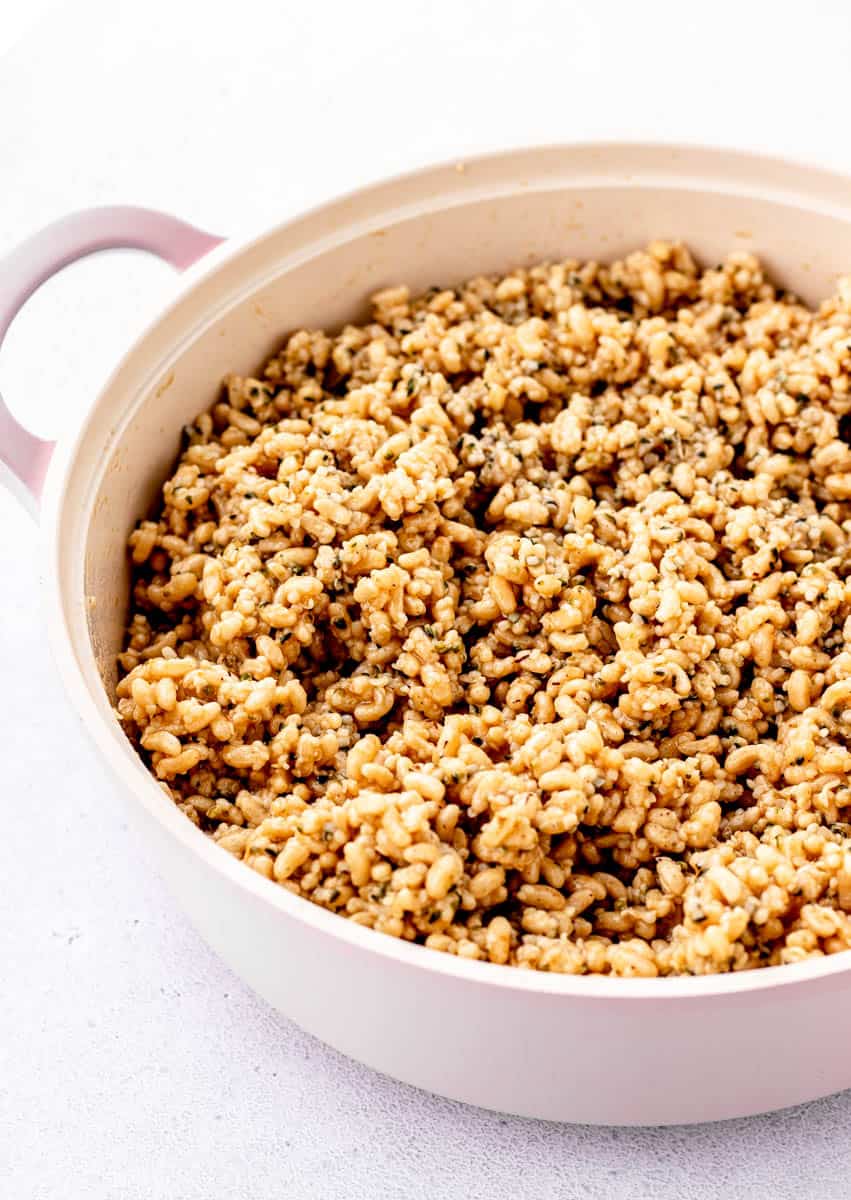
- Melt coconut oil with peanut butter and honey in a medium sized saucepan set over medium heat. Stir until mixture is smooth and combined.
- Remove from heat and stir in vanilla, salt, hemp hearts and brown rice cereal. Mix until all of the ingredients are combined.
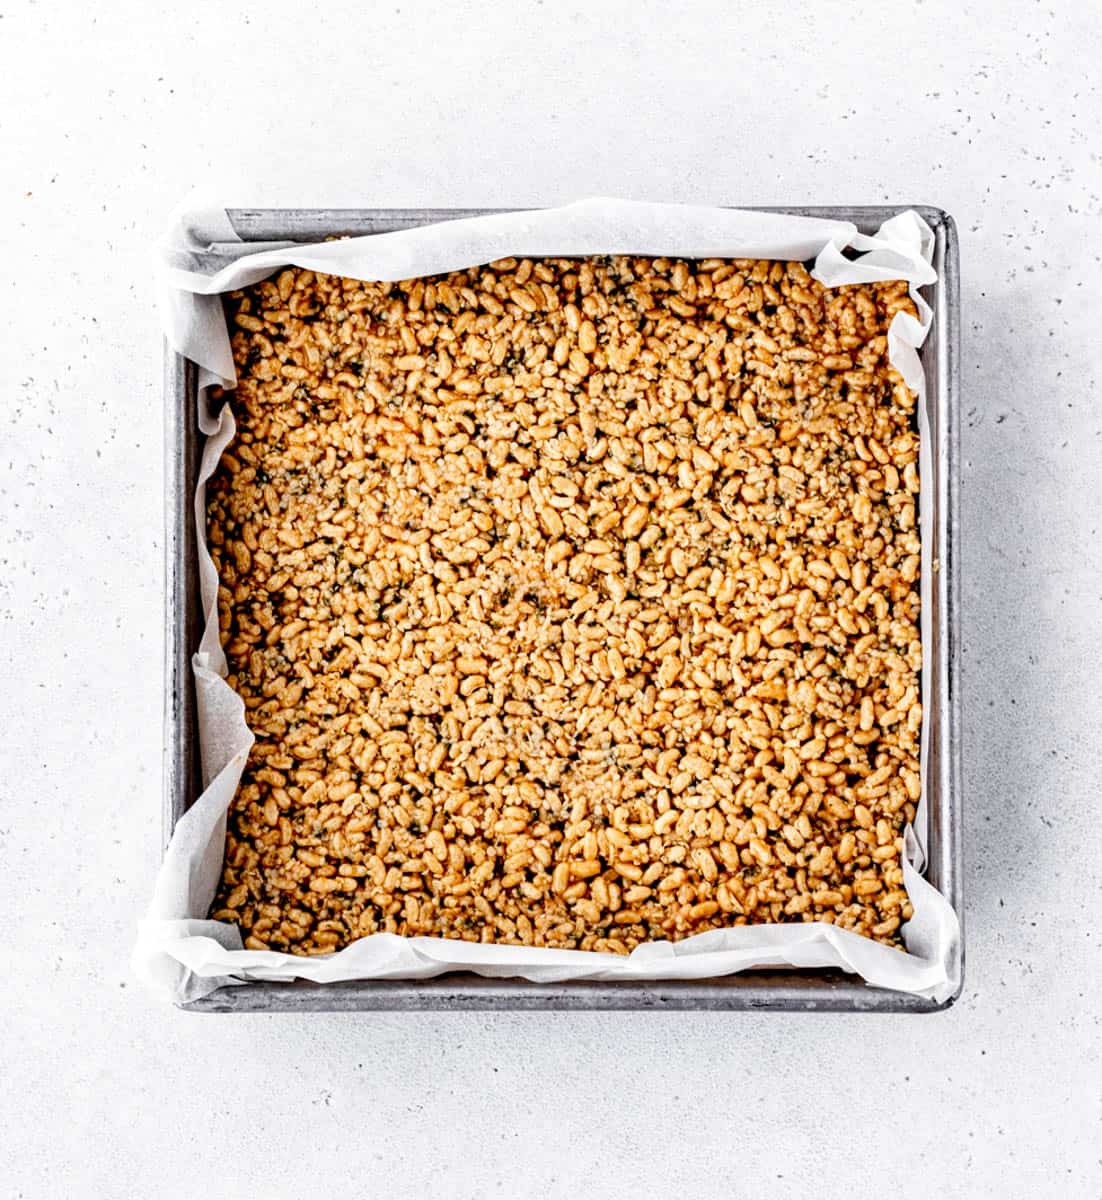
- Using a rubber spatula, evenly distribute the sticky mixture in an 8×8 inch square baking pan lined with parchment paper. Place in fridge to chill for 10 minutes.
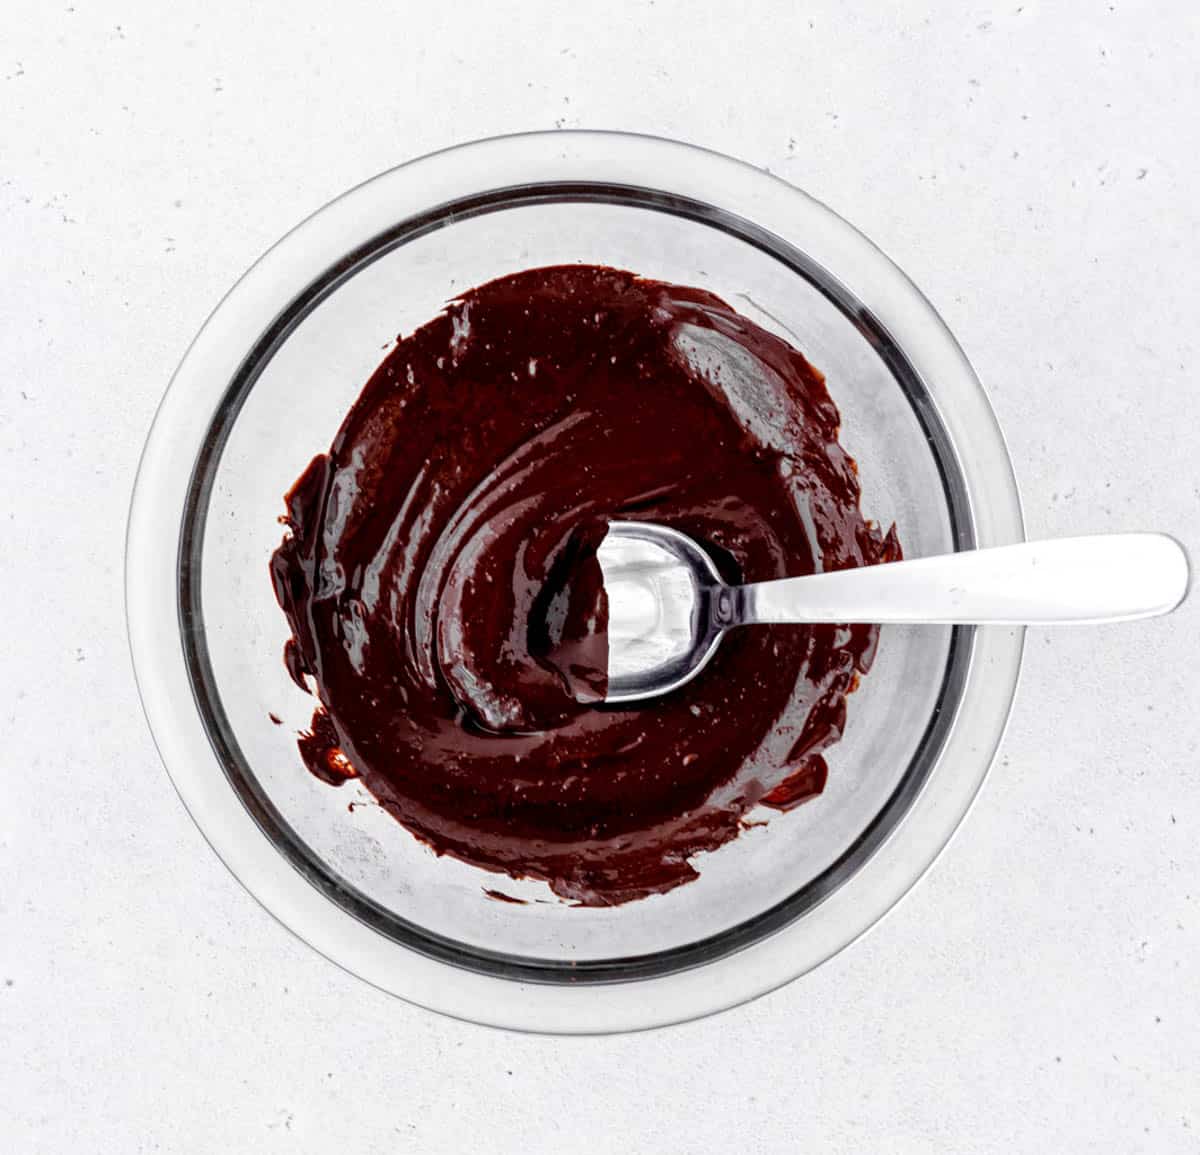
- Meanwhile, melt chocolate in a microwave-safe bowl in 30 second increments, until chocolate has melted. Stir when you check the chocolate to prevent it from burning to the bottom of the bowl. You can also melt the chocolate in a double boiler if preferred.
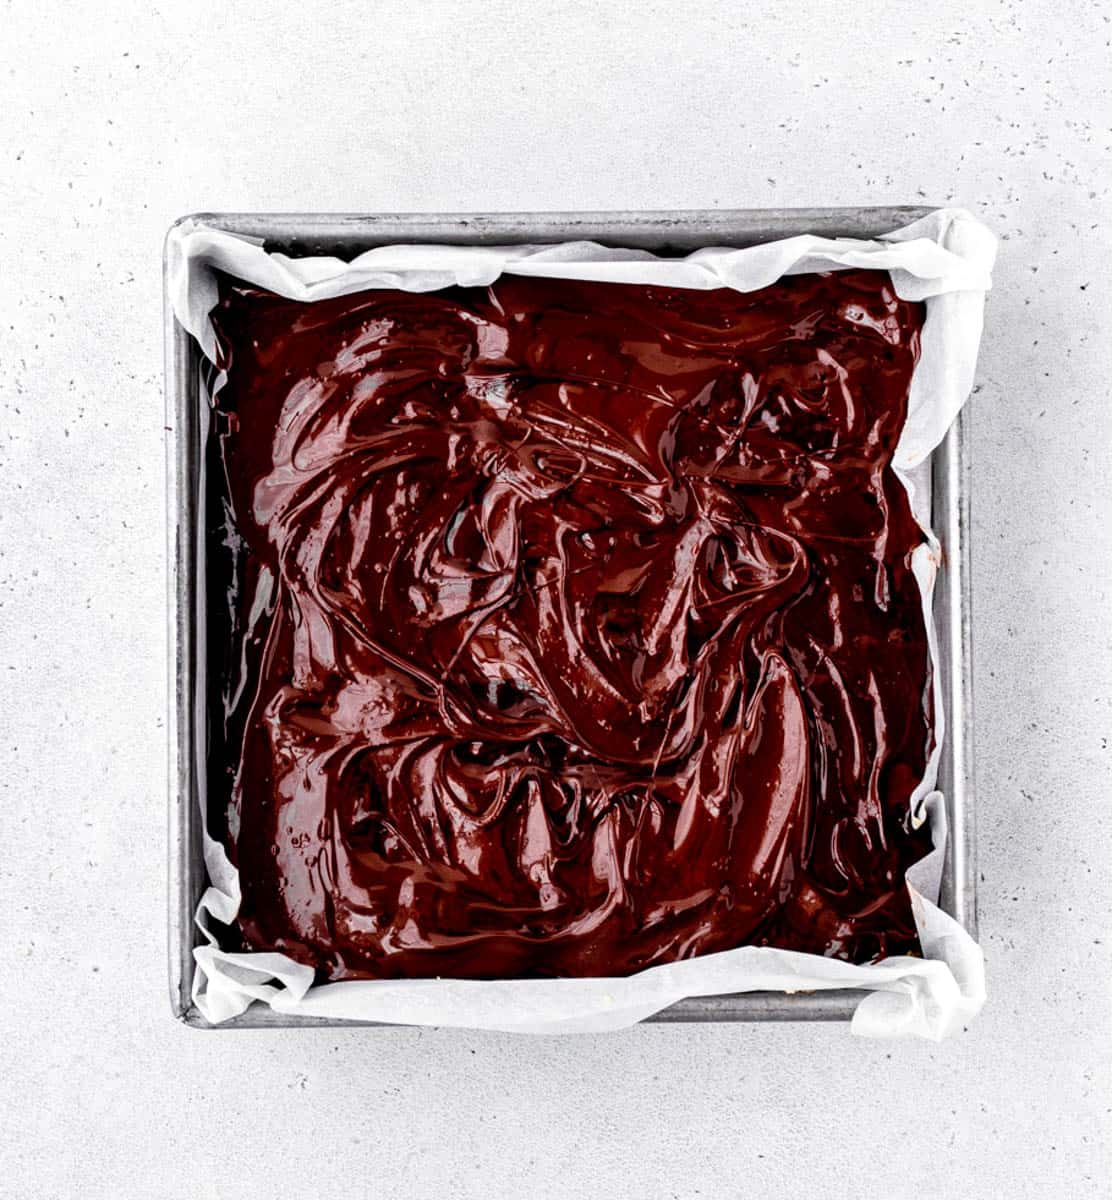
- Pour the melted chocolate over the cereal mixture and spread to evenly distribute it.
- Sprinkle with coconut if desired. Place in the freezer for 15-20 minutes, or until the chocolate firms up.
- Once firm, lift the parchment paper with the cereal mixture out of the pan and cut into 16 small bars or 9 larger bars.

Keep scrolling to the recipe card below for the full printable crispy treat recipe!
Recipe Tips for The Best Rice Krispie Treats
- Use a spatula when pressing the cereal mixture into the pan. Press it down firmly to ensure that it’s flat on the top and distributed evenly. I like to wet my spatula to prevent the cereal mixture from sticking to the spatula.
- Don’t try to cut these bars when they’re totally frozen and rock hard, otherwise it will result in a crumbly mess. If frozen solid, allow to thaw at room temperature for several minutes before cutting.
- Use a large sharp knife to cut through these bars. If the knife is too small or dull, it will be tough to cut through the bars without them crumbling.
- Rice krispie treats start to get a little more crumbly if left at room temperature for a while. They still taste amazing, but are just a little more messy. For firmer bars, eat them fresh out of the fridge or thawed for a few minutes out of the freezer.
- You can skip the chocolate layer or only add a bit of drizzle if you want to reduce added sugar. They still taste delicious!
- I typically use puffed brown rice cereal when making these bars, but you could also try subbing in cheerios, whole O’s or your favourite puffed rice cereal.
How to Store
- Refrigerator: You can store leftovers in the fridge in an airtight container or covered in the pan with plastic wrap for up to a week.
- Freezer: Freeze these peanut butter rice krispies treats in a freezer-safe container or bag for up to three months. If stacking the bars, be sure to separate them with parchment paper so that they don’t stick together
Recipe FAQs
A cereal bar is made by mixing cereal such as rice cereal or cheerios with adhesive ingredients (in this case honey and peanut butter) and then pressing the mixture into a pan and cutting it into bars. A cereal bar can be enjoyed for breakfast or as a snack as a convenient option.
Store bought and certain homemade cereal bars aren’t always the healthiest choice as they can contain lots of sugar, sodium and highly processed ingredients. These homemade rice krispie treats are made from scratch with some healthier swaps for added nutrients. By making them yourself, you also know exactly what’s going into them!
Yes! These will easily keep in the fridge for up to a week, and any leftover cereal bars can be frozen.
I highly recommend using natural peanut butter due to its oilier texture and thinner consistency. This texture and consistency makes it easier to coat the cereal mixture in the peanut butter, which helps it to better adhere together. If you try to use regular peanut butter, chances are these bars won’t work out properly since regular peanut butter tends to be more thick and sticky, meaning it won’t distribute as evenly.
Puffed brown rice cereal mimics the taste and texture of rice krispie squares, while offering more fibre and nutrients than Rice Krispies. I typically use Nature’s Path Brown Rice Crisps, but you can use another brand if preferred. You can also sub in cheerios or whole O’s for bars with a different texture.
There are a number of ways that you can prevent crumbly bars. First, use natural peanut butter rather than regular peanut butter for the best consistency and to ensure that the cereal mixture adheres together.
Secondly, it’s important that you line the pan with parchment paper to make it easier to lift the bars out of the pan and cut into bars. If you try to cut the bars right in the pan, they’ll be much more crumbly when you try to remove them. Finally, you’ll want to make sure that the cereal mixture is pressed down very firmly in the pan. If it’s only packed loosely, the bars will be crumbly when you try to cut them.
Serving Suggestions
Serve these healthy rice krispie treats as is or top with a sprinkle of shredded coconut, chopped nuts or sea salt.
You can wash them down with a glass of milk, or pair them with a cup of tea or a smoothie (try this banana smoothie without yogurt)!
Rice Krispie Treats Variations
- Switch up the cereal: Make these bars with other favorite cereals. I prefer using a whole grain cereal that contains some fiber.
- Try another nut butter: Use almond butter or cashew butter instead of natural peanut butter.
- Add dried fruit: Try mixing in dried fruits like cranberries or raisins.
- Use different chocolate: Use dairy or white chocolate to top the bars if you prefer, or leave it off altogether.
- To make nut-free: Try using sunflower seed butter or this mixed seed butter instead of natural peanut butter.
- To make lower sugar: Skip the dark chocolate layer or reduce the amount of chocolate and just use a light drizzle.
More Healthy Sweet Treats
- Healthy Chocolate Granola Recipe
- Healthy Oatmeal Breakfast Bars
- Peanut Butter Banana Oatmeal Bars
- Homemade Larabars
- Lemon Larabars
- Halloween Popcorn Balls Recipe
Did you make this recipe? Scroll down to leave a star rating and review!
Healthy Rice Krispie Treats Without Marshmallows
Ingredients
- 1/4 cup natural peanut butter
- 1/4 cup coconut oil
- 1/2 cup honey
- 1 teaspoon vanilla extract
- 1/8 teaspoon salt
- 1/2 cup hemp hearts
- 3 1/2 cups puffed brown rice cereal
For topping
- 4 ounces dark chocolate chopped (or 3/4 cup dark chocolate chips)
- 1/4 cup unsweetened coconut flakes (optional)
Instructions
- Melt coconut oil with peanut butter and honey in a medium sized saucepan set over medium heat. Stir until mixture is smooth and combined.
- Remove from heat and stir in vanilla, salt, hemp hearts and brown rice cereal. Mix until all of the ingredients are combined.
- Using a spatula, evenly distribute cereal mixture in an 8×8 inch square baking dish lined with parchment paper. Place in fridge to chill for 10 minutes.
- Meanwhile, melt chocolate in a microwave-safe bowl in 30 second increments, until chocolate has melted. Stir when you check the chocolate to prevent it from burning to the bottom of the bowl.
- Pour the melted chocolate over the cereal mixture and spread to evenly distribute it.
- Sprinkle with coconut if desired. Place in the freezer for 15-20 minutes, or until the chocolate firms up.
- Once firm, lift the parchment paper with the cereal mixture out of the pan and cut into 16 bars.
Notes
- Use a spatula when pressing the cereal mixture into the pan. Press it down firmly to ensure that it’s flat on the top and distributed evenly. I like to wet my spatula to prevent the cereal mixture from sticking to the spatula.
- Don’t try to cut these bars when they’re totally frozen and rock hard, otherwise it will result in a crumbly mess. If frozen solid, allow to thaw at room temperature for several minutes before cutting.
- Use a large sharp knife to cut through these bars. If the knife is too small or dull, it will be tough to cut through the bars without them crumbling.
- Rice krispie treats start to get a little more crumbly if left at room temperature for a while. They still taste amazing, but are just a little more messy. For firmer bars, eat them fresh out of the fridge or thawed for a few minutes out of the freezer.
- You can skip the chocolate layer or only add a bit of drizzle if you want to reduce added sugar. They still taste delicious!
- I typically use puffed brown rice cereal when making these bars, but you could also try subbing in cheerios, whole O’s or your favourite puffed rice cereal.
Nutrition
This recipe was originally posted in March 2022 and was updated to include more helpful tips in August 2023.


Leave A Review: