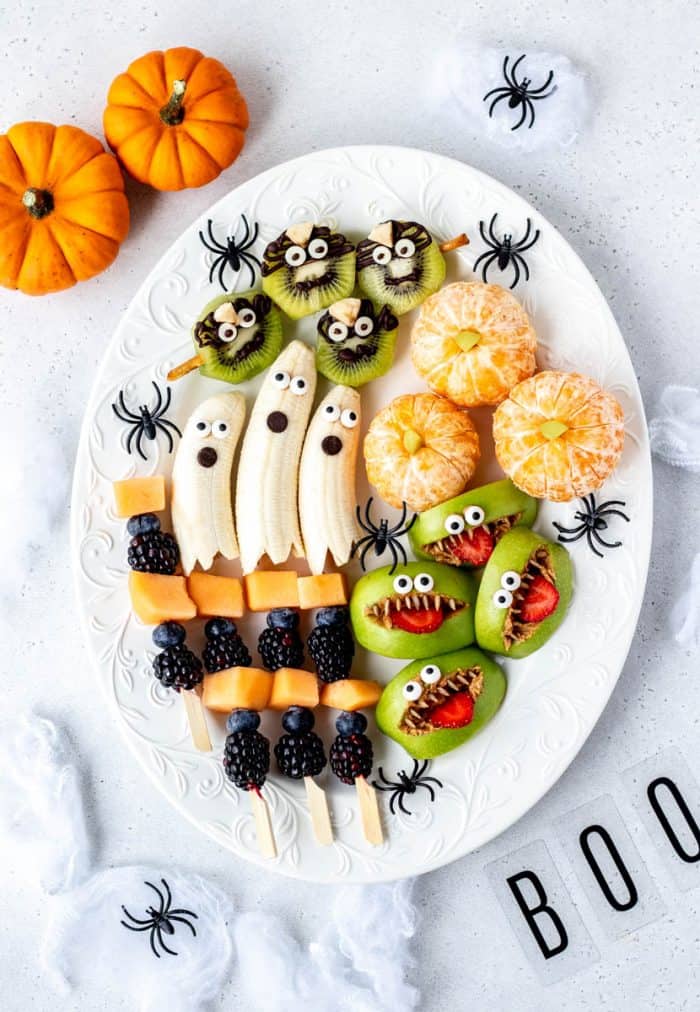
Get inspired with these creative and easy Halloween fruit tray ideas which make for super fun and healthy Halloween snacks! Pick a few favourites, or make them all for a festive treat perfect for a Halloween party, school snack, and more. They’re great for kids and adults alike!
Easy Halloween Fruit Tray – A Healthy Halloween Snack!
There’s nothing more fun than getting dressed up and celebrating Halloween with your little ones! It’s such a joy watching them pick out their costume and go trick-or-treating for the evening.
While I love candy as much as anyone, I do my best to practice what I preach and infuse balance into the holiday season while also keeping it fun.
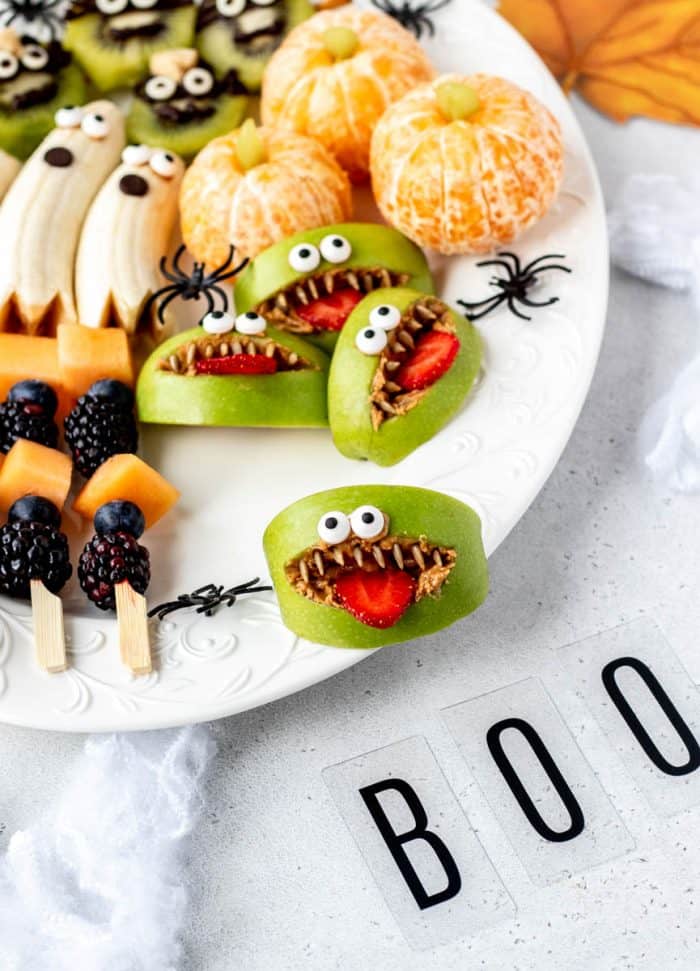
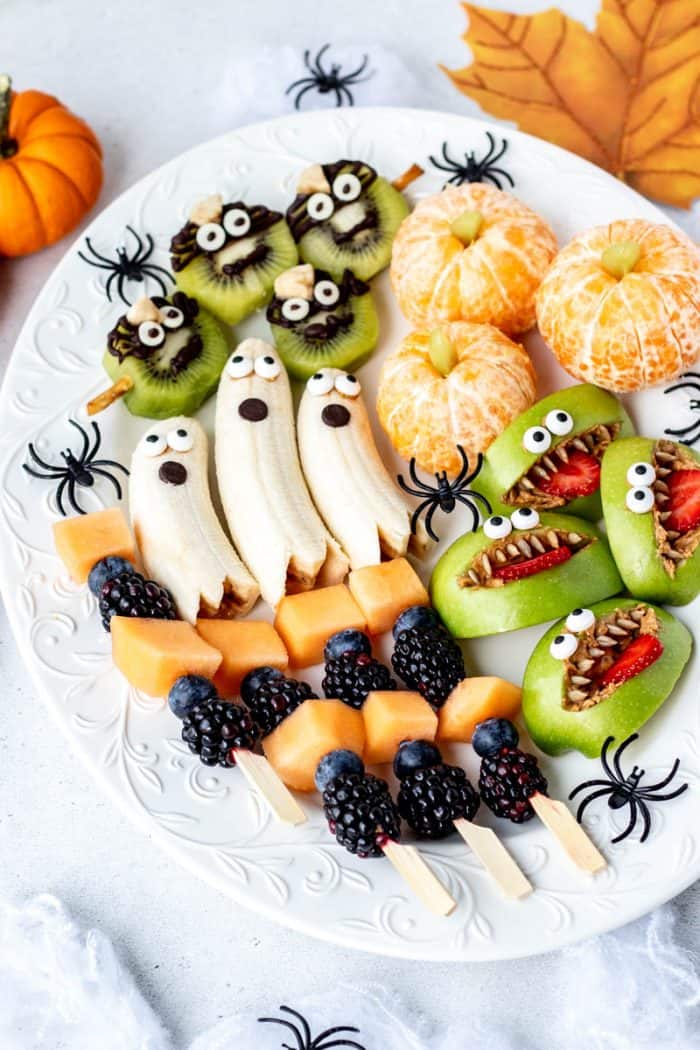
That’s where these easy Halloween fruit tray ideas come into play! Not only is this fruit platter adorable and definitely picture-worthy, it’s also a great way to get kids involved in the kitchen.
They’ll love creating their own fruit creatures and Halloween shapes, and you’ll love that they’re getting in a good dose of vitamins, nutrients, and fibre.
Having these snacks out not only makes for spooky decoration but also helps kids fill up on nourishing treats, which can potentially prevent that not so pleasant sugar crash later on. Whether you make them all or pick just one, you can’t go wrong with these healthy Halloween treats made with fruit!
If you enjoy these Halloween fruit platter ideas, be sure to check out my Rainbow Fruit Tray too!
Why We Love These Halloween Fruit Ideas
- Healthier options: Better for you than bucket loads of candy and other sugary treats, the recipes we’re sharing make for balanced snacks or sweet treats thanks to the use of nutrient-rich fresh fruit, protein and healthy fats.
- Great to make with the kids: Quick and easy, these simple treats are a fun way to get kids involved in the kitchen! They can pick whatever treats they want to make, or create their own. As an added bonus, if your little ones are hesitant to try new foods, getting them involved can help encourage them to try a taste.
- Fun and customizable: Feel free to mix and match your favorite fruits and toppings to fit dietary and allergy needs!
Ingredient Notes
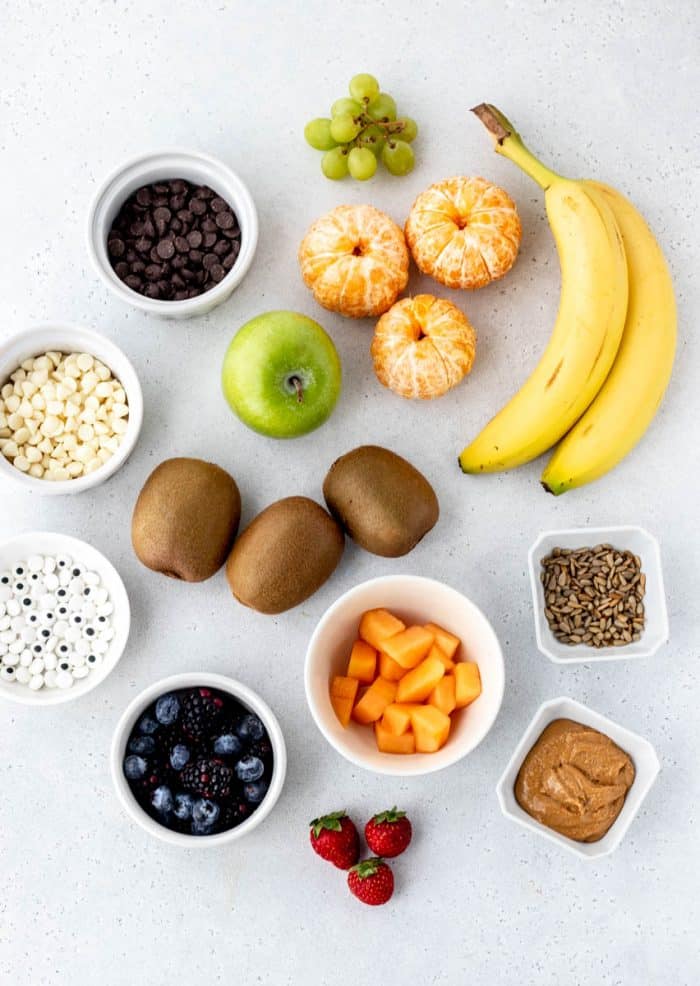
- Fruit: Granny smith apples, strawberries, blackberries, blueberries, cantaloupe, bananas, mandarin oranges, and green grapes are used to make a colourful assortment of monsters, kabobs, ghosts and more.
- Peanut Butter: Acts as a “glue” to hold eyeballs, teeth, and more in place while also adding a good source of healthy fats and fibre.
- Sunflower Seeds: Used to form “teeth” and add an extra bit of crunch.
- Candy Eyeballs: Any candy eyes can be used to add a spooky touch and extra sweetness the kids will love.
- Chocolate Chips: Dark and white chocolate chips are used to drizzle and decorate.
How to Make Fruit for Halloween – Step by Step Instructions

Apple Monsters
Ingredients:
- 1 large Granny Smith apple
- 2 tablespoons peanut butter
- 2 large strawberries
- 1/2 tablespoon unsalted sunflower seeds
- 8 candy eyeballs
Directions:
- Core a green apple and cut it into quarters. Rub a bit of lemon juice on the flesh of the apple to help prevent browning.
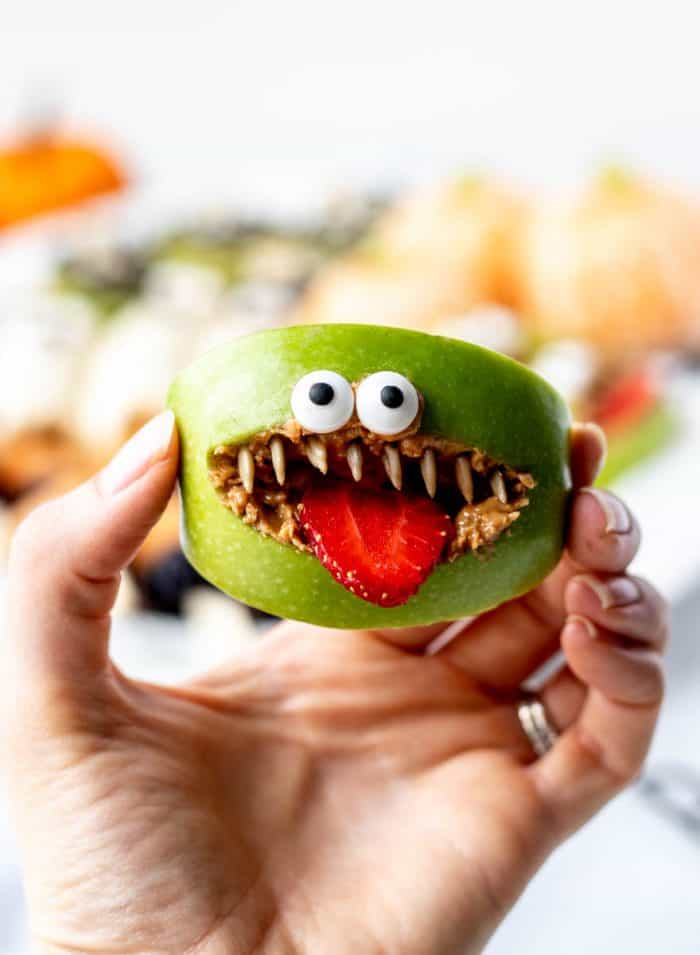
- Using a small paring knife, carefully cut a mouth shape in the centre of the quarter of each apple in the shape of a cat’s eye. Don’t worry if you happen to cut all the way through to the other side as the peanut butter usually covers it up. Repeat for each apple quarter.
- Using a knife, spread some peanut butter inside the top and bottom of the mouth. Stick a strawberry slice on the bottom of the “mouth” so that the rounded part is sticking out to resemble a tongue.
- Next poke some sunflower seeds into the top of the mouth to resemble teeth.
- Dab a bit of peanut butter onto the back of two candy eyeballs and stick close together above the mouth.
Halloween Fruit Kabobs
Ingredients:
- 8 blackberries
- 8 blueberries
- 8 cubes cantaloupe
- 4 bamboo skewers
Directions:
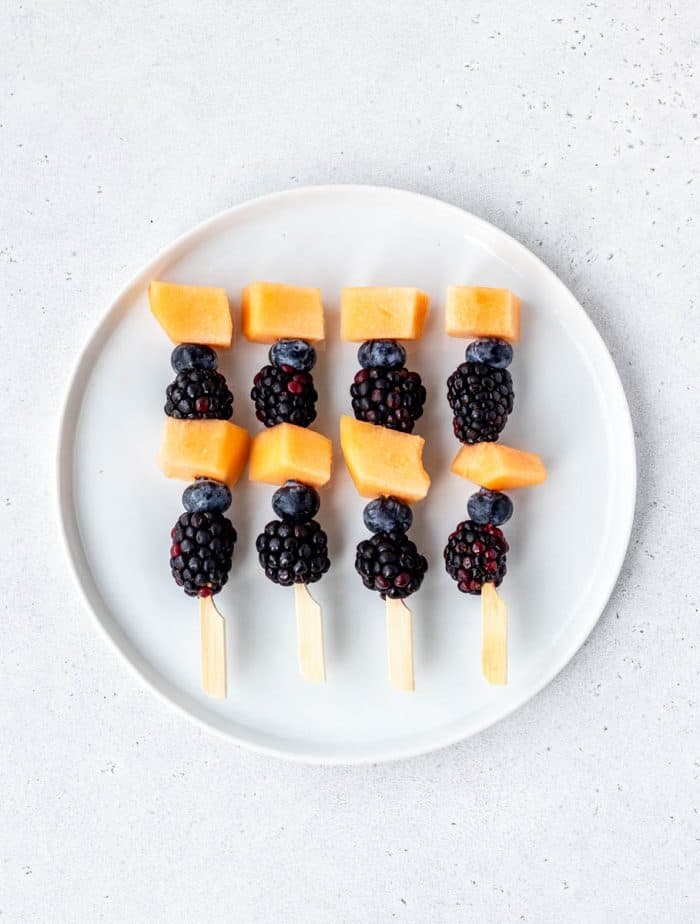
- Thread a blackberry, blueberry and chunk of cantaloupe onto a bamboo skewer. Repeat the pattern until you get to the top of the skewer. Continue until you’ve made your desired number of skewers.
- If you wish, you can also add a dab of peanut butter to a candy eyeball and stick to each of the blueberries for “monster” skewers.
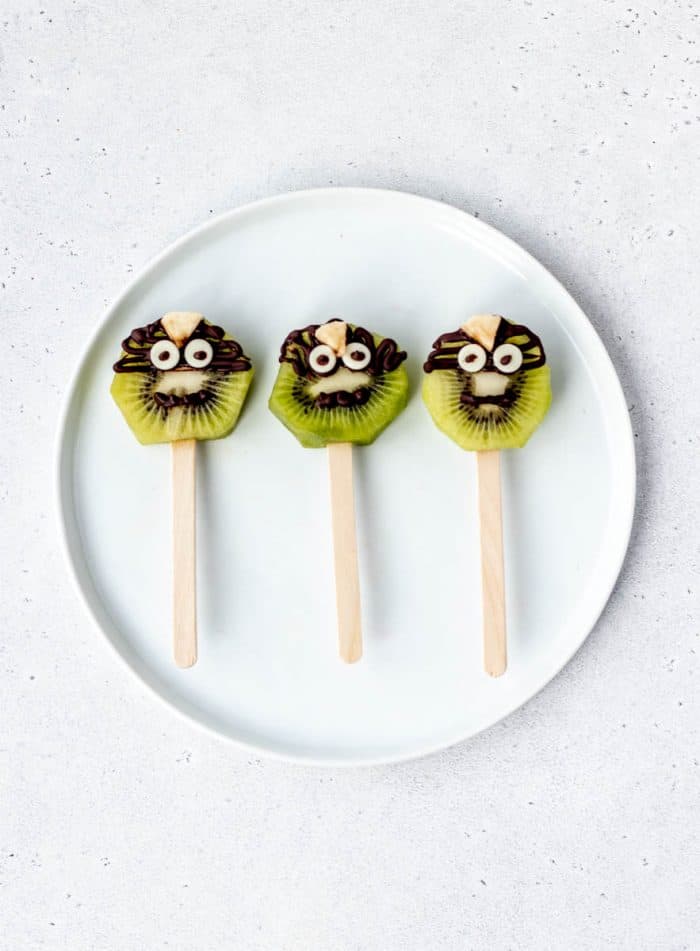
Frankenstein Kiwi
Ingredients:
- 3 kiwi fruit
- 1/4 cup dark chocolate chips
- 12 white chocolate chips
- 2 banana slices, cut into small triangles
Directions:
- Peel the kiwi and slice width-wise into thick slices. Use a sharp knife to cut a small slit in the bottom of each kiwi slice. Poke a popsicle stick into each slit so that the kiwi slices are secure. Place the kiwi pops on a parchment paper-lined baking sheet.
- Melt the chocolate chips in 30 second increments in the microwave until the chocolate is melted. Place the melted chocolate in a small ziploc bag and cut off a piece of the corner to form a small hole.
- Drizzle the chocolate over the top half of each kiwi so that it looks like a monster. Carefully press 2 white chocolate chips into the chocolate and a banana triangle at the top of the Frankenstein heads. Carefully use the bag of chocolate to make two dots in the centre of each white chocolate chip to form eye balls and a squiggly mouth under the eyes. You can even poke in pretzel sticks for the arms if you wish.
- Let the kiwi pops to sit for about 20-30 minutes to allow the chocolate to harden. You can also place them in the fridge if you need the chocolate to harden faster.
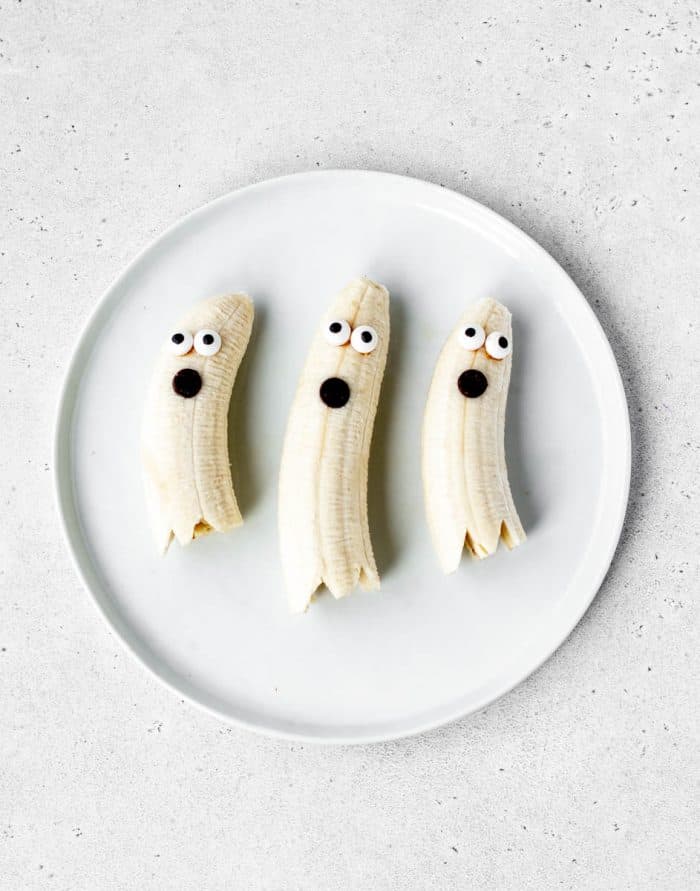
Banana Ghosts
Ingredients:
- 2 large bananas
- 4 dark chocolate chips
- A few dots of peanut butter
- 8 candy eyeballs
Directions:
- Peel the bananas and cut each banana in half.
- Using a knife, dab a small amount of peanut butter on the back of two candy eyeballs and stick side by close to the top of the banana.
- Poke the tip of a chocolate chip into the banana below the eyes to resemble an open mouth.
- Cut a couple of small triangles out of the bottom of the halved banana to make a zig zag pattern. Repeat for each banana ghost.
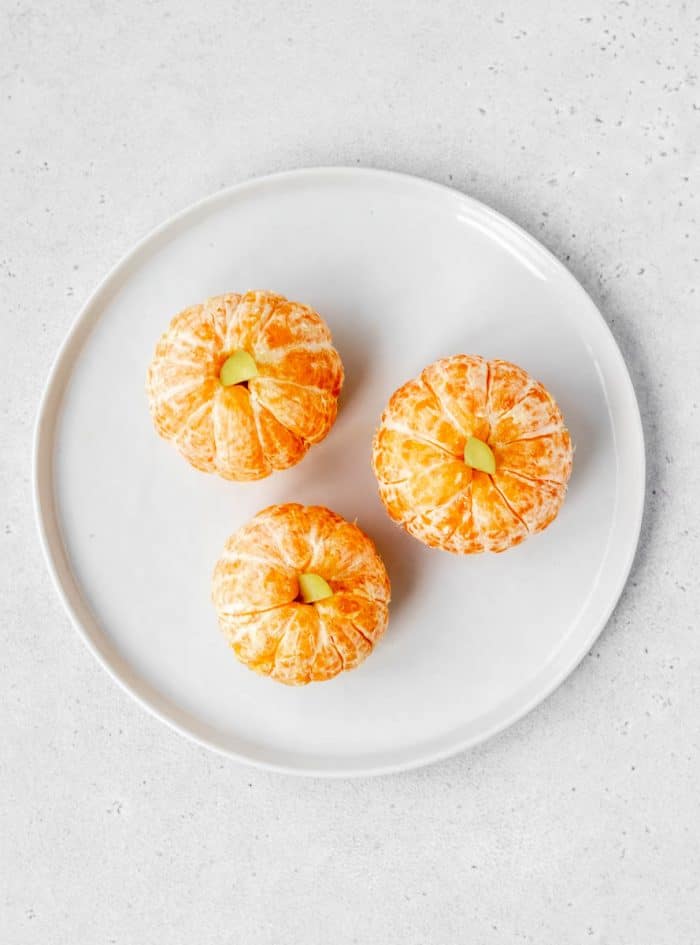
Clementine Pumpkins
Ingredients:
- 3 clementines
- 1 green grape, quartered lengthwise
Directions:
- Peel the clementines and remove any stringy white rind.
- Poke one quarter of the sliced grape into the hole in the top of each clementine so that it resembles a pumpkin. You can also use a small piece of celery stalk instead.
How to Assemble Fruit Tray
- Prepare the different kabobs and fruit creations.
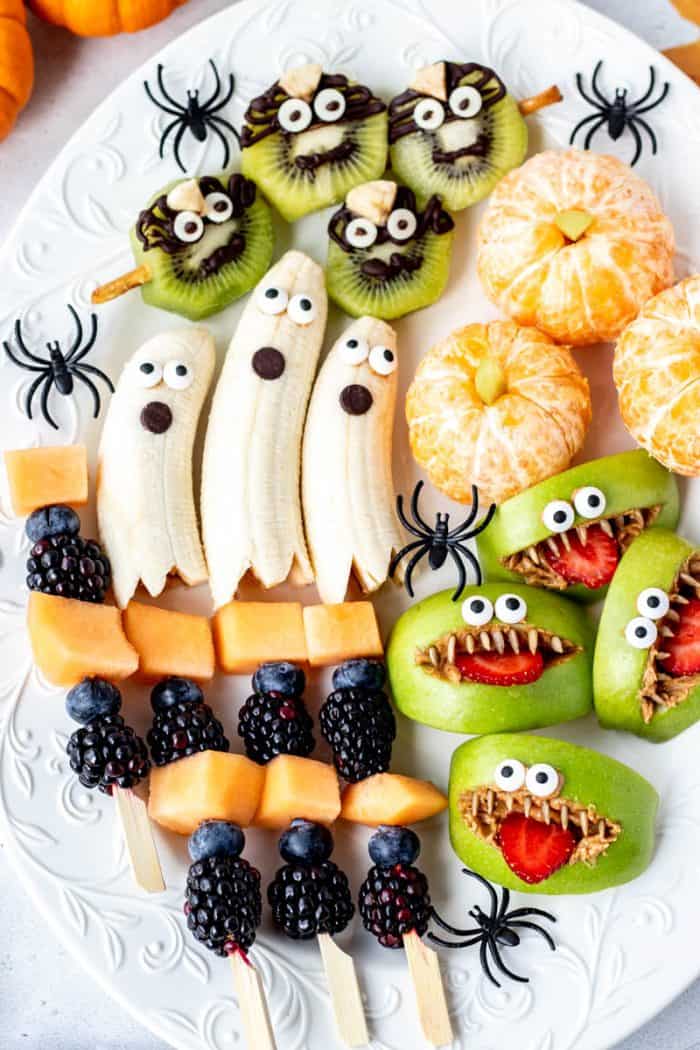
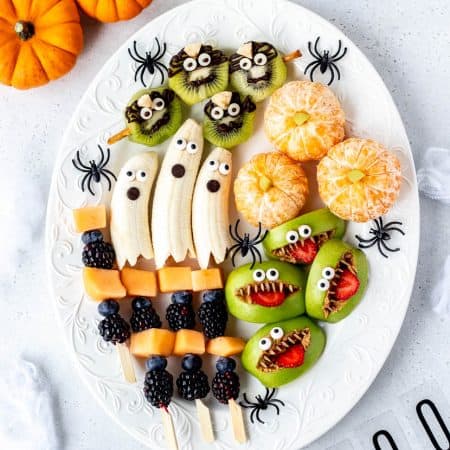
- Place the Halloween fruit on a large platter either grouped together or randomly distributed across the tray.
- Serve fresh for best results.
Keep scrolling to the recipe card below for the full printable instructions!
Tips for The Best Halloween Fruit Tray
- I recommend prepping the Frankenstein kiwis first to allow the chocolate to harden while you prepare the other fruit creations.
- For the best taste, use ripe fruits. Kiwi, bananas, berries and cantaloupe always taste better when ripe!
- For maximum freshness, serve this tray within an hour of prepping. The bananas and apples will start to brown if you leave it to sit longer than two hours and the clementines will start to go dry on the outside, so it’s best served fresh.
- I used a large 16 inch platter when making my halloween fruit tray, but you can adapt the amount of fruit you add depending on the size of your tray. You can always fill it out with extra grapes, or berries if desired.
- For a fun twist, add some fake spiders to the platter or other fun halloween decor you might have on hand. It adds some extra fun to this healthy treat.
- If serving this to a crowd, I recommend making a note that peanut butter is used “as a glue” in the event of any nut allergies. You can also use any of the nut-free alternatives listed in the substitutions if there are allergies.
Recipe FAQs
Yes, but for maximum freshness, I wouldn’t make it any more than 1-2 hours in advance of serving it to avoid any potential browning. It looks and tastes best when served as fresh as possible.
The size of your platter depends on how many Halloween fruit appetizers you make. Feel free to use a giant platter or even just a small plate. As long as your fruit can fit, whatever you have on hand will work.
I typically plan on serving 1-2 treats per guest. The amount you’ll need will vary based on how many guests you’re serving and whether your tray is being prepared as an appetizer or dessert.
How to Store
This Halloween fruit platter is best served right away. However, leftovers can be tightly wrapped with plastic wrap or placed in an airtight container, and stored in the refrigerator for up to 2-3 days.
Serving Suggestions
This Halloween Fruit Tray is delicious served with a creamy fruit dip like this Yogurt Fruit Dip!
To make it more into a Halloween fruit dip, you can serve it in a bowl and pipe on some white or dark chocolate to form a spider web in the centre of the dip. Place a plastic spider on the bowl or make chocolate spiders instead to add to this spooky treat!
Additionally, you can dress up the tray with fake spiders and other fun Halloween decor!
You could also serve this platter along with other Fall snacks and healthy Halloween recipes like:
- Halloween Popcorn Balls
- Halloween Donuts
- Halloween Dirt Cups
- Halloween Trail Mix
- No Bake Pumpkin Balls
- Gluten-Free Pumpkin Oatmeal Cookies
- Caramel Apple Skewers
- Pumpkin Pie Hummus
- No Bake Pumpkin Cheesecake Bites
- Apple Nachos
- A cheese tray or cheese board
Recipe Variations
- To make nut-free: Use Wow butter or Sun butter instead of peanut butter.
- If you don’t have edible eyes: You can also use chocolate chips for the eyes as well.
- If you run out of fruit: Get creative and swap out the specific fruit for anything you have on hand, or incorporate veggies like celery sticks and grape tomatoes, too.
More Fun Food Ideas
- Pretzel Reindeer Bites
- 8 Healthy Kids Christmas Snacks
- 8 Sweet and Savoury Healthy Snacks
- 10 Healthy Easter Snack Ideas for Kids
- Homemade Heart Healthy Trail Mix
Did you make this recipe? Scroll down to leave a star rating and review!
Halloween Fruit Tray Ideas {A Healthy Halloween Snack}
Ingredients
For the Apple Monster Mouths
- 1 large Granny Smith apple
- 2 tablespoons peanut butter
- 2 large strawberries
- 1/2 tablespoon unsalted sunflower seeds
- 8 candy eyeballs
For the Halloween Fruit Kabobs
- 8 blackberries
- 8 blueberries
- 8 cubes cantaloupe
- 4 bamboo skewers
For the Frankenstein Kiwi
- 3 kiwis
- 1/4 cup dark chocolate chips
- 12 white chocolate chips
- 2 banana slices cut into small triangles
For the Banana Ghosts
- 2 large bananas
- 4 dark chocolate chips
- A few dots of peanut butter
- 8 candy eyeballs
For the Clementine Pumpkins
- 3 clementines
- 1 green grape quartered lengthwise
Instructions
For the Apple Monster Mouths
- Core a green apple and cut into quarters. Rub with a bit of lemon juice to help prevent browning. Using a small paring knife, carefully cut a mouth shape in the centre of the quarter of each apple in the shape of a cat’s eye. Don’t worry if you happen to cut all the way through to the other side as the peanut butter usually covers it up. Repeat for each apple quarter. Using a knife, spread some peanut butter inside the top and bottom of the mouth. Stick a strawberry slice on the bottom of the “mouth” so that the rounded part is sticking out to resemble a tongue. Next poke some sunflower seeds into the top of the mouth to resemble teeth. Dab a bit of peanut butter onto the back of two candy eyeballs and stick close together above the mouth.
For the Halloween Fruit Kabobs
- Thread a blackberry, blueberry and chunk of cantaloupe onto a bamboo skewer. Repeat the pattern until you get to the top of the skewer. Continue until you’ve made your desired number of skewers. If you wish, you can also add a dab of peanut butter to a candy eyeball and stick to each of the blueberries for “monster” skewers.
For the Kiwi Frankensteins
- Peel the kiwi and slice width-wise into thick slices. Use a sharp knife to cut a small slit in the bottom of each kiwi slice. Poke a popsicle stick into each slit so that the kiwi is secure. Place the kiwi pops on a parchment paper-lined baking sheet. Melt the chocolate chips in 30 second increments in the microwave until the chocolate is melted. Place the melted chocolate in a small ziploc bag and cut off a piece of the corner to form a small hole. Drizzle the chocolate over the top half of each kiwi so that it looks like a monster. Carefully press 2 white chocolate chips into the chocolate and a banana triangle at the top of the frankenstein heads. Carefully use the bag of chocolate to make two dots in the centre of each white chocolate chip to form eye balls and a squiggly mouth under the eyes. Let the kiwi pops to sit for about 20-30 minutes to allow the chocolate to harden. You can also place them in the fridge if you need the chocolate to harden faster.
For the Banana Ghosts
- Peel the bananas and cut each banana in half. Using a knife, dab a small amount of peanut butter on the back of two candy eyeballs and stick side by close to the top of the banana. Poke the tip of a chocolate chip into the banana below the eyes to resemble an open mouth. Cut a couple of small triangles out of the bottom of the halved banana to make a zig zag pattern. Repeat for each banana ghost.
For the Clementine Pumpkins
- Peel the clementines and remove any stringy white rind. Poke one quarter of the sliced grape into the hole in the top of each clementine so that it resembles a pumpkin.
To Assemble Fruit Tray
- Place the Halloween fruit on a large platter either grouped together or randomly distributed across the tray. Serve fresh for best results.
Notes
- I recommend prepping the Frankenstein kiwis first to allow the chocolate to harden while you prepare the other fruit creations.
- For the best taste, use ripe fruits. Kiwi, bananas, berries and cantaloupe always taste better when ripe!
- For maximum freshness, serve this tray within an hour of prepping. The bananas and apples will start to brown if you leave it to sit longer than two hours and the clementines will start to go dry on the outside, so it’s best served fresh.
- I used a large 16 inch platter when making my halloween fruit tray, but you can adapt the amount of fruit you add depending on the size of your tray. You can always fill it out with extra grapes, or berries if desired.
- For a fun twist, add some fake spiders to the platter or other fun halloween decor you might have on hand. It adds some extra fun to this healthy treat.
- If serving this to a crowd, I recommend making a note that peanut butter is used “as a glue” in the event of any nut allergies. You can also use any of the nut-free alternatives listed in the substitutions if there are allergies.


Leave A Review: