
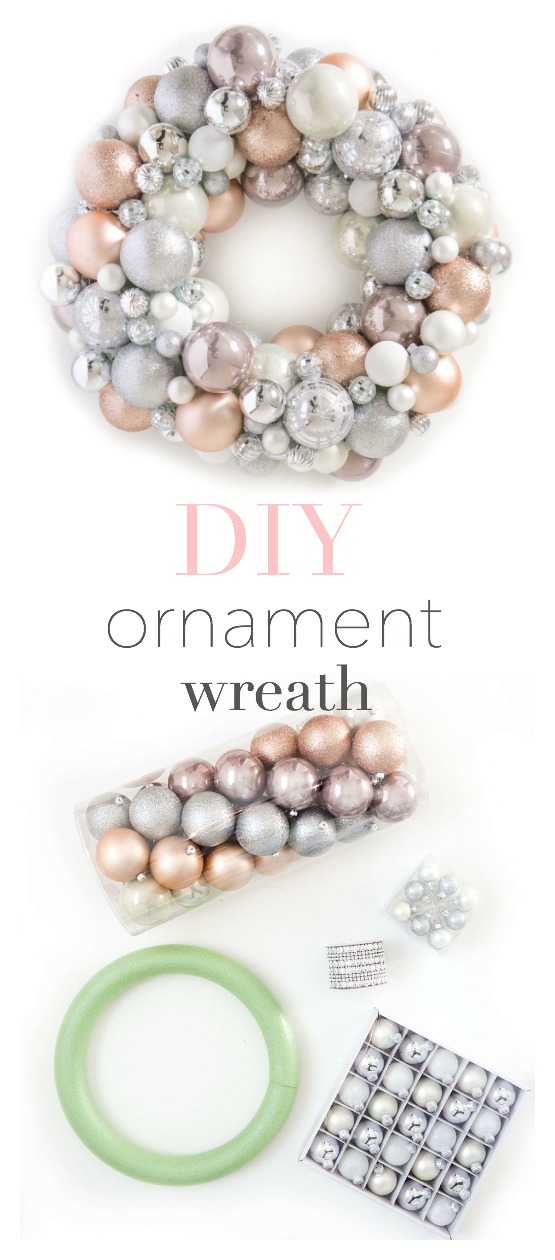
Add some glam to the holiday season by making a DIY Christmas Ornament Wreath! The best part is, you can customize it with your favourite colours to match your other holiday decor. Easy to make and budget-friendly!
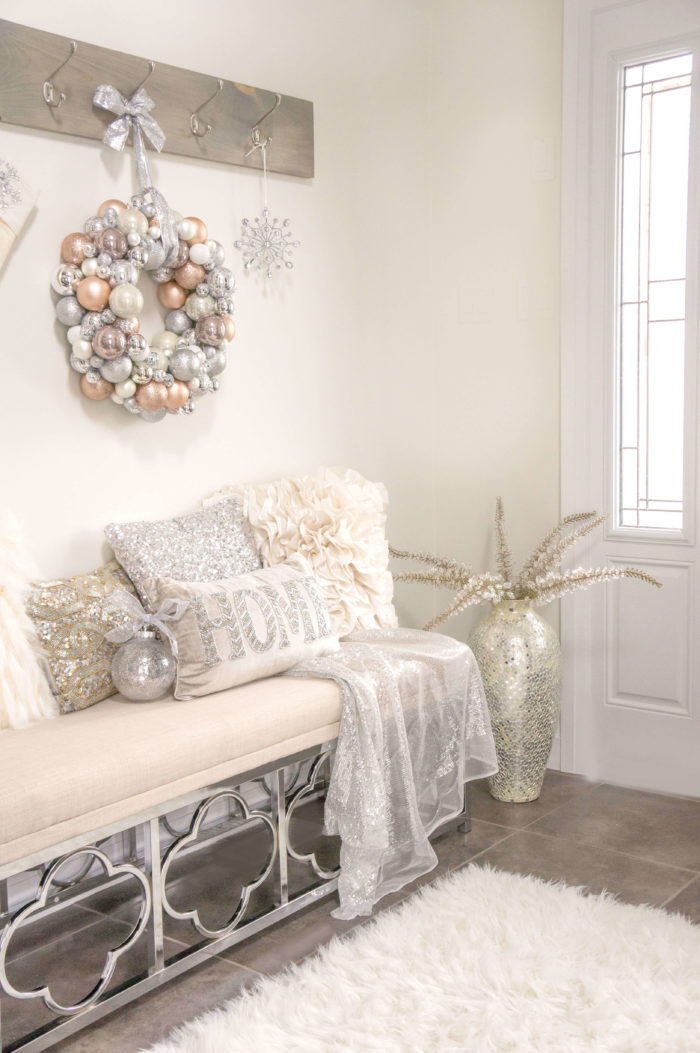
Table of Contents
DIY Ornament Wreath
Eeeek! I am SO excited about this DIY project I’m sharing today. I have been dreaming about this project for quite some time now and finally buckled down this weekend and got it done.
It helped that my baby had a 3 hour nap (which he NEVER does because he always wants to party!), which meant that this mama had a good chunk of time to work on this ultra glam DIY Ornament Wreath.
We have been working hard over the past few weeks trying to make our new house feel more like a home and not a big empty box.
The latest project we’ve been working on has been making our front entrance way a little more warm and welcoming. After all, that’s the first impression you get when you walk into your house, so you want it to feel home-y, right?
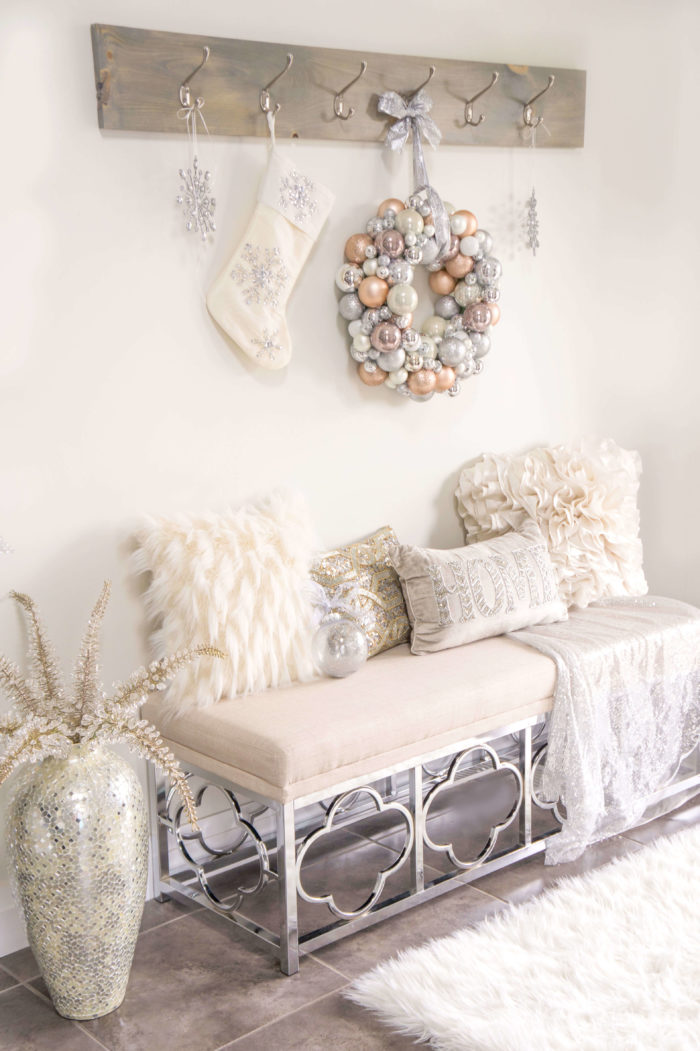
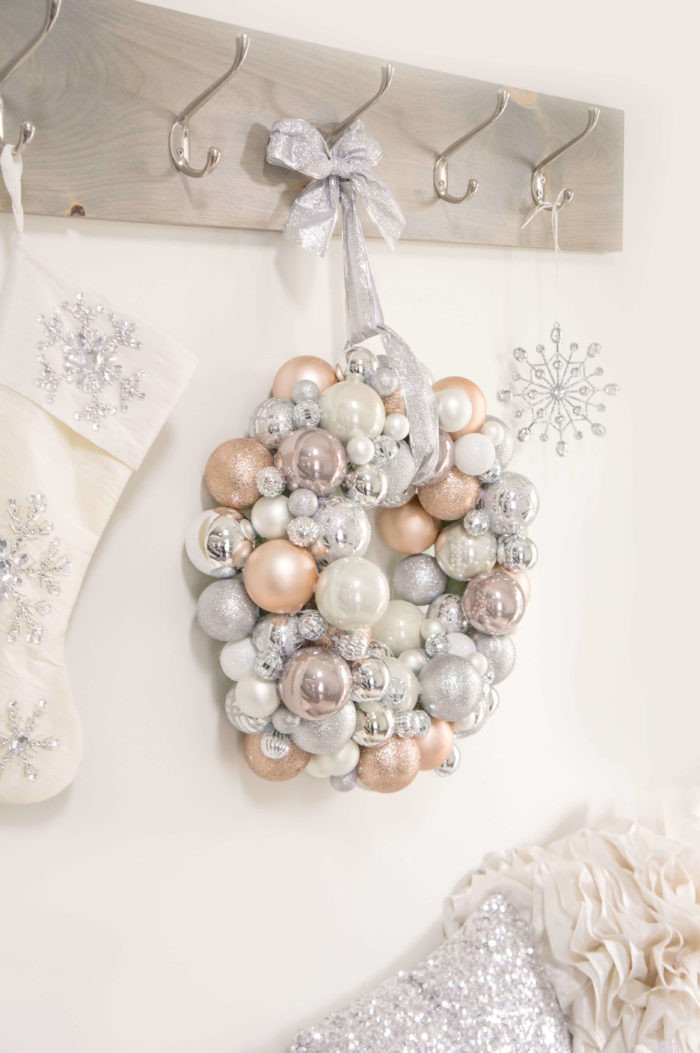
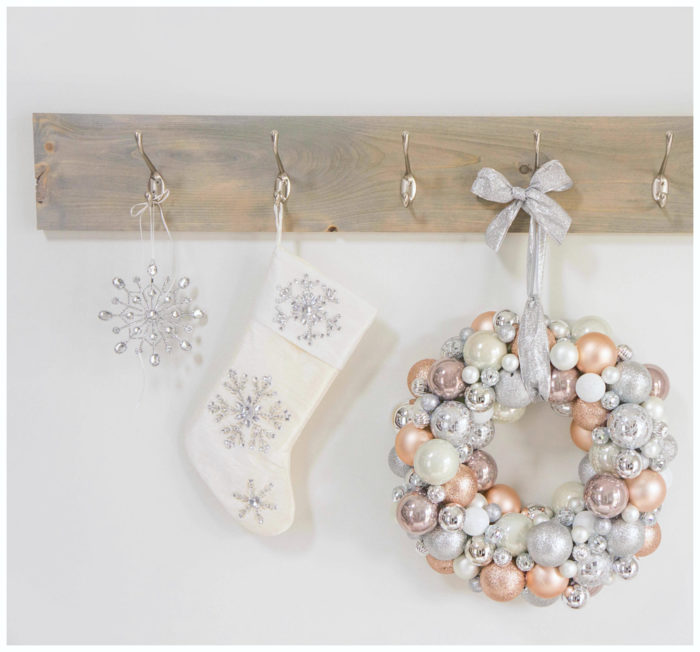
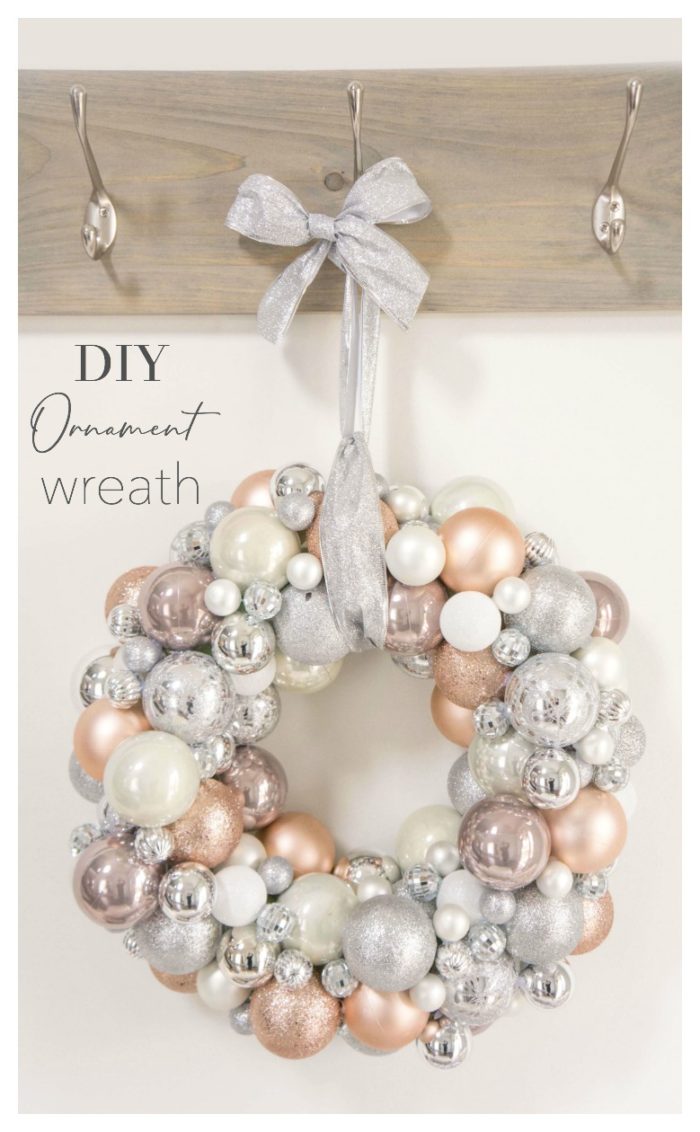
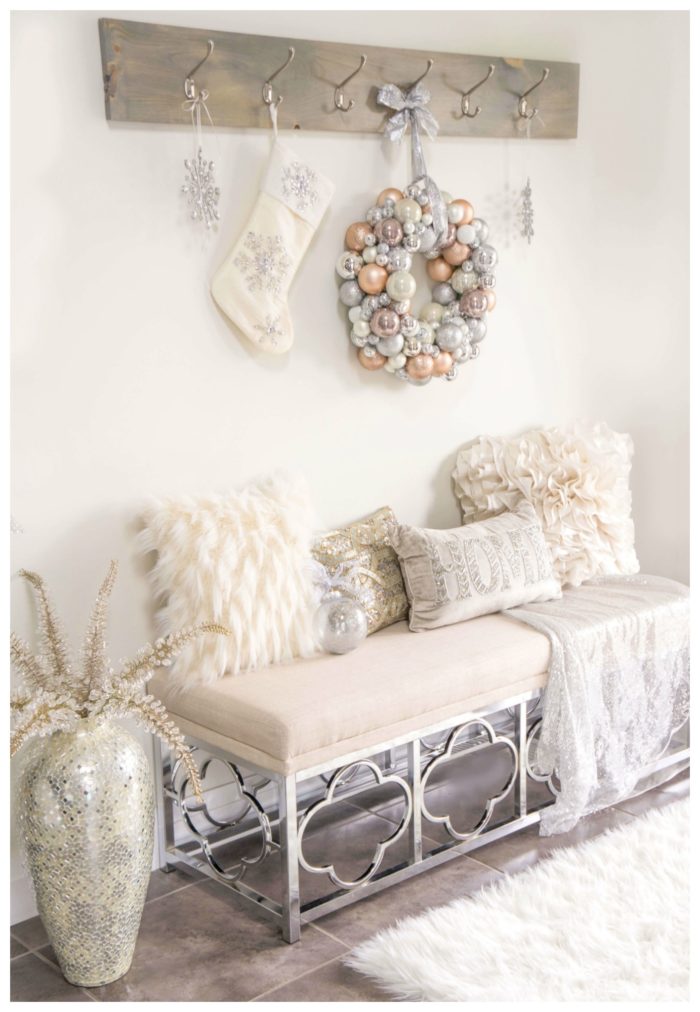
We recently built a rustic coat hook by our front door to hang over our new bench, and I wanted to hang a pretty wreath from it for Christmas.
Immediately, I started dreaming up this silver, ivory and blush sparkly wreath to go along with the rest of our Christmas decoration colour scheme.
The problem is, once I get a vision, I have to execute it or it will drive me CRAAAAZY.
So, baby and I hit up Michaels and the dollar store to search high and low for the ornaments I was envisioning.

I’ll admit that the first trip wasn’t all that successful because I didn’t find exactly what I was looking for, other than a styrofoam wreath form. I didn’t want to waste money on a bunch of ho-hum ornaments that I didn’t love and that were also pretty pricey, so I decided to wait a few days and go back in time for the Black Friday sales.
This is highly recommended. If you plan to make a DIY ornament wreath, wait for the ornaments to go on sale. HUGE savings my friends, which means a MUCH more budget-friendly project.
Sure enough, on round two of my trip to Michaels, I found EXACTLY what I was looking for. A set of larger ornaments in the exact colour scheme and textures I was imagining and lots of small shiny and sparkly ornaments to fill in the gaps.
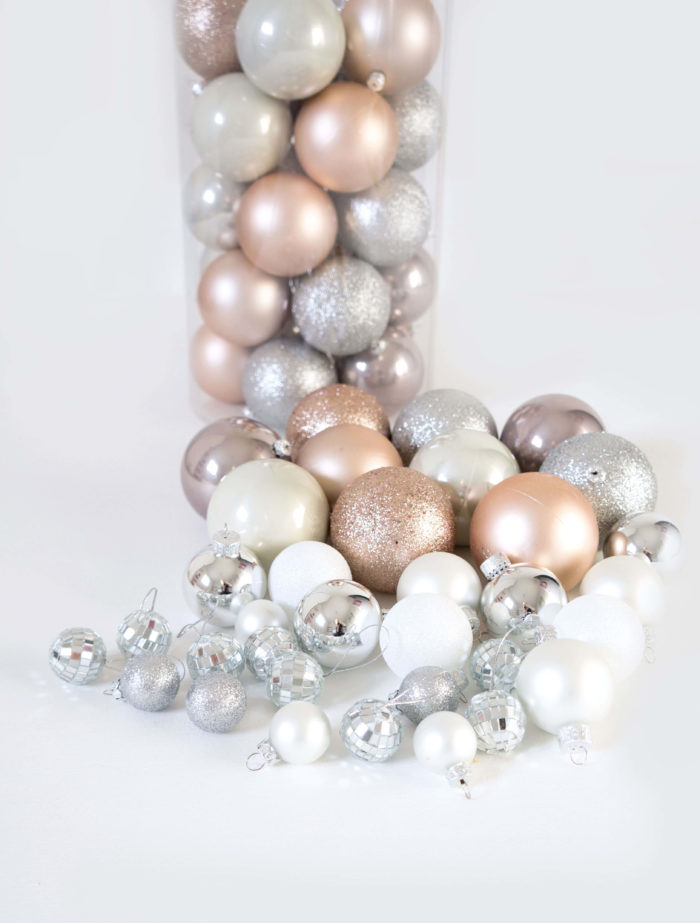
Once again, I suggest picking up quite a few of the small ornaments as these will fill in the holes and create a really full looking ornament ball wreath. Luckily, all of the ornaments were 40% off, PLUS I had an additional discount coupon, so we got some good savings that day.
Since I knew that I was aiming to get close to 100 ornaments and still needed some more medium and extra small ornaments, I decided to hit up the dollar store too.
Jackpot.
Not only did I find a bunch of medium-sized ornaments, I also found these tiny mirrored disco balls that absolutely glimmered. These turned out to be my favourite addition to the wreath as they looked like sparkly diamonds.
Every girl has got to have a little bling ;)
So next was the fun part. Putting the wreath together. Here is a step-by-step tutorial to make it super easy!
How to Make an Ornament Wreath
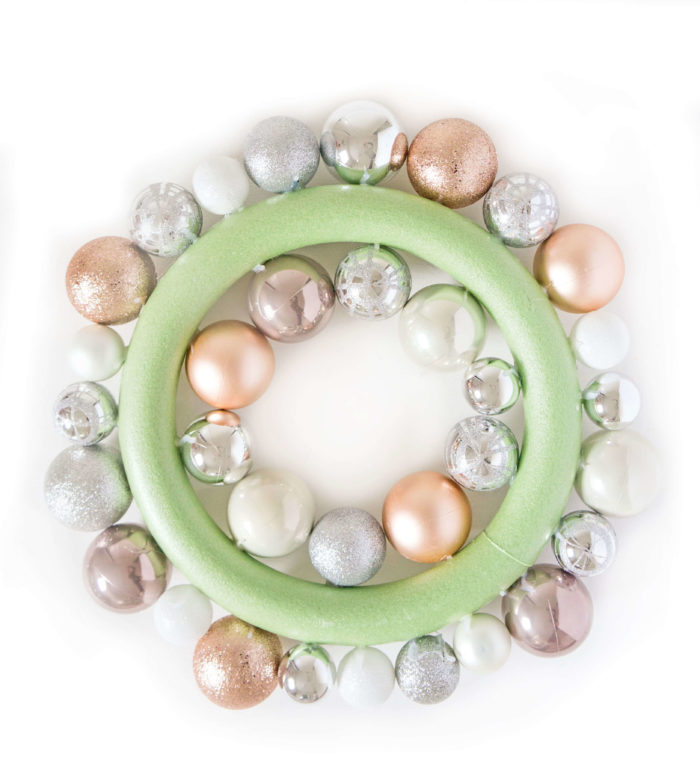
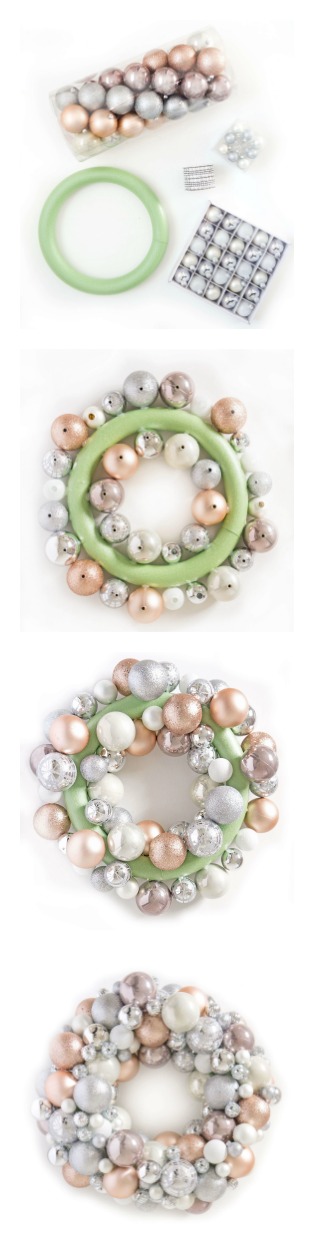
Basically, to start, you want to take the tops off of all of the ornaments. Next, using a hot glue gun, start sticking the ornaments to the interior of the wreath form so that the tops of the ornaments are sticking upwards.
Repeat on the outer edge of the wreath.
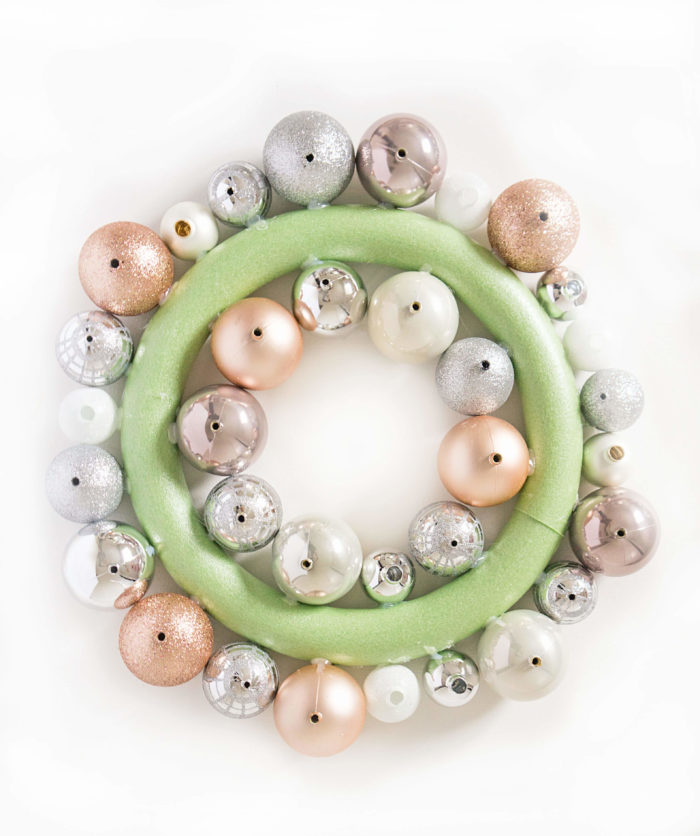
Flip the wreath over and it should look something like this.
Next, you want to start filling in the gaps with ornaments. I tried to be strategic as to where I was placing my ornaments as I wanted the different colours and textures to be evenly dispersed throughout the wreath.
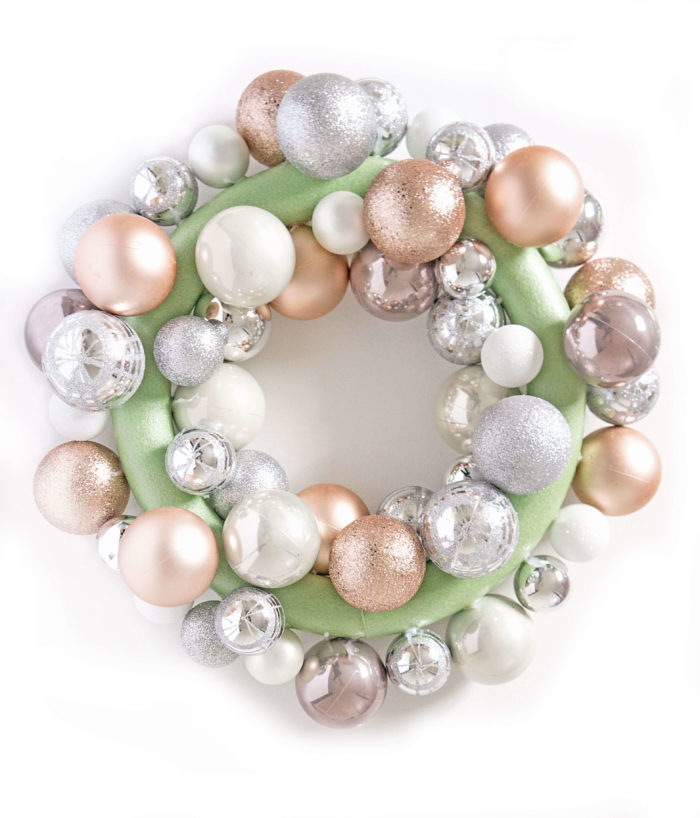
The good news is, if you don’t like the placement of an ornament, you can always peel it off and find a new home for it.
Just as a reference, I used about 40 large ornaments, 30-40 medium ornaments and LOTS of small and extra small ornaments to fill in the gaps. I basically kept going until I ran out of the small ornaments and glue sticks. Just a word of warning — you go through quite a bit of glue.
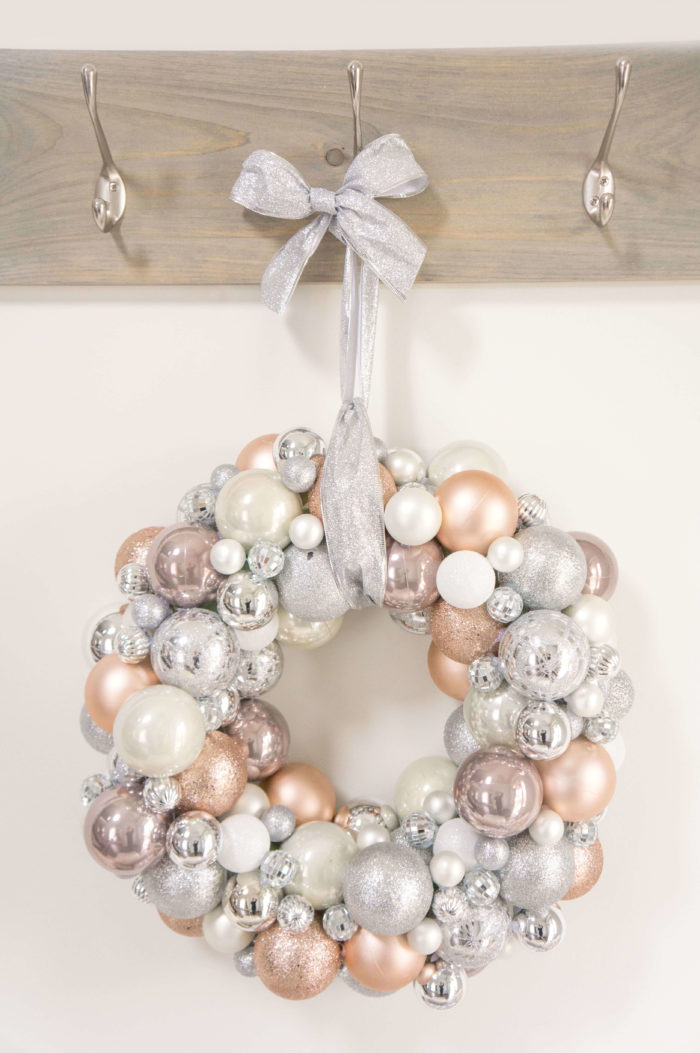
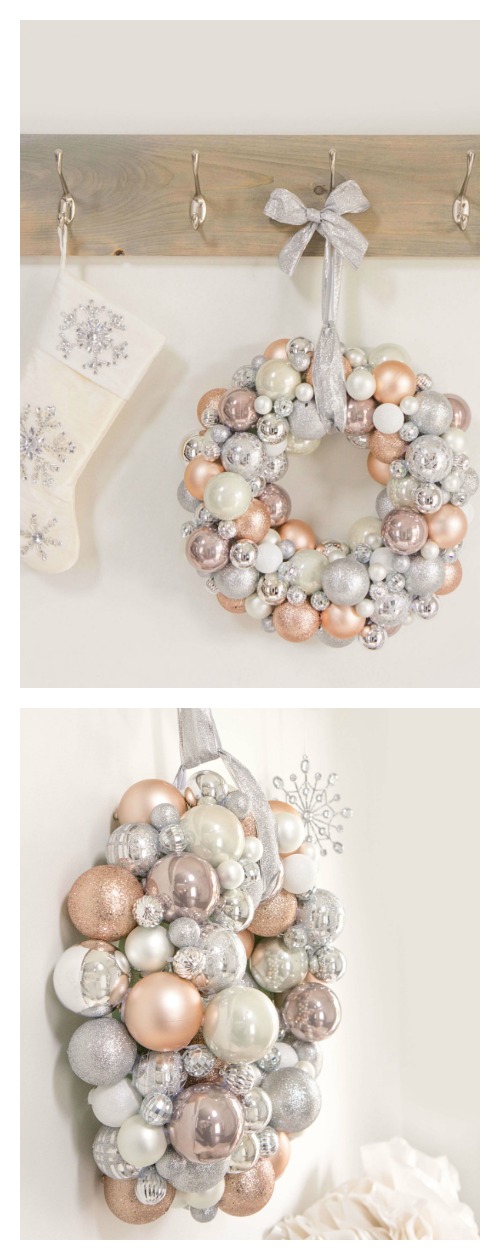
And this was the end result!
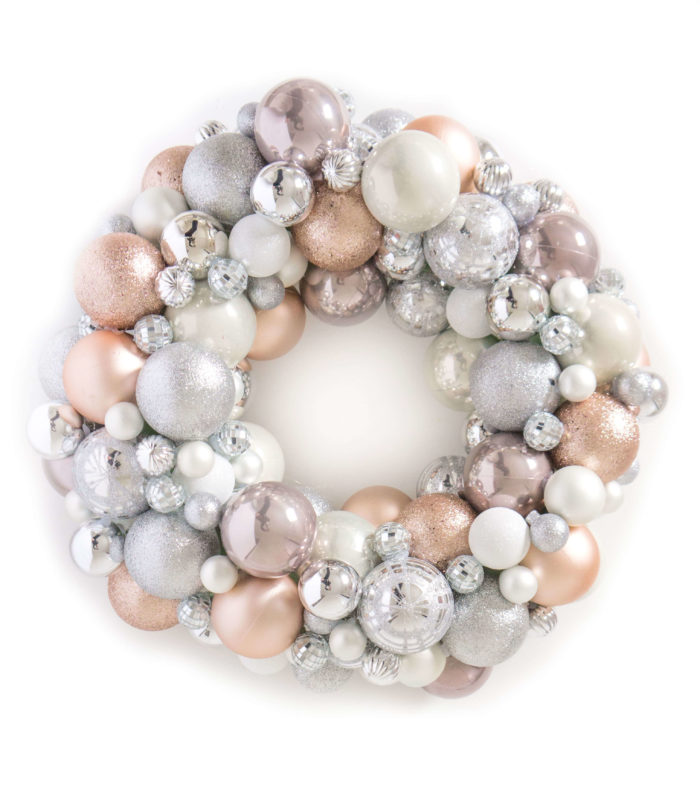
Gorgeous, right?!
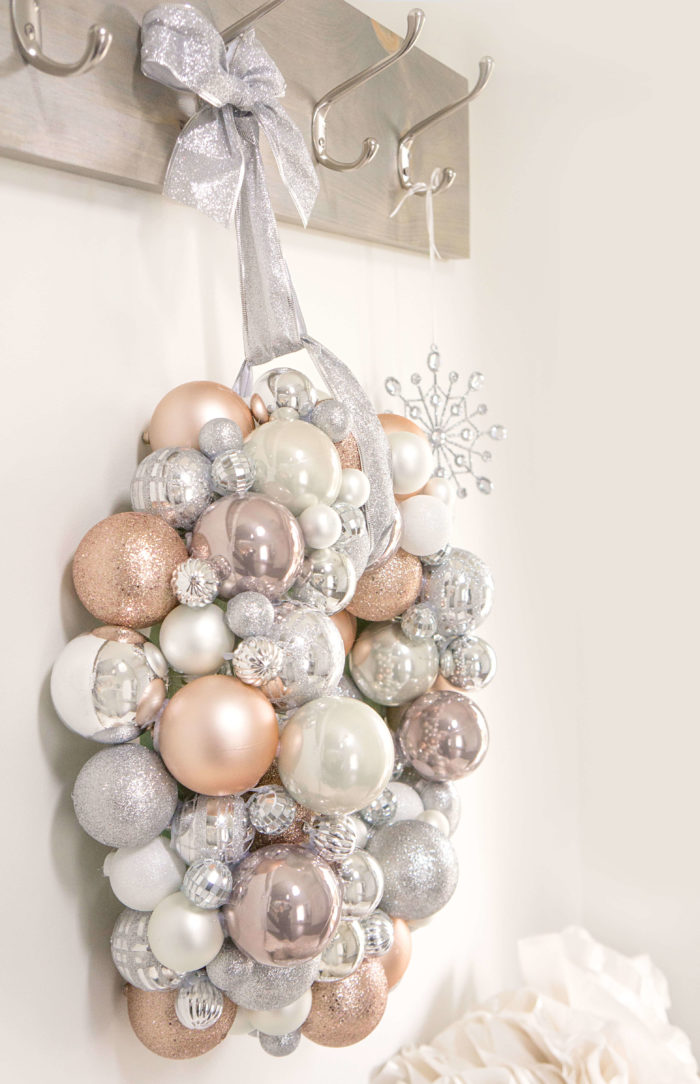
In order to hang the wreath up, you can either secure the ribbon to the wreath form before you start sticking on the ornaments.
Afterwards, I kinda wish I had done this, but I improvised by looping a pretty ribbon around the top of the wreath when it was all done and secured it with a couple of safety pins. Then I looped another ribbon through the loop I just created and tied a knot and bow at the top so that it could be hung.
Also, make sure to remove all of the glue strings from the wreath…. and from yourself. I pretty much looked like a spider web at the end of the project, but no worries! The glue is pretty easy to peel off once it’s dry. Just don’t wear your best outfit while doing this project.
AND be careful not to burn yourself! I’ll admit I got a few burns from the glue gun in my eagerness to get the wreath done before baby woke up. This mama ain’t got NO time to waste!
And that’s pretty much it!
These wreaths are SO addictive, once you make one, you’ll want at least 10 more because the end result is absolutely STUNNING!
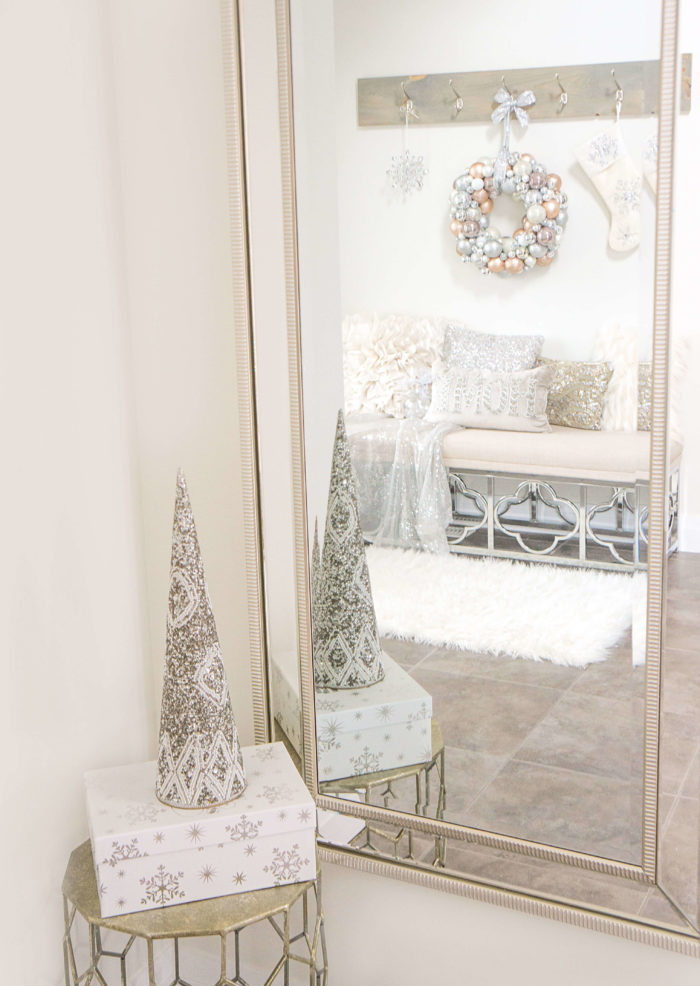
I chose to hang our wreath up by the front entrance where I can see it everyday coming into the house. I also love that I can see it in the mirror coming down the stairs. I could totally keep this up all year round.
Supplies for this DIY Ornament Wreath
Supplies Required:
- Wreath form (I used a 15.8 inch foam one from Michaels)
- An assortment of ornaments of all different sizes – large, medium, small and extra small (I probably used close to 100 ornaments in total. It will vary depending on the size of your wreath form).
- Hot glue gun
- A LOT of glue sticks for the glue gun (I used the whole pack of 20 small glue sticks).
- Pretty Ribbon
Hope you enjoy this fun holiday project!
Love this DIY project? Pin for later!
More DIY projects
- DIY Glitter House
- DIY Wooden Crate Shelf
- DIY Decorative Tin Can Vases
- DIY Inspirational Cork Board
- DIY Mason Storage Jars
This post may contain affiliate links which means that I may make a small commission at no extra cost to you. I only promote products that I love and feel will benefit my readers :)


What a beautiful wreath. I have made a few for friends and family. Even for a raffle at school.
For cheap ornaments, hit the after Christmas sales at Wal-Mart, and so on. You can get them for up to 70% off. I have a small wall stacked with them to make wreaths over the Covid summer. Not a one got made.
Thanks so much Tina! Love how you’ve made them for your family and friends! That’s a great tip too about grabbing the ornaments on sale after Christmas. It’s a fun little project to work on when you have some down time. I appreciate you stopping by to comment! :)
Can you please let me know the brand name of the ornaments you got from Michaels?
I am trying to make a wreath using the same colors but can not find them on line.
Sorry for the delayed response Cathy! I believe the ornaments I used were the Ashland brand. They were shatterproof and came in in big plastic cylinder.
Hope you’re able to find ornaments with a similar colour scheme!