Healthy Pumpkin Pie Recipe without Evaporated Milk
Servings 8 servings
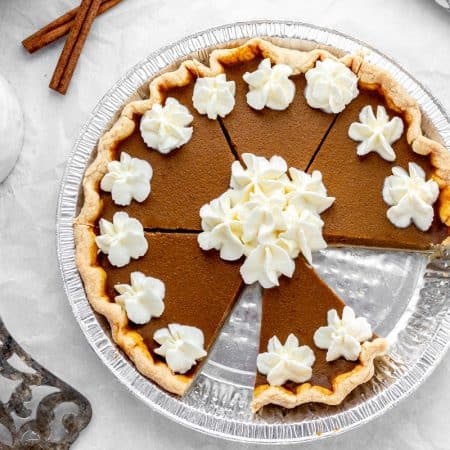
One bite of this healthy pumpkin pie recipe without evaporated milk, and you'll never go back! The creamy and fluffy pumpkin pie filling is made from scratch with almond milk, maple syrup, and pumpkin pie spice for a healthy, lower sugar dessert. Simple to make and the perfect option for holidays! {Dairy-free & Gluten-free-friendly}
Ingredients
- 1 15oz can 100% pure pumpkin puree (or 2 cups pumpkin puree)
- 2 whole eggs plus one egg yolk whisked
- 1/2 cup maple syrup
- 1/2 cup unsweetened almond milk
- 2 tablespoons arrowroot powder (or cornstarch)
- 1 tablespoon vanilla extract
- 2 teaspoons pumpkin pie spice
- 1 teaspoon cinnamon
- 1/4 teaspoon salt
- 1 9-inch deep dish pie crust (or 2 shallow 9-inch pie crusts)
Instructions
- Preheat the oven to 350 degrees F.
- Add the pumpkin puree, eggs, egg yolk, maple syrup, almond milk, arrowroot, vanilla extract, pumpkin pie spice, ground cinnamon, and salt to a mixing bowl. Whisk all of the ingredients together until combined.
- If using an aluminum pie tin, place inside a glass pie plate. (If you don't have a pie plates, you can also place the tin on a baking sheet). Alternatively, you can place the pie crust directly in a 9-inch pie plate. Pour the pumpkin pie filling into the crust.
- Bake for 50-60 minutes or until a knife inserted into the centre comes out clean.
- Remove the pie from the oven and allow it to cool on a wire rack. For best results, allow the pie to cool for at least 4 hours to firm up before cutting.
- Serve at room temperature with a dollop of whipped cream and a sprinkle of cinnamon, if desired.
Notes
- The pumpkin pie filling makes enough to fill two shallow 9-inch pie crusts or one 9-inch deep dish pie crust. You can either make your own homemade pie crust and place the pie dough in a deep dish 9-inch pie pie pan or purchase the crusts already made. You can usually find pre-made crusts in the freezer section of your grocery store or health food store.
- The pumpkin pie filling may seem quite runny when you first pour it into the pie crust(s). Don't worry, it will firm up when baking and continue to set while cooling.
- Allow the pumpkin pie to sit in the fridge for at least 4 hours or overnight before serving (let it cool fully before placing it in the fridge). This will allow sufficient time for the pie filling to set.
- If using an aluminum pie tin, place it inside of a glass pie plate, then bake as usual. The glass dish will transfer the heat more evenly through the aluminum and result in a more well cooked pie. It also makes it easier to transfer both in and out of the oven.
- For the photos, I used a store-bought frozen pumpkin pie crust that I allowed to thaw out at room temperature. I then fluted the edges using this technique. It's a personal preference if you want to customize your pie crust.
- To prevent cracking: Familiarize yourself with the signs that a pumpkin pie is done baking to prevent over-baking the pie. Another helpful trick is to bake the pie in the lower third of the oven. This will help brown the crust of the pie while keeping the filling further from the top heating element.
- If the edges of the crust start to brown too fast, use a pie crust shield or piece of foil to cover it.
Nutrition
Calories: 227kcalCarbohydrates: 29gProtein: 4gFat: 10gSaturated Fat: 3gPolyunsaturated Fat: 1gMonounsaturated Fat: 5gTrans Fat: 0.01gCholesterol: 61mgSodium: 218mgPotassium: 101mgFiber: 1gSugar: 12gVitamin A: 111IUVitamin C: 0.1mgCalcium: 63mgIron: 1mg
Tried this recipe?Tag me Today! Mention @hauteandhealthyliving or tag #HauteandHealthyLiving!